Warning, Flush mount installation – InFocus SP-CEIL-UNIV User Manual
Page 5
ISSUED: 10-22-04 SHEET #: 055-9236-5 01-10-06
Visit the InFocus Web Site at www.infocus.com
5 of 11
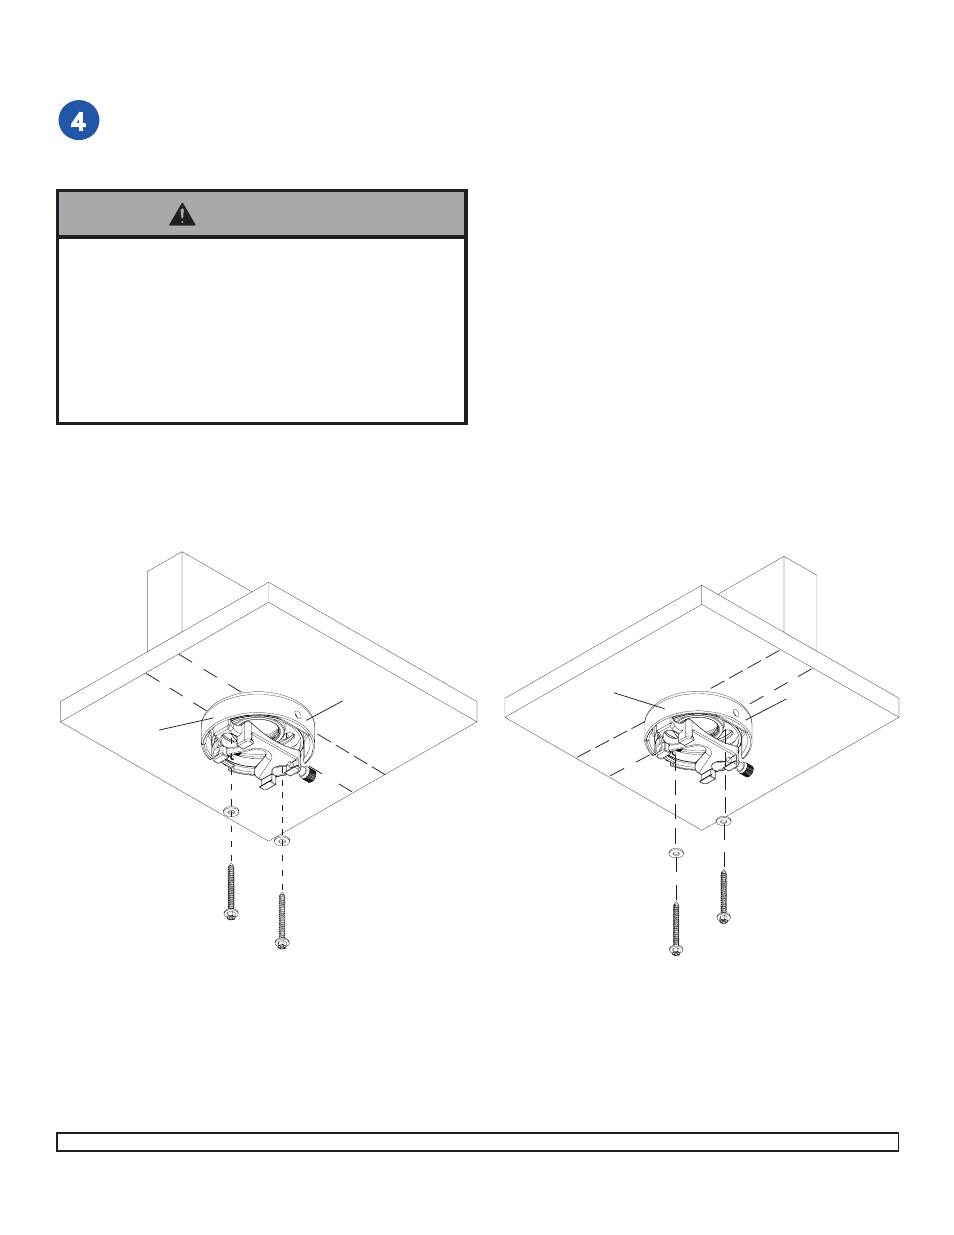
Flush Mount Installation
Drill two 5/32" (4 mm) dia. holes to a minimum depth of 2.5" (64 mm). Attach projector mount assembly (A) with two
#14 x 2.5" (6 mm x 65 mm) wood screws (F) and two flat washers (E) as shown in figure 1 or figure 2 depending
on joist orientation. Tighten wood screws (F) using 3/8" (10 mm) socket wrench until projector mount assembly (A)
is firmly attached.
Skip to step 7.
F
F
A
WOOD JOIST
FRONT OF
MOUNT
E
E
FRONT OF
MOUNT
WOOD JOIST
A
figure 1
figure 2
• Tighten wood screws so that projector mount assem-
bly is firmly attached, but do not overtighten. Overtight-
ening can damage the screws, greatly reducing their
holding power.
• Never tighten in excess of 80 in • lb (9 N.M.).
• Make sure that mounting screws are anchored into the
center of the joist. The use of an "edge to edge" stud
finder is highly recommended.
WARNING
- IN10 (8 pages)
- IN5122 (89 pages)
- IN34 (4 pages)
- SP-CEIL-004 (3 pages)
- in32 in34 (8 pages)
- IN100 (55 pages)
- IN2106 (8 pages)
- X2 (49 pages)
- X3 (1 page)
- 570 (72 pages)
- C250 (39 pages)
- IN74 (54 pages)
- LP 540 (4 pages)
- LP 420TM (4 pages)
- IN3116 (46 pages)
- IN114 (35 pages)
- IN42 (4 pages)
- IN3106 (39 pages)
- X1 (50 pages)
- X1 (49 pages)
- X6 (37 pages)
- C300 (4 pages)
- liquid crystal (26 pages)
- DP8500x (61 pages)
- DP8000 (4 pages)
- INTEGRATION LP850 (60 pages)
- DISPLAY LINK IN3108 (8 pages)
- IN20 (41 pages)
- X9 (37 pages)
- C85 (12 pages)
- 5700 (43 pages)
- XGA multimedia projector LP930 (77 pages)
- IN20 Series (8 pages)
- LP 120 (3 pages)
- IN82 (39 pages)
- C40/C50 (4 pages)
- DISPLAY LINK IN3904LB (51 pages)
- X3 (50 pages)
- IN35 (8 pages)
- 4800 (2 pages)
- Play Big IN82 (39 pages)
- 760 (63 pages)
- IN24 (8 pages)
- IN1500 P1501 (8 pages)
- SP-CEIL-010 (5 pages)