Using the on-screen menus, Adjusting picture settings, Adjusting tv picture settings – Insignia NS-LCD19W-09 User Manual
Page 13: Adjusting pc picture settings
13
Insignia NS-LCD19W-09 19” LCD TV
www.insignia-products.com
2 Press CH+ or CH- to select to a blank record,
then press ENTER to add the current
channel to your favorites list.
To remove channels from your favorites list:
1 Go to the channel you want to remove, then
press FAVORITE to open your favorites list.
2 Press CH+ or CH- to select to the record of
current channel, then press ENTER to
remove it from your favorites list.
Using the on-screen menus
Use your remote control to navigate in the
on-screen menus. The on-screen menus shown
in this guide may be different from those on your
TV. These are examples to illustrate your TV’s
operation.
To use the on-screen menus:
1 Press INPUT on the remote control to select
the video source.
2 Press MENU on the remote control. The
on-screen menu appears.
3 Press CH+ or CH- to highlight the Video,
Audio, Channel, Function, or Lock icon,
then press ENTER to enter the menu.
4 Press CH+ or CH- highlight a setting, then
press ENTER to confirm.
5 Press VOL+ or VOL- to adjust the setting.
6 Press EXIT to close the menu and return to
normal viewing.
Adjusting picture settings
Adjusting TV picture settings
To adjust TV picture settings:
1 Press MENU on the remote control. The
on-screen menu appears.
2 Press CH+ or CH- to highlight the Video
icon, then press ENTER to enter the
Video
menu.
3 Press CH+ or CH- to highlight an option, then
press ENTER to confirm. Choices include:
•
Mode—Select a preset picture mode
which best corresponds to your viewing
requirements. Choices include Mild,
Standard, Vivid, and Custom.
•
Brightness—Set the brightness level of
the picture.
•
Contrast—Set the contrast balance of the
picture.
•
Color—Set the color saturation of the
picture.
•
Tint—Set the color tone of the picture.
•
Sharpness—Set the amount of detail
enhancement of the picture.
•
Color Temperature—Select Warm
(increased red tones), Custom (to make
your own settings), Cool (increased blue
tones), or Standard for a balance.
•
Advanced Video—Select to change
advanced picture settings, which include:
•
DNR–Digital Noise Reduction. Adjust
to reduce the appearance of digitizing
error caused by compression: Off,
Auto, Weak, Medium, or Strong.
•
Black Level Extender–Adjust to
increase the level of detail in black
areas of the picture: On or Off.
•
White Peak Limiter–Adjust to increase
the level of detail in white areas of the
picture: On or Off.
•
CTI–Color Transient Intensity. Adjust
the picture to eliminate color errors:
Medium, Strong, Off, and Weak.
•
Flesh Tone–Adjust the flesh colors: On
and Off.
•
Adaptive Luma Control–Adjust the
luminance of the picture: On and Off.
4 Press VOL+ or VOL- to adjust the setting.
5 Repeat Steps 3 and 4 to adjust the other
settings.
6 Press EXIT to close the menu and return to
normal viewing.
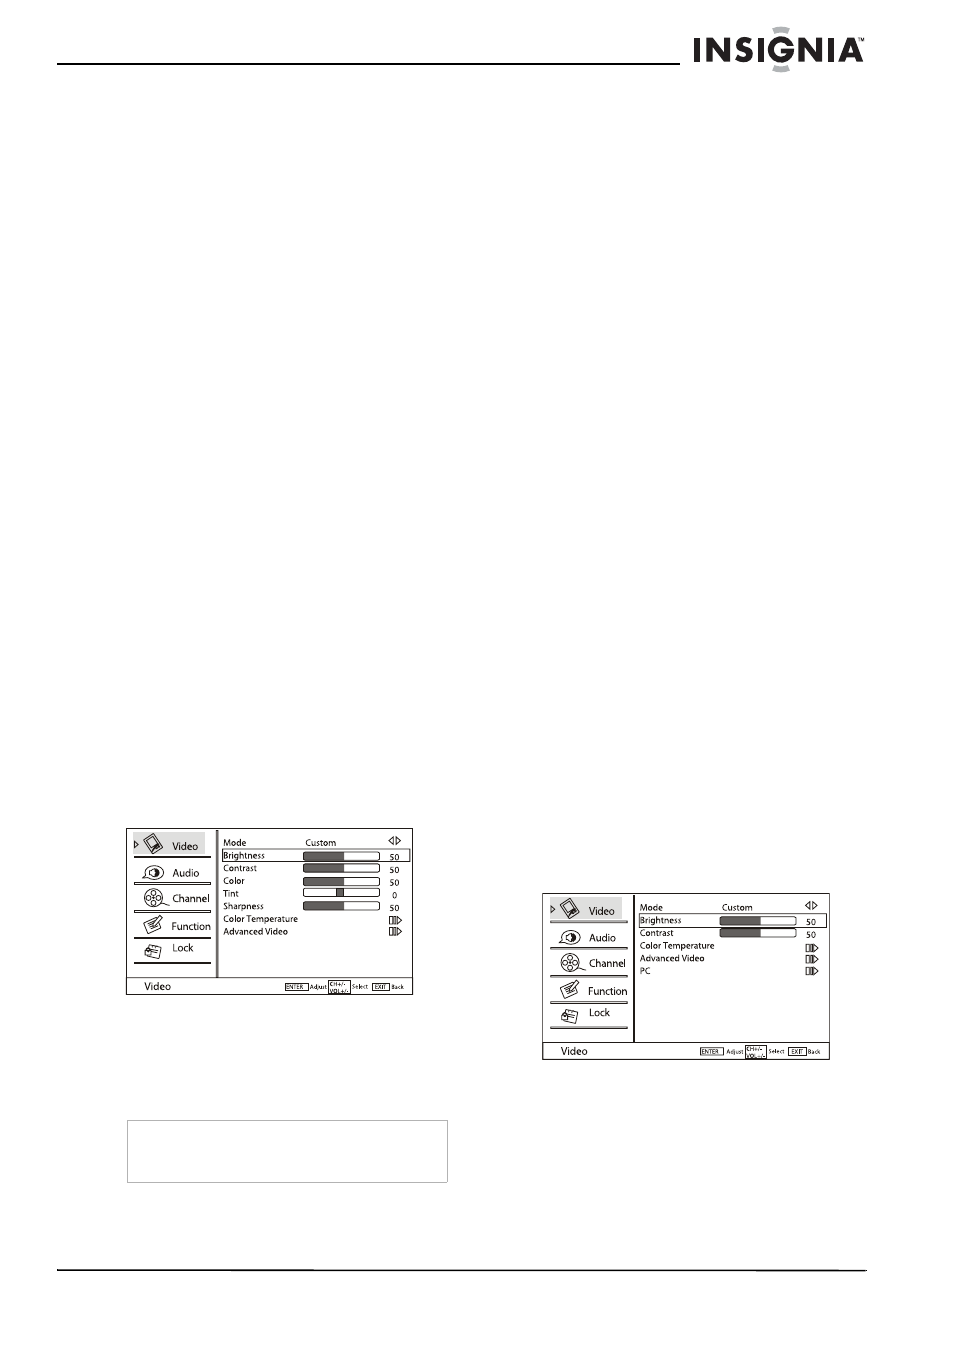
Adjusting PC picture settings
When you are using a PC with your TV, a special
PC option becomes available. This lets you
optimize your TV’s picture settings for use with
the PC.
To adjust PC picture settings:
1 Press MENU on the remote control. The
on-screen menu appears.
2 Press CH+ or CH- to highlight the Video
icon, then press ENTER to enter the
Video
menu.
Note
The Brightness, Contrast, Sharpness, Color
Temperature, and Tint can only be adjusted if
Custom mode is selected.