Using the time pak plug-in, Front panel overview – MACKIE Digital Mixers User Manual
Page 10
10
Acuma Time Pak
Front Panel Overview
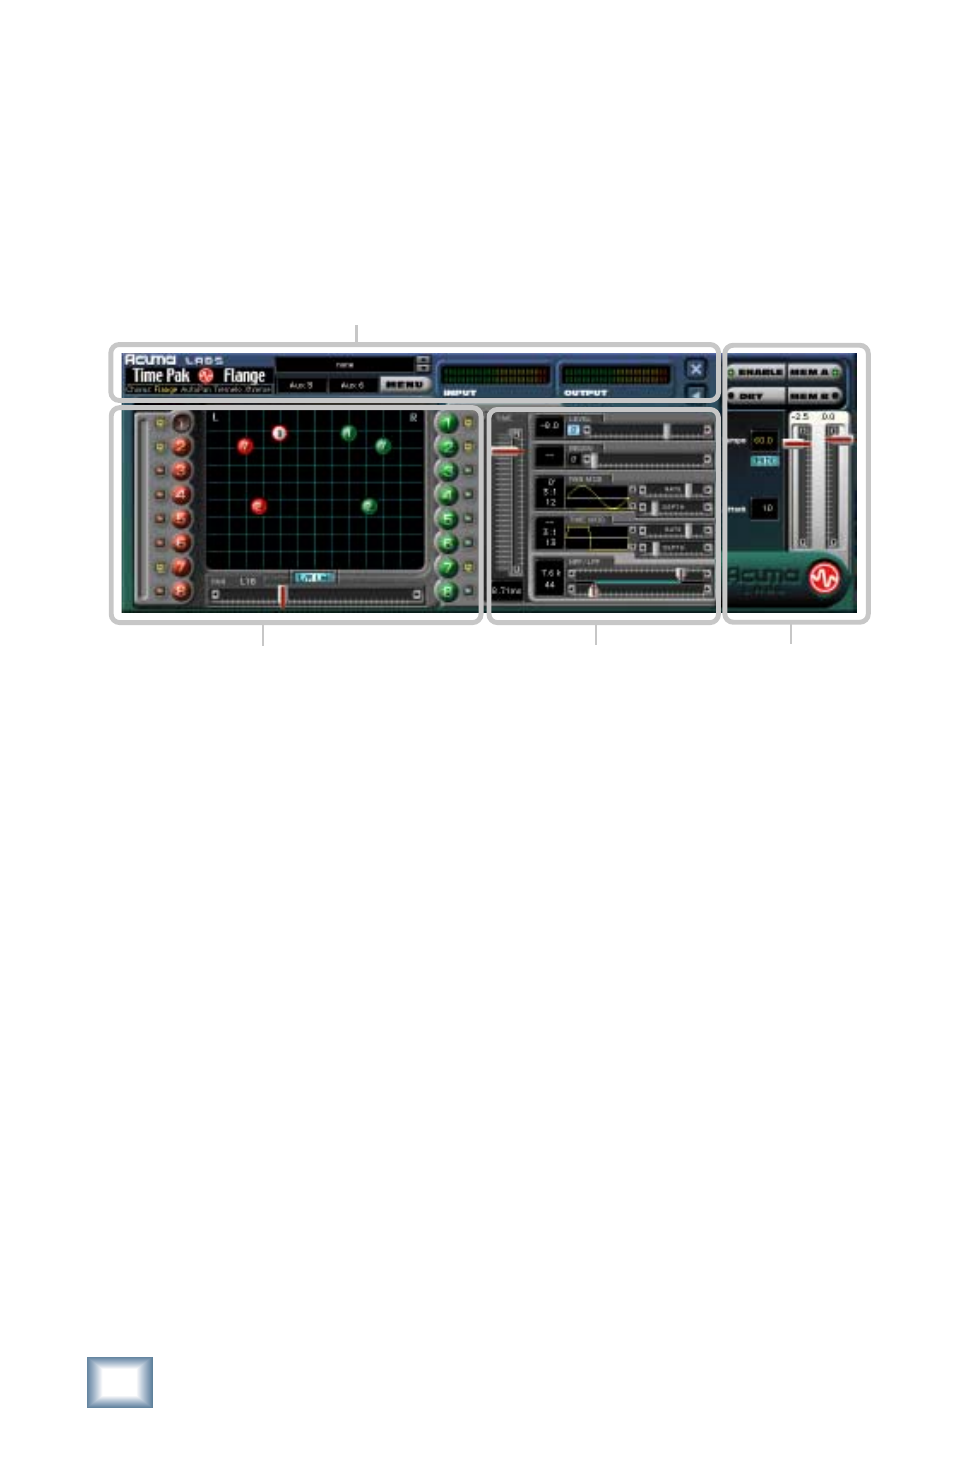
You can think of Time Pak as being broken into four blocks,
starting at the top of the GUI (Graphic User Interface) and then
moving from left to the right:
Status Block (see page 11)
The Status block includes the Mode select, where you can
choose between Chorus, Flange, Auto Pan, Tremolo, and Xtreme.
Additional functions include Preset select, Input Assign, Menu
button, Input and Output meters, and the Minimize button.
Screen Block (see page 13)
The Screen block includes: Node select buttons, the main Time
Pak Screen, mutes, Left/Right Link button and Pan slider.
Controls Block (see page 15)
The Controls block includes the Main Time Slider, Level Slider,
Pan Modulation, Time Modulation, Phase adjust, and Low Pass
and High Pass Filtering.
Global Controls Block (see page 20)
The Global Controls are located at the far right-hand side of the
GUI. These controls include the Enable select button, Dry select
button, Memory A and Memory B select buttons, Input gain
sliders, and finally the manual Tap Tempo button represented by
the Acuma logo found at the bottom right hand corner.
Using the Time Pak Plug-in
Status
Global Controls
Controls
Screen