Maintenance – Multiquip tile saw tp24 User Manual
Page 26
page 26 — Tp24 TILe SaW • operaTIon and parTS manuaL — rev. #2 (04/12/12)
WaTer pump maInTenanCe
When the machine has not been used for a long period of
time, hard packed dirt may build up inside the pump and
block the pump wheel.
Please follow the steps below to clean the pump before
operating the saw.
1. Remove the immersion pump from the water container.
2. Clean the immersion pump.
3. Loosen the fixing screws of the pump lid.
4. Take the lid off the pump (be careful not to damage or
lose the gasket underneath)
5. Clean the pump lid.
6. Remove all dirt and incrustations from the pump wheel.
7. Check whether the pump wheel can be easily turned.
8. Reassemble the immersion pump and check that it
works properly.
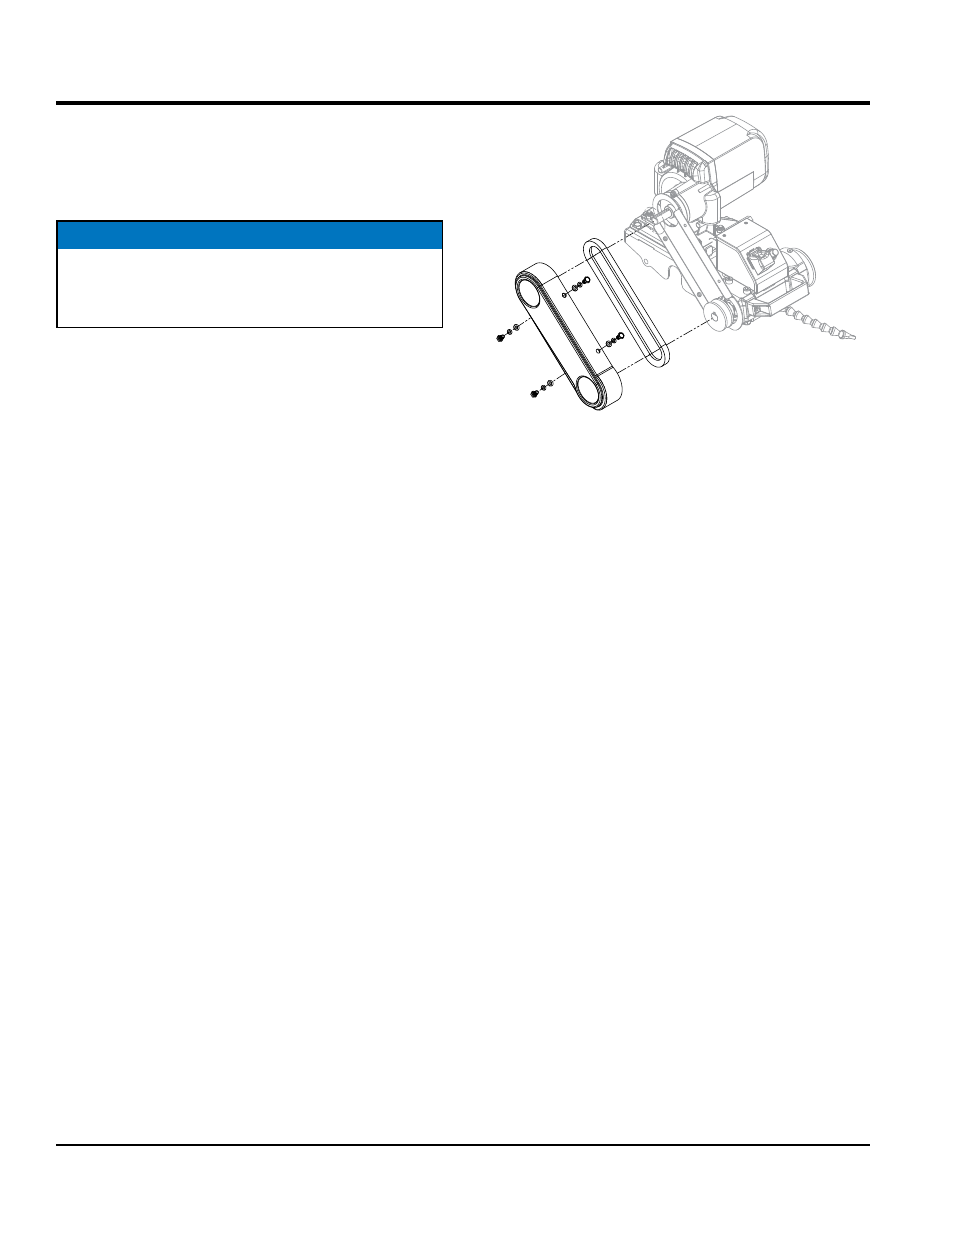
BeLT repLaCemenT
To replace the belt (Figure 18) perform the following.
1. Turn off and unplug the saw.
2. Loosen and remove the 4 bolts located above and
below the belt guard. Remove the belt guard.
3. Loosen the 4 bolts located at the base of the motor.
4. Use a hex wrench to access the socket hex bolt located
at the rear of the cutting head. Turn wrench to move the
motor forward, thus providing some slack in the belt.
5. Take off the old belt and replace with new belt.
6. To reassemble, follow steps 1-4 in reverse order. Make
sure belt is at the proper tension before tightening the
four bolts at the base of the motor.
NOTICE
If the machine is activated with the immersion pump
blocked, the electric motor will be damaged within a
few minutes!
Figure 18. Belt Replacement
CuTTIng Head removaL
To remove the cutting head, see Saw Set-Up
BearIng HouSIng removaL
To remove the bearing housing (Figure 19), perform the
following:
1. Remove the 4 screws on the belt guard.
2. Remove the belt guard.
3. Loosen (do not remove) the adjustment screw behind
the mounting plate and the 4 screws on the motor base
to remove the belt.
4. Remove the blade lock nut and remove the blade (if
there is one present.)
5. Remove the 4 screws on the mounting plate closest to
the cutting head handle to remove the bearing housing
(including the attached pulley and inner flange.)
Maintenance