Step 2a, ro water line, Step 3, connect water supply, Step 4, connect power – GE Monogram ZFSB25D SS User Manual
Page 8: Step 5, move refrigerator into position, 213dia7, Installation instructions, Important, 716dia2, Step 3 connect water supply, Step 4 connect power
Installation Instructions
8
Step 2A
WATER LINE
INSTALLATION WITH
A REVERSE OSMOSIS
SYSTEM
Skip this step when not using RO System
IMPORTANT:
When connecting a GE Reverse Osmosis Water System
to your refrigerator, the GE RVKit must be used. For
other reverse osmosis water systems, follow the
manufacturer’s recommendations.
If the water supply to the refrigerator is from a Reverse
Osmosis Water System, use the refrigerator’s filter
bypass plug. Using the refrigerator’s water filtration
cartridge with the RO filter can result in hollow ice cubes
and slower water flow from the water dispenser.
213Dia7
Turn left to remove
Turn right to install bypass plug
213Dia8
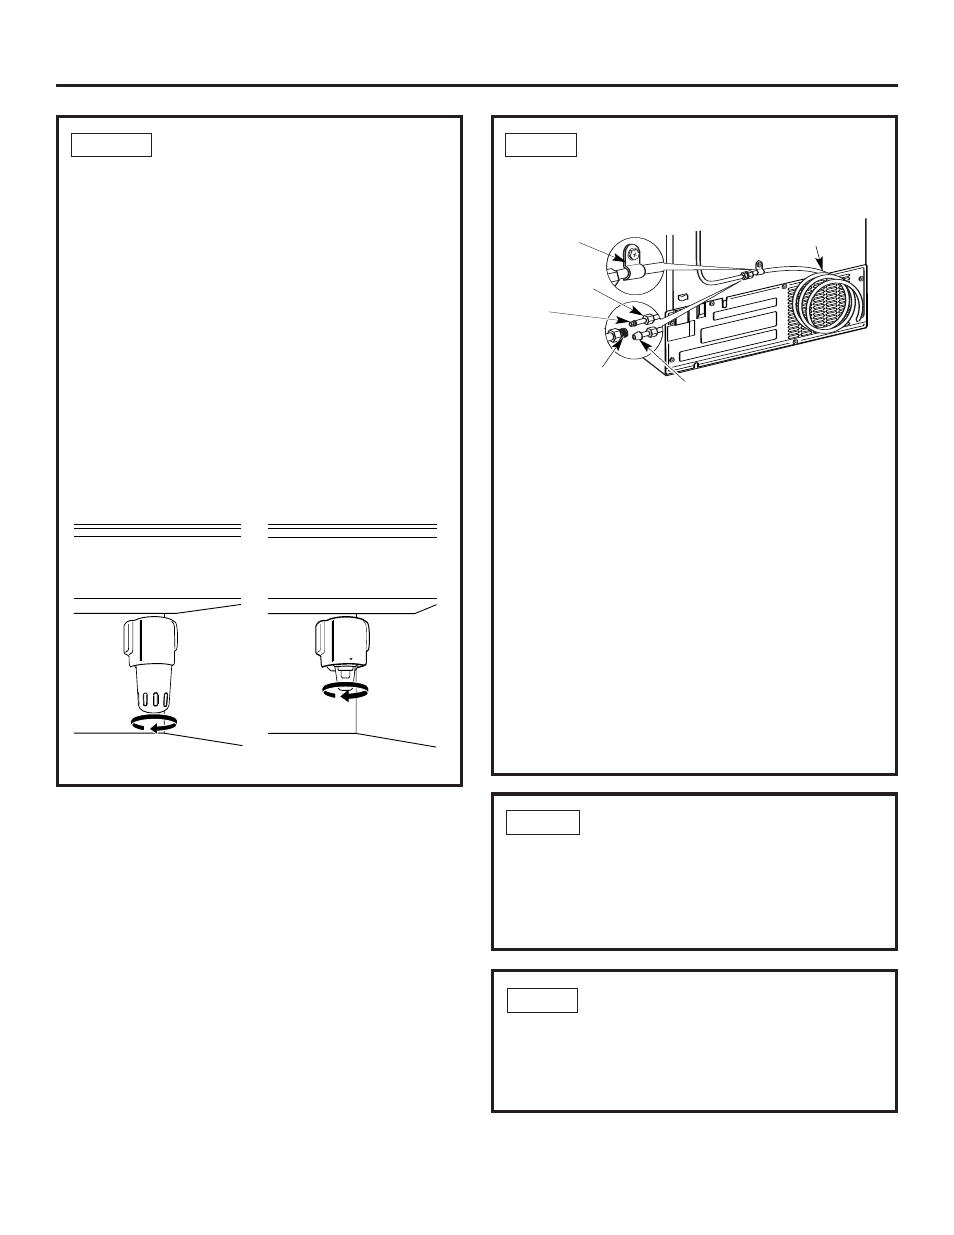
STEP 3 CONNECT WATER SUPPLY
Check to be sure that refrigerator power cord is not
plugged into the wall outlet.
If you are using copper tubing:
• Place compression nut and ferrule (sleeve) onto
the end of the tubing coming from the house water
supply.
• Insert the end of the copper tubing into the
refrigerator connection at the back of the
refrigerator, as far as possible. Hold the tubing
in place and tighten the fitting.
If you are using GE SmartConnect
™
tubing:
• Insert the molded end of the tubing into the
refrigerator connection, at the back of the
refrigerator, and tighten the compression nut
until it is hand tight.
• Then tighten one additional turn with a wrench.
Overtightening may cause leaks.
• Fasten the tubing into the clamp provided to hold it
in position. You may need to pry open the clamp.
• Turn on the water at the shut-off valve to check
for leaks.
STEP 4 CONNECT POWER
• Connect refrigerator power cord plug to a properly
grounded receptacle.
• Check to make sure power to refrigerator is on by
opening refrigerator door to see if interior lights
are on.
1/4" Tubing
Tubing Clamp
1/4"
Compression Nut
Ferrule
(sleeve)
SmartConnect™ Tubing
Refrigerator Connection
716Dia2
STEP 5 MOVE REFRIGERATOR
INTO POSITION
• Remove outside protective wrapping.
• Move the refrigerator into final installation position.
• Remove door spacer and all inside packaging.