Tank assembly – Grizzly H8225 User Manual
Page 8
Model H8225 2
1
⁄
2
Gallon Paint Tank with Gun
-6
-
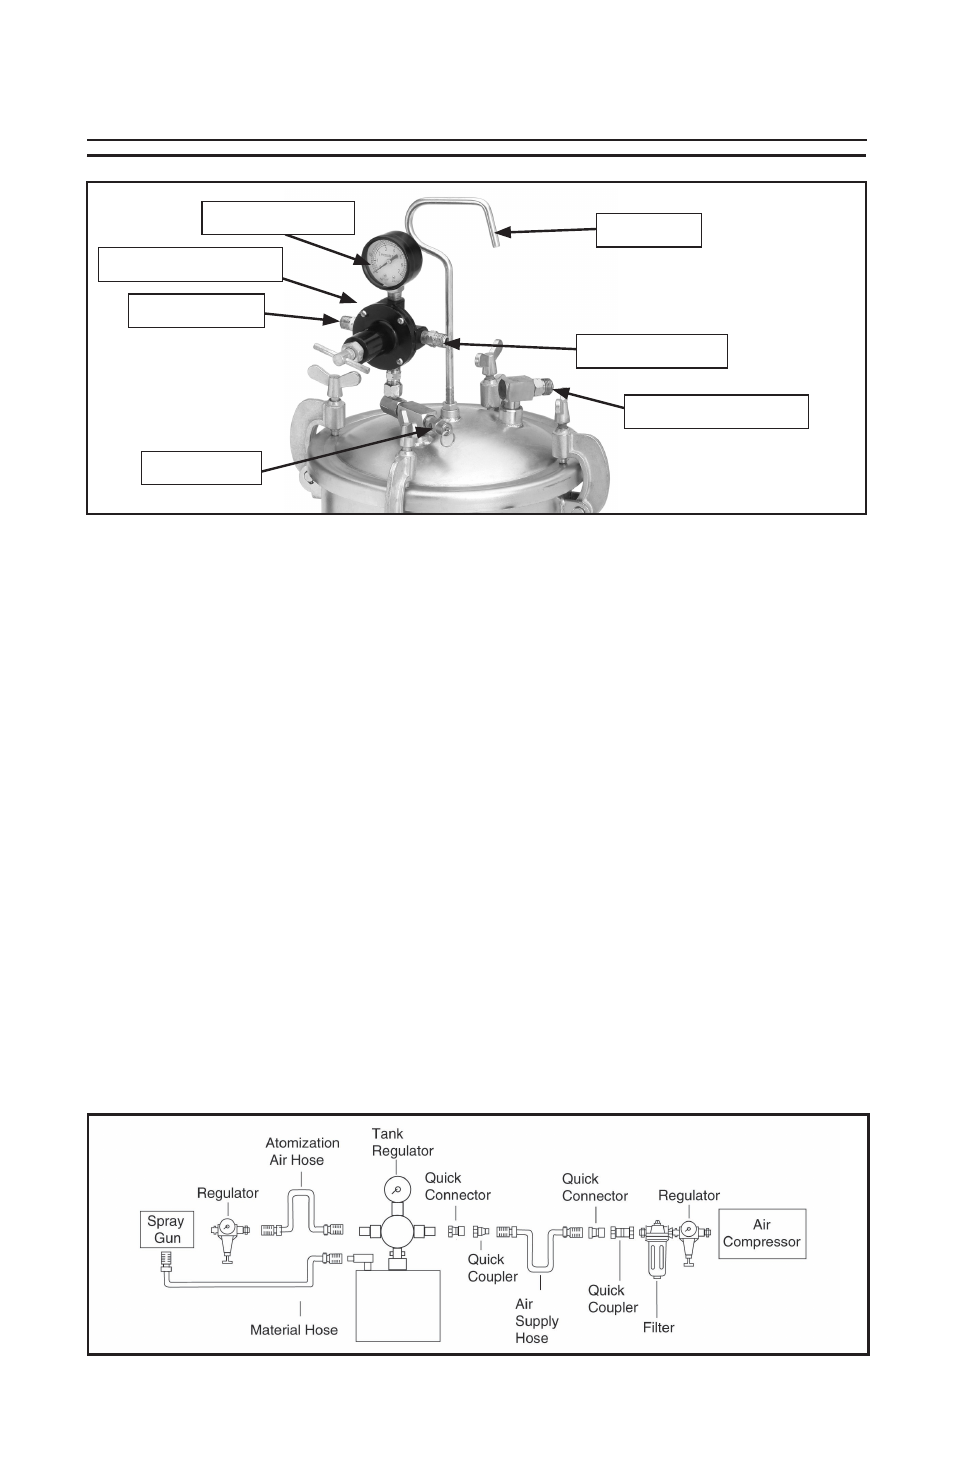
Tank Assembly
To assemble the paint tank:
1. Apply Teflon tape to all male pipe
threads.
2. Thread the lift handle into the center
hole on the tank lid (see
Figure 2) and
secure with the hex nut.
3. Thread the regulator assembly onto the
swivel adapter on the lid, as shown in
Figure 2.
4. Connect a
1
/
4
" NPT air supply hose
(not included) to the inlet fitting on the
regulator.
5. Attach the air hose to the air outlet fit-
ting.
6. Connect the material hose to the fluid
outlet adapter on the tank lid.
7. Install a pressure regulator (not includ-
ed), between the tank regulator, (
Figure
3) and the spray gun, since some of the
pressurized air from the compressor
will bypass the tank regulator.
Figure 3 depicts the paint tank con-
nected to a compressed air system with
a filter/regulator unit and a spray gun.
The filter/regulator unit protects your
tool from damaging water build-up,
and allows you to adjust and maintain
regulated air pressure. If you plan on
installing a filter/regulator unit in your
compressed air system, follow the con-
nection instructions with the unit.
Regulator Assembly
Fluid Outlet Adapter
Lift Handle
Figure 2. Regulator and lift handle installed on paint tank.
Figure 3. Paint tank connect to air compressor and spray gun.
Pressure Gauge
Air Inlet Fitting
Safety Valve
Air Outlet Fitting