Knife setting jig, Dust port – Grizzly G1021Z User Manual
Page 13
G1021Z 15" Planer
-13-
Planer knives are dangerously sharp. Use
extreme caution when working near cutting
surfaces. Failure to exercise care while
working near knives could result in severe
personal injury.
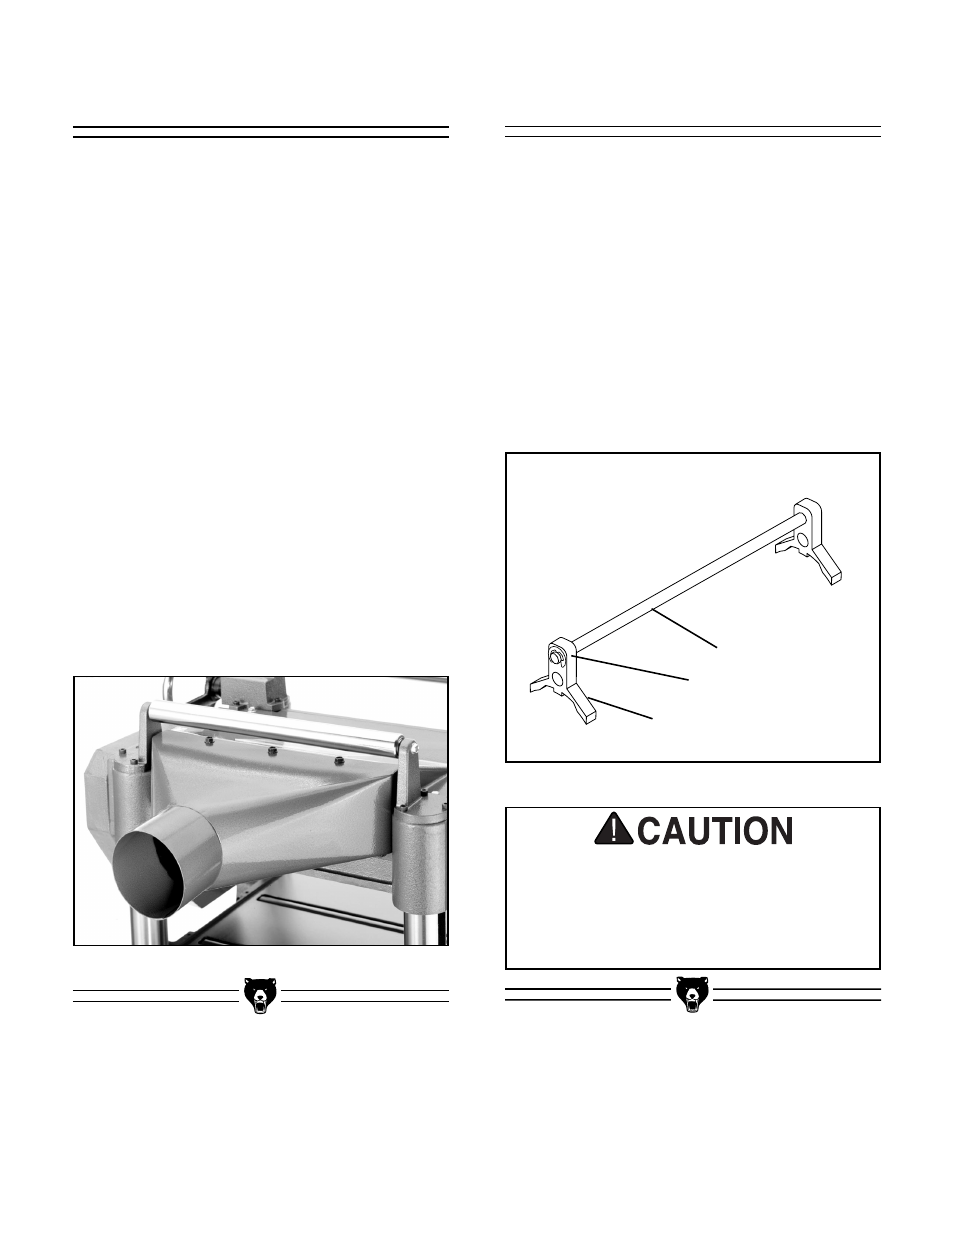
Knife Setting Jig
The knife setting jig has been provided to make
knife setting quick and easy. See Figure 8.
TO ASSEMBLE THE KNIFE SETTING JIG:
1. Snap one of the E-clips over the notch on
one end of the knife setting rod.
2. Slide the cast aluminum knife setting jig
brackets onto the rod.
3. Snap the other E-clip onto the notch at the
other end of the knife setting jig rod.
Figure 8. Knife setting jig components.
E-clip
Jig Rod
Jig Bracket
Dust Port
The G1021Z Planer features a 4" dust port for
use with a dust collection system. If you will not
be using a dust collection system with this plan-
er, do not attach this dust port!
TO ATTACH THE DUST PORT:
1. Fit the dust port over the planer upper
cover. Line up the mounting holes. Three
holes go through the upper cover, and
three holes on the flange line up with three
threaded holes on the back of the planer
head.
2. Use three (3) M6 - 1.0 x 12mm hex bolts
and nuts and lock washers to secure the
dust port to the planer upper cover. See
Figure 7. It will be necessary to reach
inside the port opening with a wrench to
hold the nut to tighten the hex bolts.
3. Use three M6 - 1.0 x 12mm cap screws and
flat washers to secure the dust port to the
planer body.
Figure 7. Dust port assembly.