Servicing instructions, Replacing parts, Ignition lead and piezo – Stovax Brunel 8050 User Manual
Page 16: Gas filter, General, Pilot unit
16
3. IGNITION LEAD AND PIEzO
Due to the method of manufacture, these components can
only be replaced as an integral unit.
3.1 • Turn the gas supply off at the isolation device
• Pull the control knob off the gas valve spindle to reveal
the piezo securing screw access holes
Using a small pozidriv screwdriver:
• Remove the two screws, Diagram 2
AR0894
2
3.2 • Pull the piezo body down and remove from the valve
• Disconnect the ignition lead from the electrode, Diagram
1,D
3.3 • Replace the assembly with a new unit
• Refit the screws and connect the ignition lead to the
electrode
• Check the operation of the new piezo
• Turn the gas supply on and with the pilot running:
• Check for leaks, especially where the two halves of the
valve join
• Replace the control knob
NOTE: WHILST PERFORMING THE PIEzO
REPLACEMENT, YOU WILL BE BREAkING THE SEAL
BETWEEN THE TOP AND BOTTOM HALVES OF THE
VALVE. ENSURE THAT THIS JOINT IS CORRECTLY
SECURED AND LEAk TESTED.
4. GAS FILTER
The gas filter is located just inside the inlet boss of the
control valve, to replace the filter, proceed as follows:
4.1 • Turn the gas supply off at the isolation device
• Undo the inlet compression nut and pull the pipe clear
of the valve, Diagam 3
1. GENERAL
1.1 This appliance must be serviced at least once a year by a
competent person.
1.2 All principal components can be replaced without removing
the stove from its installation, although it is essential that the
gas supply to the appliance is turned off at the isolation
device before proceeding further.
2. PILOT UNIT
2.1 • Turn the gas supply off at the isolation device.
To open the doors:
• Slacken the domed nut on the upper door and loosen
the bolt from behind the latch
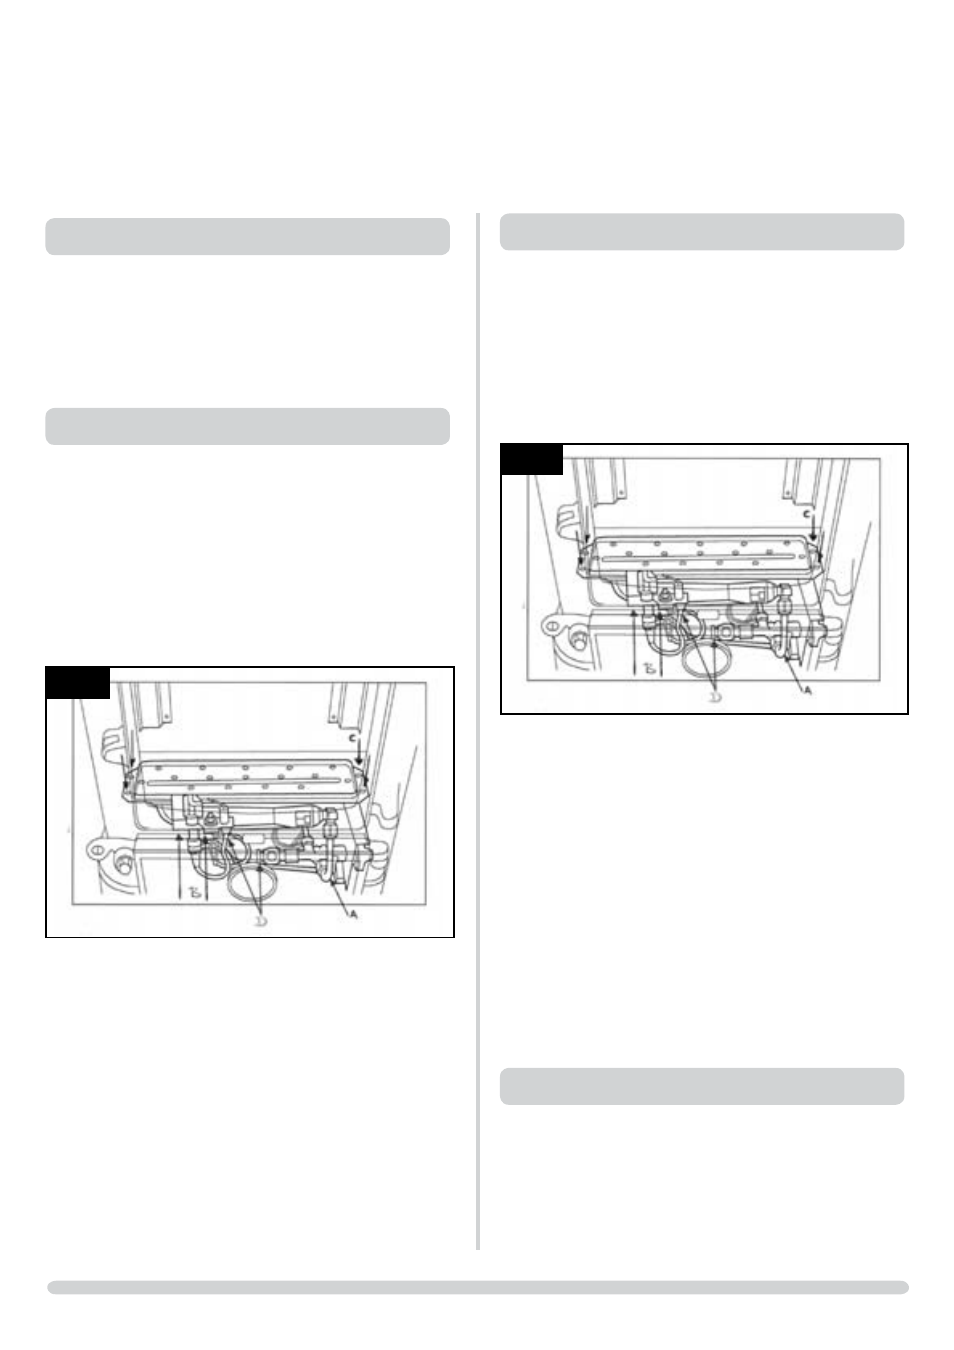
2.2 • Undo the pilot compression nut
• Remove the ignition lead from the electrode by gently
pulling downwards
• Undo the thermocouple from the back of the gas valve,
Diagram 1,D
AR0895
1
2.3 • Remove the two screws securing the pilot unit
• Cut the cable tie securing the ignition lead taking care
not to damage it
The unit can now be removed from beneath the stove.
2.4 When replacing the new pilot unit:
• Ensure the thermocouple follows the same route as the
original one
• Secure the ignition lead to the pilot pipe with a new
cable tie
2.5 • Reconnect the thermocouple, ignition lead and pipe
• Turn on the gas supply and check for leaks
• Close the doors and tighten the bolts and locknuts
SERVICING INSTRUCTIONS
REPLACING PARTS