Low voltage wiring, Heater – Goldline LOGIC PL-P-4 User Manual
Page 16
Low Voltage Wiring
Valve Actuators
The Pro Logic can control up to three automatic valve actuators. Two of the valve outputs are dedicated to the pool/
spa suction (Valve2) and return (Valve1) valves. Valve3 is for general purpose use (solar, water feature, in-floor
cleaner, etc.).
For installations with solar heating, Goldline offers the AQ-SOL-KIT-xx solar kit that contains a valve, actuator, and
extra temperature sensor. The “xx” indicates the valve type from the 3 choices below:
-1P
1.5” Positive Seal
-2P
2” Positive Seal
The Pro Logic is compatible with standard valve actuators manufactured by Hayward, Pentair/Compool, and Jandy.
See diagram on page 10 for the location of valve connectors.
Heater Control
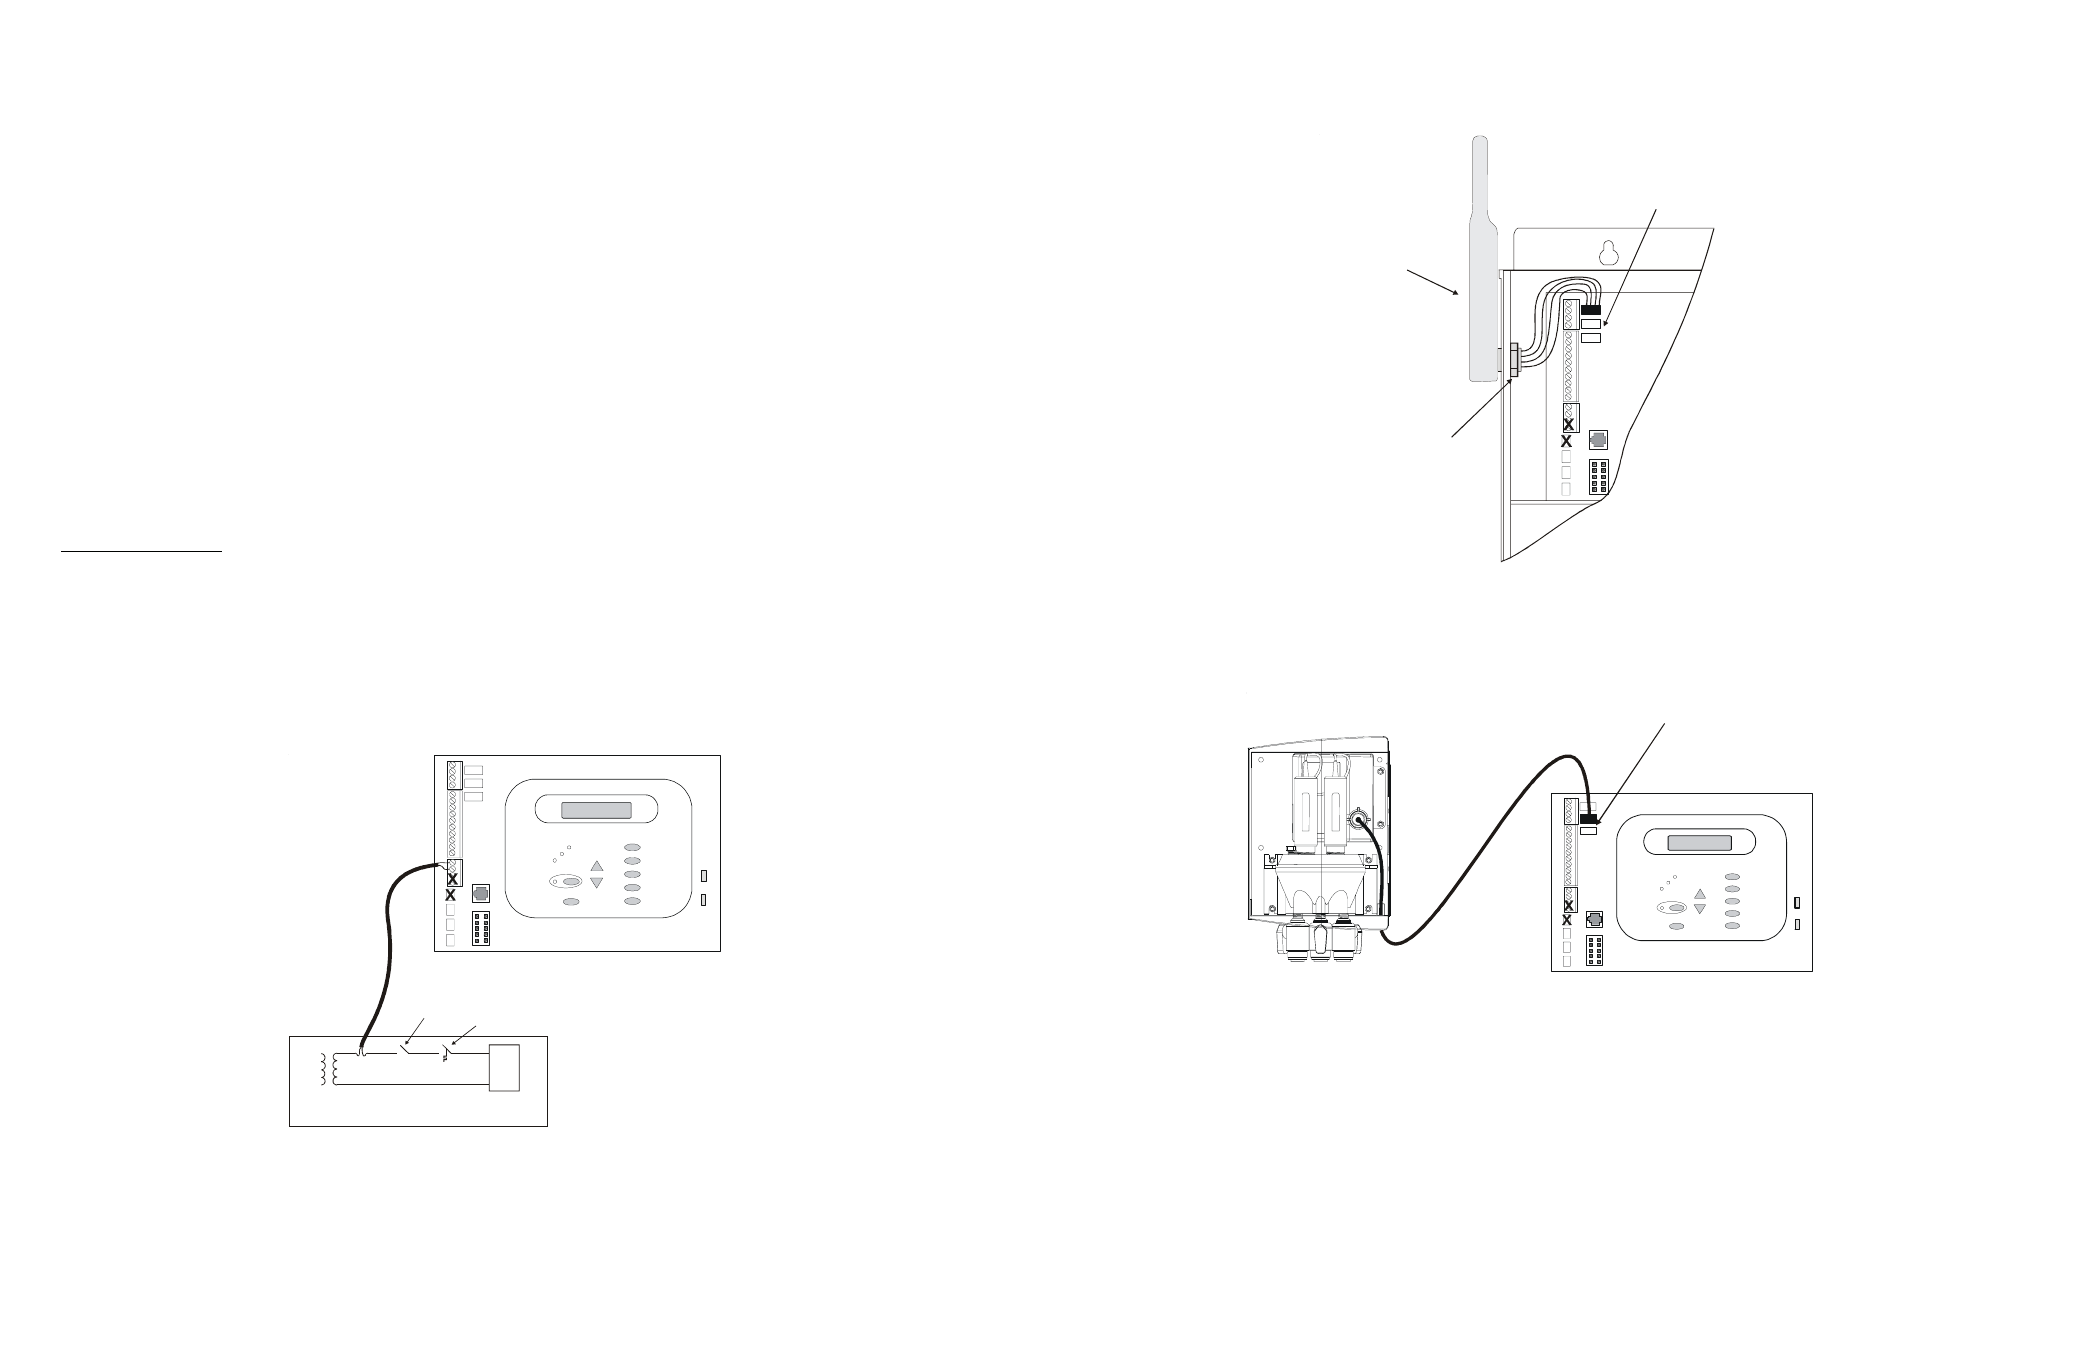
The Pro Logic provides a set of low voltage dry contacts that can be connected to most gas heaters or heat pumps with
24V control circuits. Refer to the diagram below for a generic connection. The manuals supplied with most heaters
also include specific wiring instructions for connecting the heater to an external control (usually identified as “2-wire”
remote control). For millivolt or line voltage heaters, contact Goldline Tech support, 908-355-7995. Refer to the
diagrams and the information on the following pages for more details on the connection to several popular heaters.
Generic Heaters
1. Wire heater to 120/240V power source per the instructions in the heater manual. The Pro Logic does NOT
control the power going to the heater.
2. Wire the Pro Logic dry contact heater output per the diagram below. Many internal parts of the heater can get very
hot--see the heater manufacturer’s recommendations on the minimum temperature rating for wires. If no guidance
is given, use 105°C rated wire.
3. Set any ON/OFF switch on the heater to ON.
4. Set the thermostat(s) on the heater to the maximum (hottest) setting.
Ignition/Valve
Heater
Kill Switch
Thermostat
13
Base Station
Plug in the pigtail connector from the wireless base station into the “wireless” connector on the main PCB
in the Pro Logic control unit.
Base Station
(AQL2-BASE-RF)
Tighten nut
Pro Logic
Main PCB
Connector for
Base Station
AQL-CHEM ORP and pH Sensing Kit
Plug in the connector from the AQL-CHEM into one of the “COMM” connectors on the main PCB in the
Pro Logic control unit as shown below.
Connector for
AQL-CHEM
Flow Switch
Only applicable if the chlorinator function is enabled. The flow switch cable plugs into the Pro Logic
Control Center at the position shown in the diagram on page 10. Ensure that the connector catch “snaps”
in order to provide a reliable connection.
Turbo Cell
Only applicable if the chlorinator function is enabled. The Turbo Cell should be plugged in after the
Pro Logic cover panel is put back in place. Refer to page 10 for the location of the connector.
18