Miter sanding, Angle sanding – Grizzly G0702 User Manual
Page 18
-16-
Model g0702 (Mfg. since 1/12)
the most efficient way to get a perfect miter is to
cut the workpiece slightly long and sand it to the
desired dimension. Miter sanding can be done
easily with the miter gauge.
to perform miter sanding operations:
1. loosen the knob on the miter gauge and
adjust the angle to the desired point. tighten
the knob.
2. Slide the miter gauge into its slot and use it to
hold your workpiece in position.
Note:
The miter gauge can be used in either
direction in the slot to achieve the proper rela-
tion of the workpiece to the disc.
3. With light, but firm pressure, push the work-
piece slowly into the down-spin side of the
rotating disc (
figure 11).
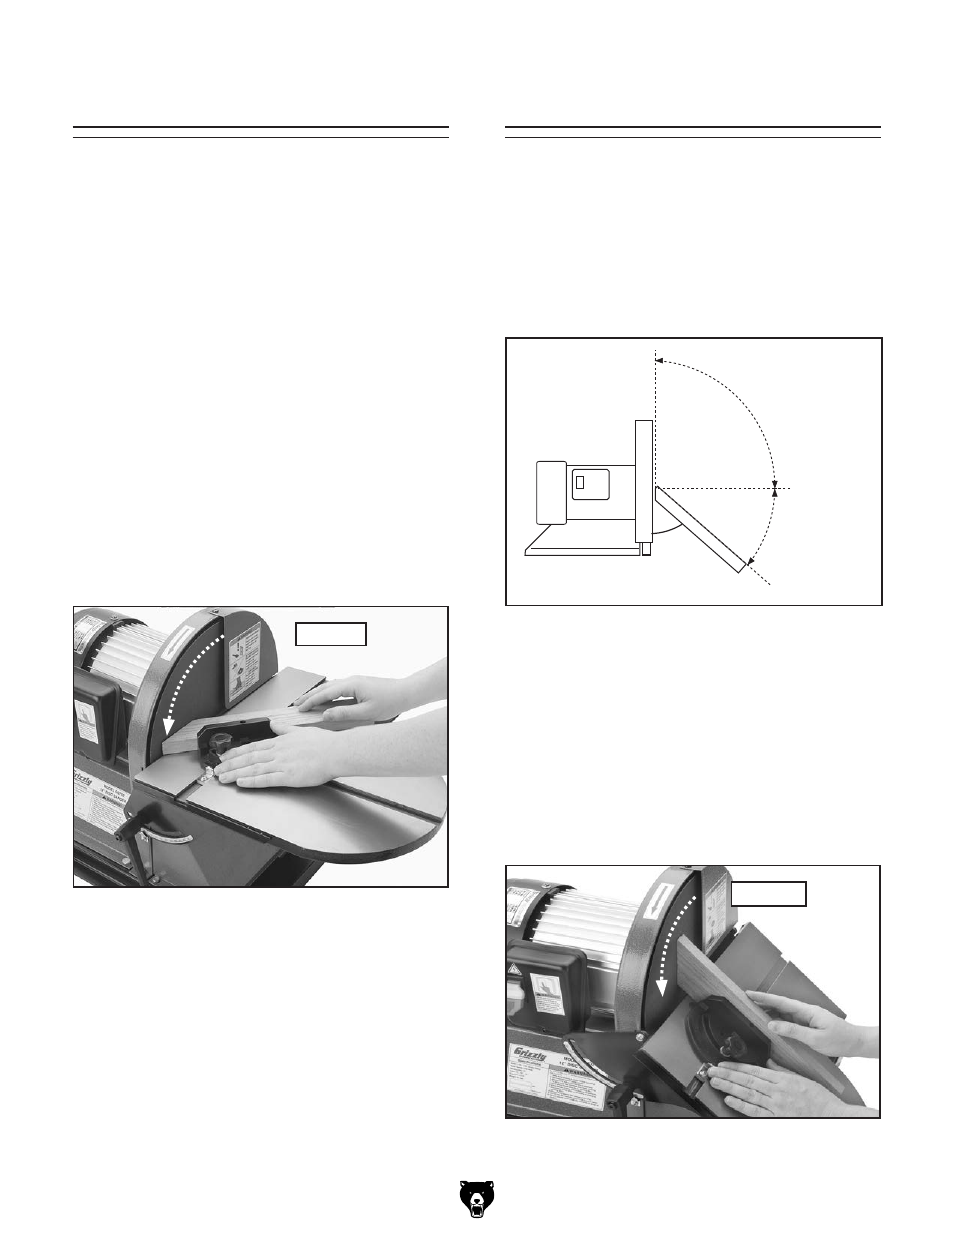
Miter Sanding
the disc table can be positioned from -15˚ to 45˚,
relative to the plane of the sanding disc. Sanding
in an "open angle zone" rather than in a "closed
angle zone" is typically safest (
figure 12).
understanding this relationship helps prevent
trapping the workpiece between the sanding sur-
face and the table, and reduces the hazard of
workpiece kickback.
Angle Sanding
figure 11. angle sanding.
rotation
figure 13. Sanding with table angled.
rotation
to perform angle sanding operations:
1. position the table to the desired angle as
shown on the angle scale.
2. use the miter gauge to hold your workpiece
in position, and with light, but firm pressure,
push the workpiece slowly into the down-spin
side of the rotating disc (
figure 13).
High Trapping
Angle Hazard
Low Trapping
Hazard
Low Kickback
Hazard
High Kickback
Angle Hazard
Open-Angle
Zone
Closed-Angle
Zone
figure 12. trapping and kickback zones.