Grizzly G0514X User Manual
Page 30
-28-
G0514X/-X2/-X2B/-X3 (Mfg. Since 2/12)
Installing foot Brake
(G0514X2, -X3)
secure the foot pedal to the brake lever using the
cap screws and lock washers, as shown in
figure
43.
figure 43. Foot brake installed.
Installing fence
(G0514X2B)
To install the fence:
1. attach the rail plates to the front square rail
with the three M6-1 x 20 cap screws, 6mm
lock washers, and 6mm flat washers (see
figure 40).
figure 40. installing front rail onto table.
Knob
Flat
Washer
8mm
Flat Washer 6mm
lock Washer 6mm
lock Washer
8mm
Front rail
rail plate
Cap screw
M6-1 x 20
Cap screw
M8-1.25 x 20
2. attach the outer two rail plates with the round
and elongated mounting holes on the outer
part of the table bottom with two M8-1.25 x
20 knobs and 8mm flat washers.
3. attach the remaining rail plate with the round
mounting holes using an M8-1.25 x 20 cap
screw, 8mm lock washer and 8mm flat wash-
er (
figure 40).
4. thread the fence handle into the fence, then
tighten the hex nut against the fence pivot
block (see
figure 41).
figure 41. Fence handle components.
pivot Block
hex nut
Fence
handle
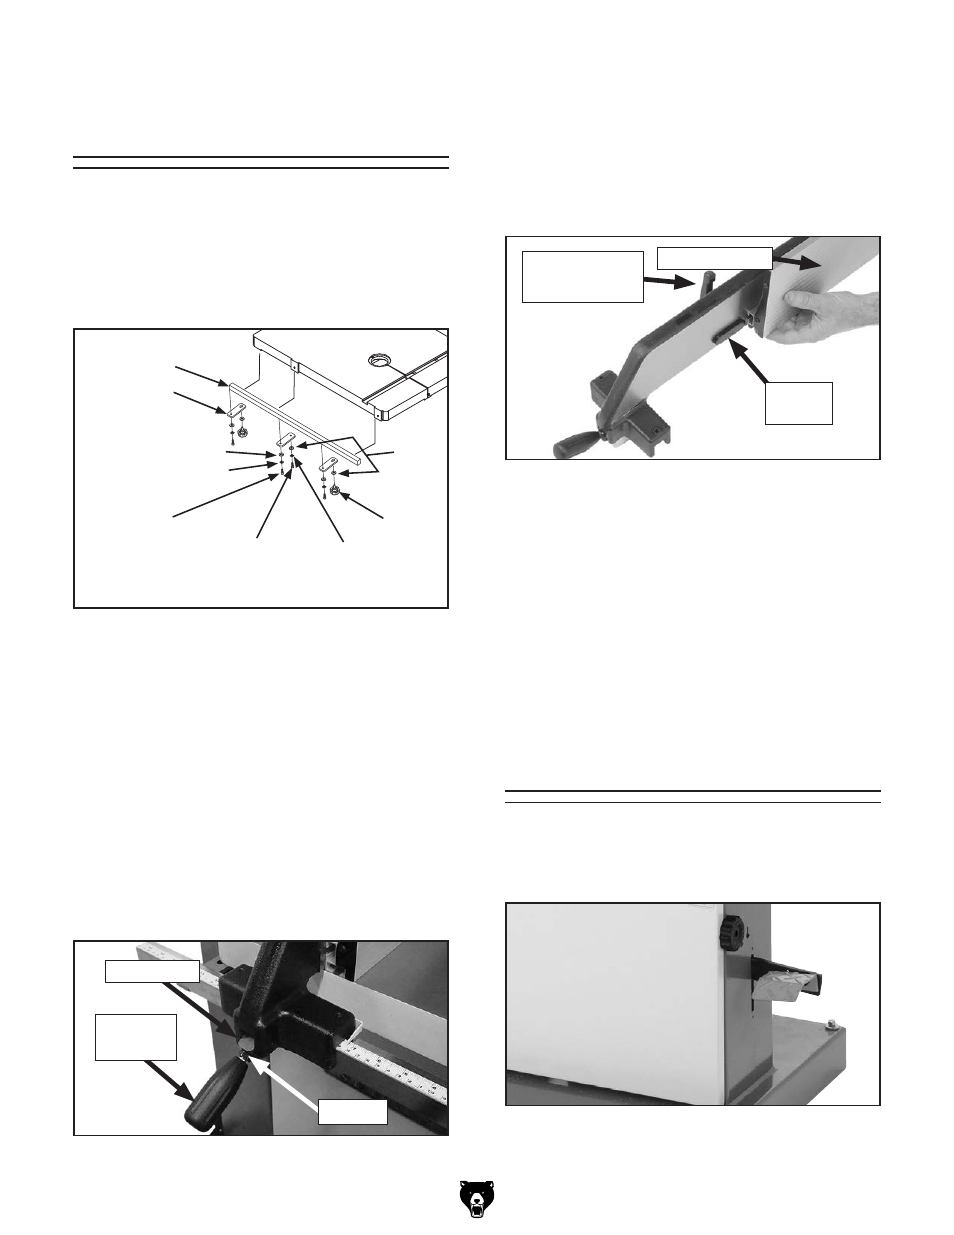
5. install the resaw fence lock handle (with the
washer and moving plate) onto the fence,
then slide the resaw fence over the moving
plate as shown in
figure 42.
Note: Leave the moving plate and lock han-
dle loose enough to slide on the fence.
figure 42. attaching resaw fence to standard
fence.
Moving
plate
resaw Fence
resaw lock
handle
6. tighten the resaw lock handle.
7. pull the fence handle up and place the fence
assembly on the rail.
8. push the fence handle down to lock the fence
assembly in place.