Grizzly G0514X User Manual
Page 24
-22-
G0514X/-X2/-X2B/-X3 (Mfg. Since 2/12)
2. adjust the upper and lower blade guides
away from the blade. refer to
Adjusting
Blade Guide Bearings on page 33 for more
details.
All saw blades are danger-
ous and may cause per-
sonal injury. To reduce the
risk of being injured, wear
leather gloves when han-
dling saw blades.
3. With the help of another person, lift the table
onto the trunnions.
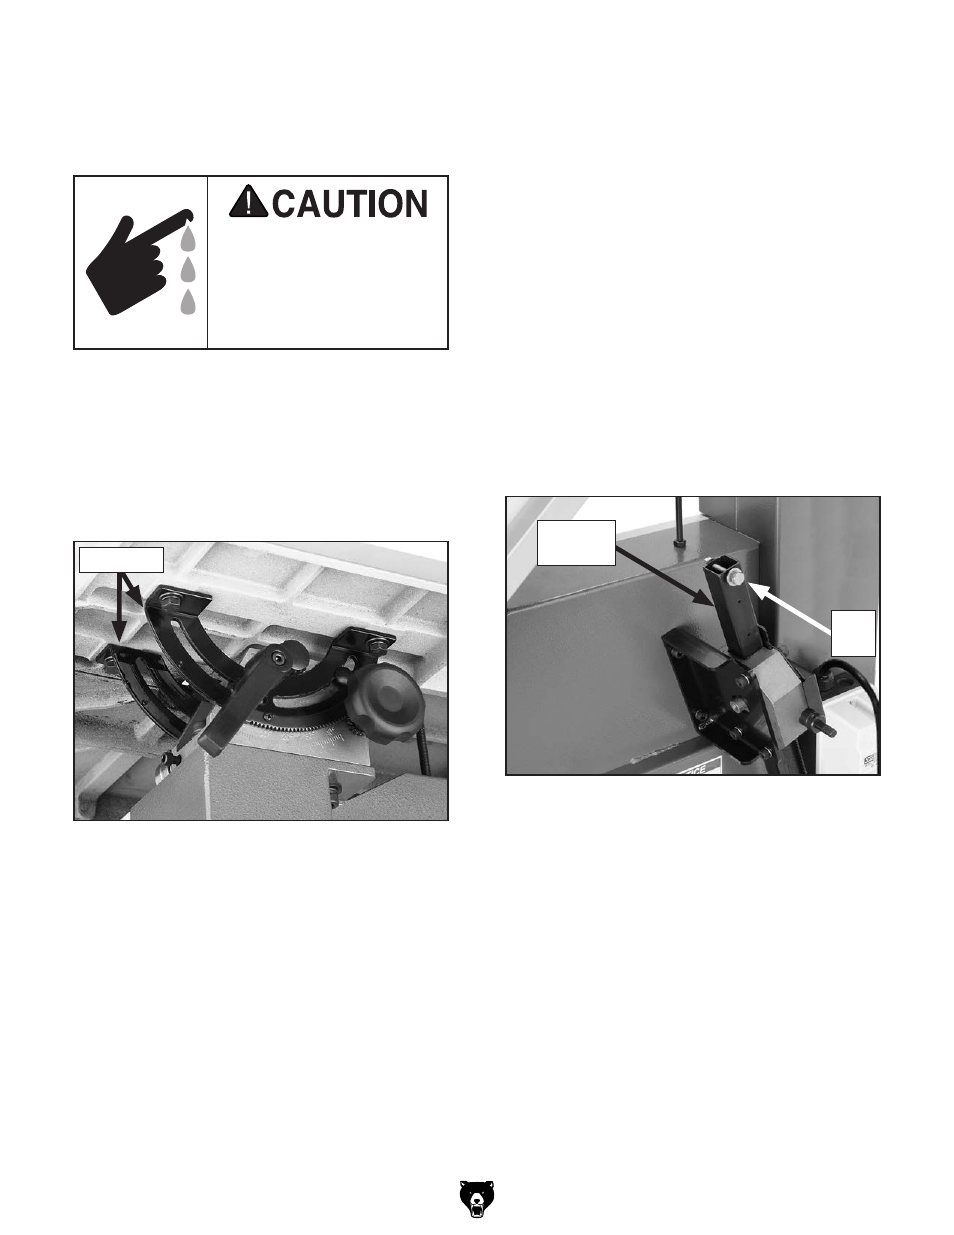
4. Model G0514X: secure the table to the trun-
nions, as shown in
figure 25 with the (4)
M8-1.25 x 16 hex bolts, 8mm lock washers,
and 8mm flat washers.
6. slide the blade through the upper and lower
blade guides, and mount it over the upper
and lower wheels.
7. tighten the quick release tension lever, then
install the table insert and table pin.
8. Keep the upper and lower blade guides
adjusted away from the blade until the blade
tracking and tension have been adjusted.
Table Tilt Assembly (G0514X2,
G0514X2B, & G0514X3 Only)
1. tilt the table up and secure the table lock
lever.
2. remove the hex bolt, hex nut and flat wash-
ers installed on the geared table tilt tube (see
figure 26).
figure 25. Mounting the table.
trunnions
Model G0514X2, G0514X2B, G0514X3:
secure the table to the trunnions with the (4)
M8-1.25 x 25 hex bolts, 8mm lock washers,
and 8mm flat washers.
5. With the blade teeth pointing downward, and
toward the front of the machine, slide the
blade through the table slot.
— if the table insert is preinstalled, remove it
before changing the blade.
figure 26. table tilt assembly.
table tilt
tube
hex
Bolt
3. secure the sliding plate to the table tilt tube
with the fasteners removed in
Step 2, mak-
ing sure the hole closest to the edge of the
plate is installed on the left side of the table—
facing the rear of the bandsaw.
4. lower the table onto the positive stop bolt.