Accessories, Unpacking, Assembly – Global Machinery Company LS236LS User Manual
Page 9: Overview, Adjusting the cutting depth
Accessories
The GMC LS236LS Circular Saw is supplied with the
following accessories as standard:
1. Blade wrench
2. Blade (fitted)
3. Parallel fence guide
4. Dust extraction adaptor
5. Instruction manual
6. Receipt holder
Unpacking
Due to modern mass production techniques, it is unlikely
that your GMC Power Tool is faulty or that a part is
missing. If you find anything wrong, do not operate the
tool until the parts have been replaced or the fault has
been rectified. Failure to do so could result in serious
personal injury.
Assembly
The saw is packed, fully assembled.
Overview
You have purchased a 2300 watt heavy duty circular saw
with the REDEYE® laser line generator.
Please refer to the safety instructions given earlier in this
manual for important instructions regarding the use of
the laser.
The saw is capable of ripping and cross cutting
hardwoods, softwoods and man made boards quickly,
accurately and safely.
If the tool becomes too hot, let it run under no load for
2–3 minutes to cool the motor.
The quality of the cut will improve as the number of blade
teeth increases.
The blade cuts on an upward stroke and may chip the
uppermost surface or edges of your work piece. When
cutting, ensure that your uppermost surface is a
non-visible surface when your work is finished.
By loosening the bevel adjustment lever (8), the body
and the blade of the saw can be tilted to any angle up to
45° for making angle cuts. Please note that the maximum
depth of cut is reduced when cutting at an angle.
A fixed guard (15) encloses the upper part of the blade.
As the saw advances through the work piece, the pivoting
lower blade guard (13) is pushed back by the edge of
the wood to expose only that part of the blade which
is needed. When the blade clears the work, the spring
loaded lower blade guard snaps back to completely
enclose the blade.
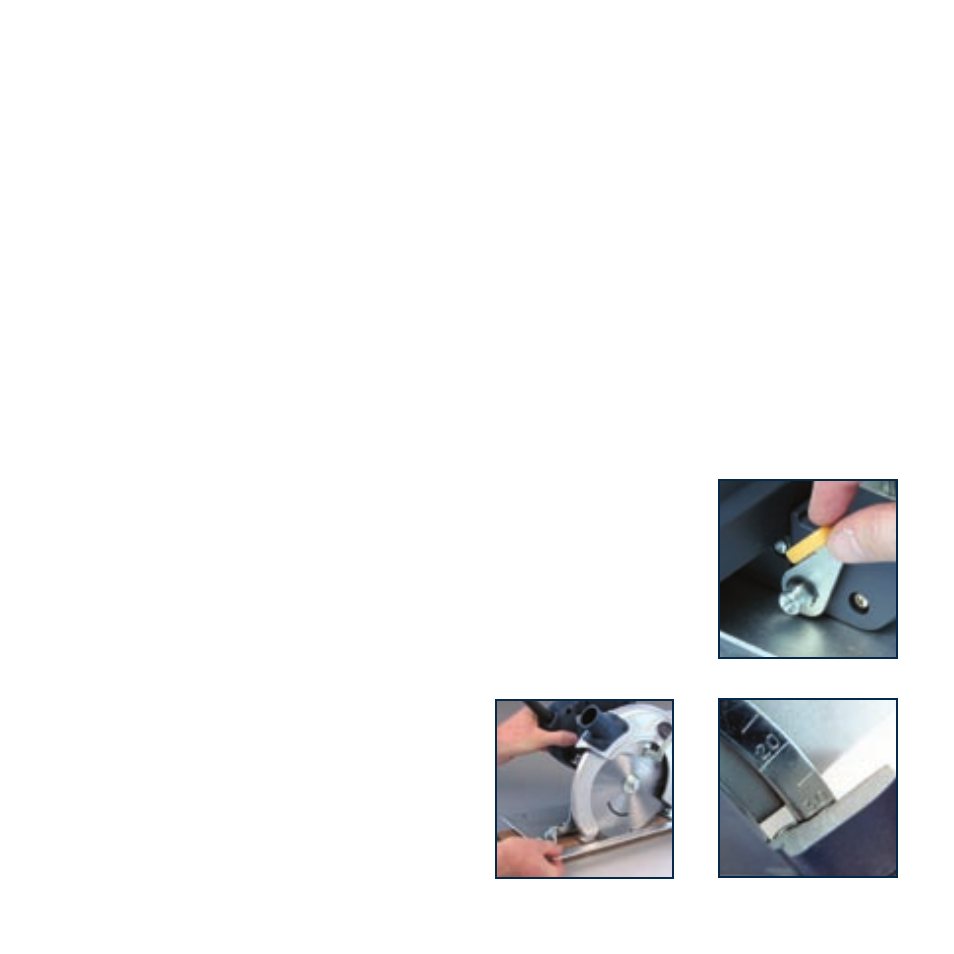
Adjusting the cutting depth
CAUTION.
Always ensure that the saw is switched off
and unplugged from the power supply before making any
adjustments.
1. Ensure that the saw is facing away from you.
2. Loosen the depth locking lever (18).
3. Hold the base plate flat against the edge of the work
piece and lift the body of
the saw until the blade is
at the right depth. Use the
depth of cut indicator (19)
to determine the cutting
depth.
4. Tighten the depth
locking lever (18).
9