Changing the blade – Global Machinery Company LS236LS User Manual
Page 13
6. Align the beam with the line
on the work piece.
7. Always let the blade reach
full speed (approximately
2 seconds) before you begin
to cut into the work piece.
8. Slowly push the saw forward
using both hands, keeping
the red laser light beam on
the line of cut.
9. After completing your cut, release the trigger switch
and allow the blade to come to a complete stop. Do
not remove the saw from the work piece while the
blade is moving.
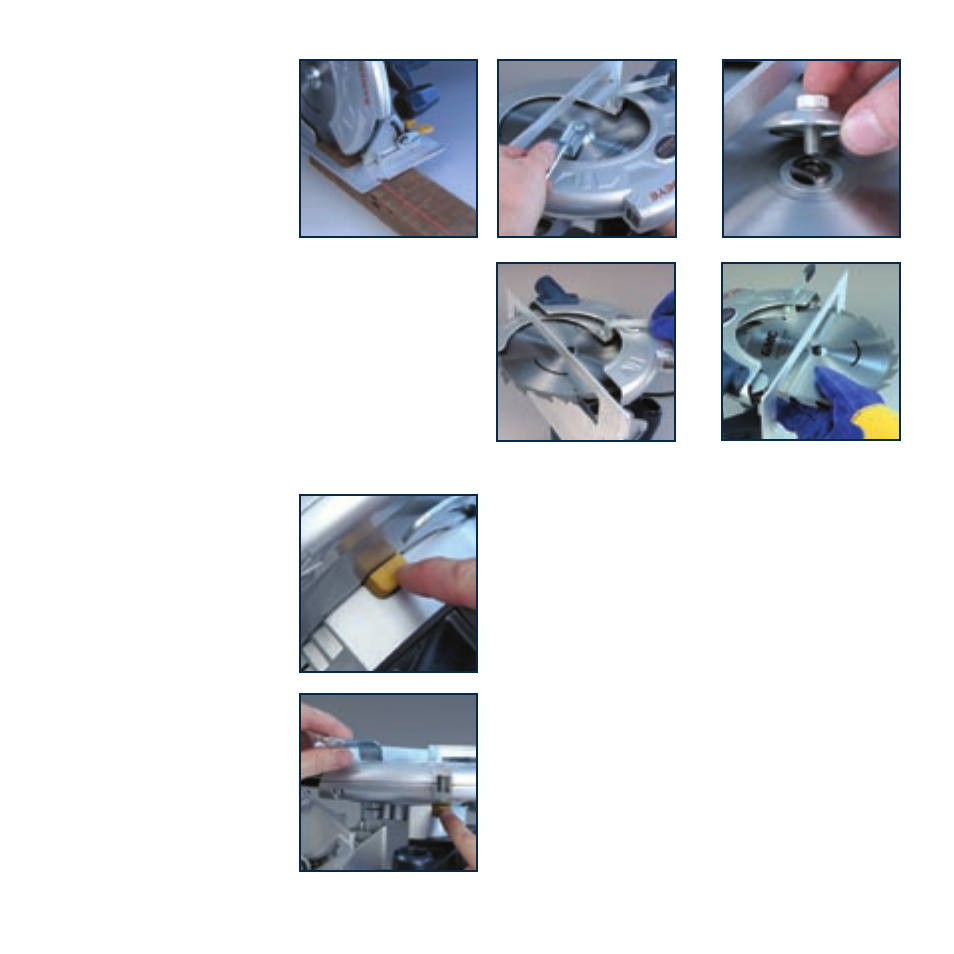
Changing the blade
CAUTION.
Always ensure that the saw is switched off
and unplugged from the power supply before making any
adjustments.
1. Place saw on its side on a flat surface.
2. Rotate the saw blade by
hand whilst depressing the
spindle lock button (20)
until the blade locks.
3. Whilst depressing the spindle
lock button, turn the blade
bolt anti-clockwise using the
wrench provided.
4. Remove the outer blade
flange and the blade bolt.
5. Raise the lower blade guard
(13) using the blade guard
lever (12).
6. Remove the saw blade from
the inner flange and pull
it out.
7. Clean the saw blade flanges thoroughly before
mounting the new saw blade. Wipe a drop of oil onto
the inner and outer flange where they will touch
the blade.
8. Mount the new saw blade onto the spindle and against
the inner flange.
9. Replace the outer flange and tighten the blade bolt.
WARNING.
The direction in which the blade rotates has
to be the same as the direction of the arrow marked on
the housing.
10. Ensure that the spindle lock button (20) is released.
11. Before using the saw again, check that the safety
devices are in good working order.
Important.
After replacing the saw blade, make sure that
the saw blade runs freely by turning the blade by hand.
12. Plug the machine into a power socket and run the
saw under no load to check that it runs smoothly
before using it to cut any material.
13