Adjusting the bevel angle, Adjusting the bevel setting – Global Machinery Company LS236LS User Manual
Page 10
Note.
Always use the correct
blade depth setting. The
correct blade depth setting for
all cuts should not be more
than 6mm below the material
being cut. Allowing more
depth will increase the chance
of kickback and result in a
rough cut.
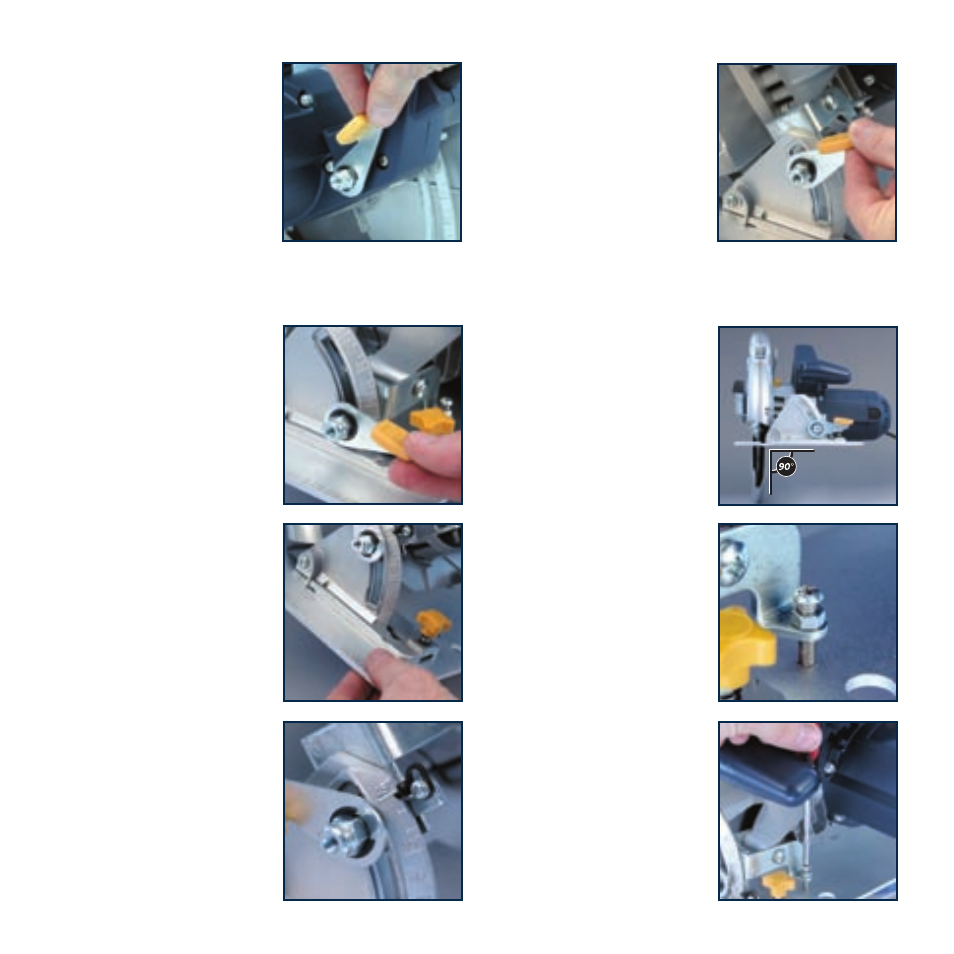
Adjusting the
bevel angle
CAUTION.
Always ensure that
the saw is switched off and
unplugged from the power
supply before making any
adjustments.
1. The saw can be adjusted to
cut at any angle between
0° and 45°. When making
45° bevel cuts, there is
a notch (23) in the saw
base to help you line up
the blade with the line of
cut. Align your line of cut
with the inner blade guide
notch on the base of the
saw when making 45°
bevel cuts.
2. Loosen the bevel
adjustment lever (8)
located at the front of the
base plate.
3. Tilt the body of the saw
until the required angle is
reached using the bevel
scale (9) as a guide.
4. Tighten the bevel
adjustment lever (8) to
secure the base plate.
Note.
Always make a trial
cut in a scrap piece of
material along a guideline
to determine how much you
should offset the blade from
the guideline to make an
accurate cut.
Adjusting the bevel
setting
CAUTION.
Always ensure that the saw is switched off
and unplugged from the power supply before making any
adjustments.
1. Ensure power is
disconnected from the
mains socket.
2. With the saw turned upside
down and the lower guard
fully retracted, check that
the saw blade is at 90° to
the base.
3. If adjustment is necessary,
adjust as follows.
4. Loosen the lock nut of the
stop screw found beside the
parallel fence locking knob
(10) and turn it either in
or out to adjust the base
down onto the screw.
4. Re-check the blade until it
is at 90° to the base.
5. Lock the screw with the
lock nut.
10