Grizzly 60" WORKBENCH H7724 User Manual
Page 3
model h7724 (mfg. since 7/08)
-3-
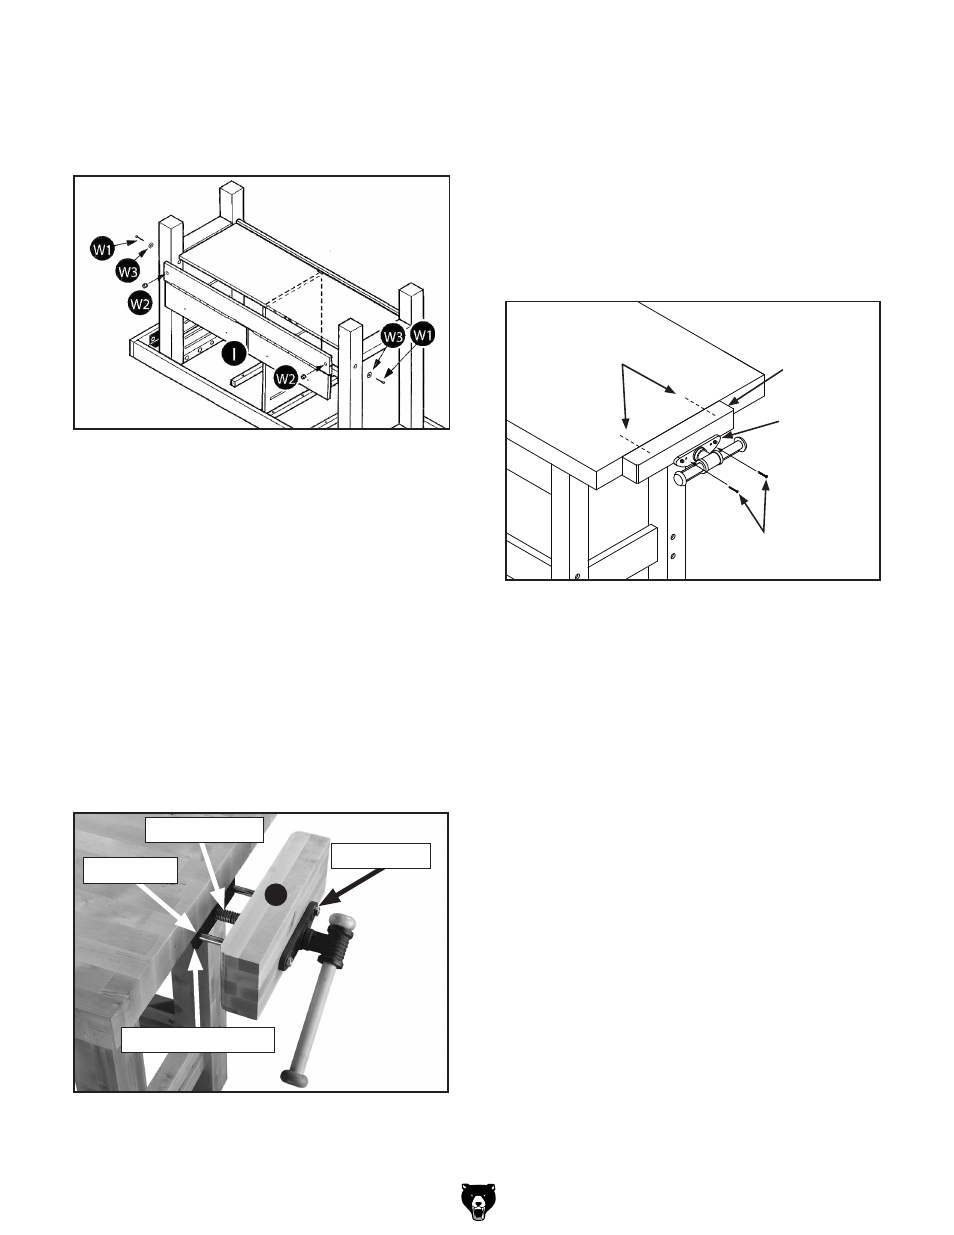
figure 7. Front cross brace installation.
10. insert two (W2) barrel nuts into the front
cross brace "i", so the barrel nuts slots are
horizontal and facing toward the inside of the
workbench (
figure 7).
11. using the 5mm hex wrench, secure the front
brace and legs together with two (W1) barrel
bolts and two (W3) washers (
figure 7).
12. tighten all loose fasteners except the four
(X1) fasteners holding the legs to the table.
13. tighten the (X1) fasteners at this time.
14. With assistance, position the workbench onto
its feet.
15. insert the metal shafts and threaded rod of
the vise through the holes in the vise wood
block (J) and into the vise support block
under the bench top (see
figure 8).
figure 8. Vise threaded into vise support block.
Wood Block
threaded rod
metal shaft
Vise support Block
figure 9. installing vise.
table top &
Wood Block Flush
Vise plate
Wood Block
17. Adjust the top of the wood block flush with the
surface of the table using a straightedge, as
shown in
figure 9.
16. turn the vise handle clockwise until the wood
block (
figure 8) just touches the table.
Note: Do not fully tighten the vise handle;
leave it loose enough so the wood block can
be adjusted in the next step.
18. using an
1
⁄
8
" drill bit, drill 1
7
⁄
16
"
deep holes
through the vise plate mounting holes and
into the wood block.
19. secure the vise plate to the wood block with
two #5 x 1
7
⁄
16
" wood screws (
figure 9).
20. place a cotter pin in the end of the threaded
rod, bending it tightly around the shaft to
keep it from threading out of the vise support
block.
J
#5 x 1 7⁄16"
Wood screws