Grizzly 60" WORKBENCH H7724 User Manual
Page 2
-2-
model h7724 (mfg. since 7/08)
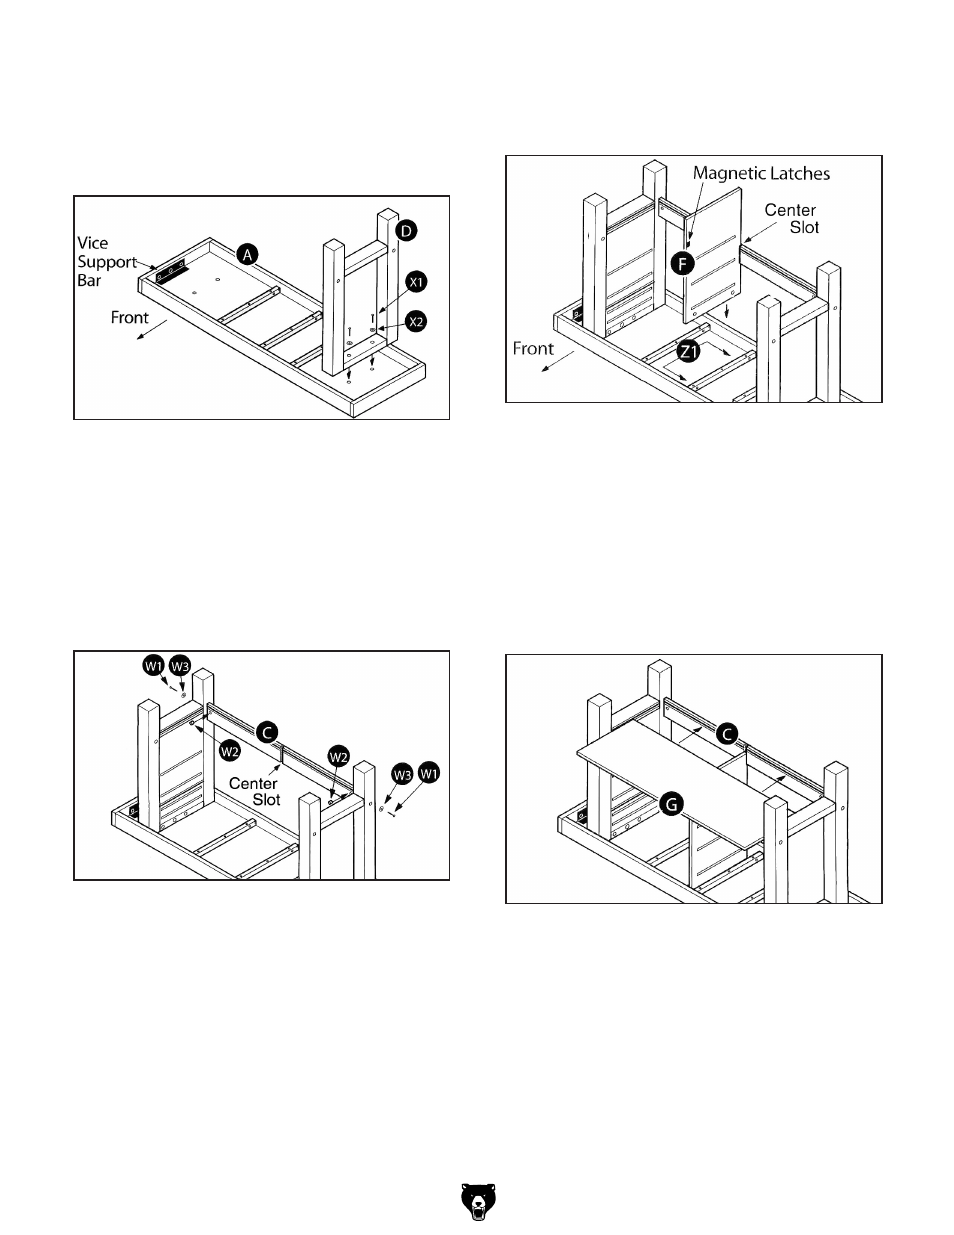
figure 3. Leg installation.
figure 6. Bottom panel installation.
figure 5. Center panel installation.
figure 4. Back board installation.
2. position the workbench top "A" so the vise
support bar is to your left. using the 4mm hex
wrench, install leg "d" with two (X1) wood
screws, and two (X2) washers (
figure 3). do
not fully tighten at this time.
3. install leg "B" with two (X1) wood screws, and
two (X2) washers as previously done. do not
fully tighten at this time.
4. insert two (W2) barrel nuts into the back
cross brace "C", so the barrel nuts slots are
horizontal and showing on the same side as
the back board center slot (
figure 4).
5. position the back cross brace "C" so it is fac-
ing inward and the grooves in the brace line
up with the grooves in the legs.
6. using the 5mm hex wrench, secure the brace
and legs together with two (W1) barrel bolts
and two (W3) washers (
figure 4). do not
fully tighten the bolts at this time.
7. position the center panel "F" so the magnetic
latches are facing toward the front (
figure 5),
and the panel slips in the center slot.
8. using the 4mm hex wrench, secure the cen-
ter panel "F" to the cross brace with two (z1)
special cap screws and washers (
figure 5).
do not fully tighten at this time.
9. position the bottom panel "g" into the leg
grooves. using care, slide the panel all the
way back until it fully seats into the groove in
the back cross brace "C" (
figure 5).