Caution, Chassis installation, Figure 16 – Friedrich 24,000 BTU/h User Manual
Page 16
2
3
/
8
Chassis to
plenum gasket
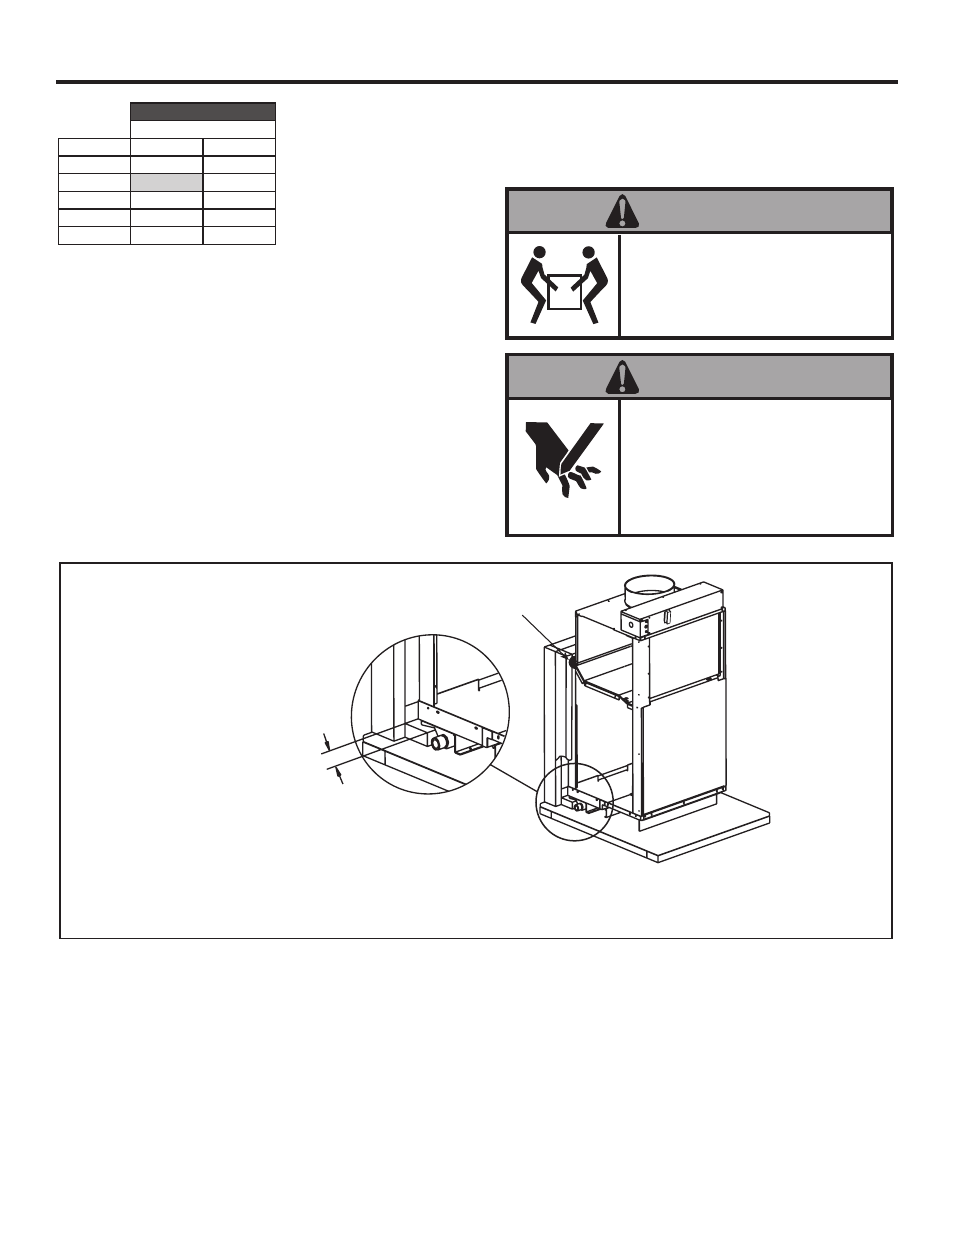
Chassis Installation /Installed View
Figure 16
The Vert-I-Pak chassis must be inserted into the wall plenum so that the plenum divider gasket makes contact with the condenser
baffle in the unit.The chassis will fit approximately 2 3/8” into the wall plenum.
NOTE: Prior to installing the chassis, ensure that the drain pan and line are free from debris.
C. Place the chassis into the closet with the outdoor side
facing the wall plenum opening.
D. Slide the chassis into the wall plenum until the plenum
divider seal is established and the factory-installed
chassis to plenum gasket has sealed to the top flange of
the plenum. (See Figure 16)
Chassis Installation
NOTE: Prior to installing the chassis, ensure that the drain
pan and line are free from debris.
A. Ensure that the wall plenum is installed in accordance
with the VPAWP1-8/1-14 Installation Manual.
B. Ensure that the VPDP1 drain pan is installed correctly
(see Figure 16). Using the 3/4" plugs supplied with the
pan, plug the unused condensate drain hole. Connect a
drain to the condensate exit location. Be sure to use
teflon tape or approved pipe sealant on all drain
connections and plugs (see Figure 16).
ESP (")
Low
High
.00"
690
740
.10"
610
700
.20"
560
640
.30"
510
580
.40"
450
520
Model
VEA24/VHA24
Highlighted values indicate
rated performance point.
Excessive Weight Hazard
CAUTION
Use two or more people when
installing your air conditioner.
Failure to do so can result in back
or other injury.
Cut/Sever Hazard
CAUTION
Some edges may be sharp, use
gloves or other hand protection
when handling unit.
Failure to do so can result in minor
to moderate personal injury.
For single speed thermos-
tats connect to the GL
terminal for Low speed or
GH
terminal
for
High
speed. Two speed control
thermostats will use both.
14
- 7,200 BTU Packaged Terminal Air Conditioner Warranty 920-087-09 (12/10) ZoneAire Series 42 Inch Packaged Terminal Air Conditioner Warranty A-SERIES 9 HEAT PUMPS 7,200 BTU Packaged Terminal Air Conditioner Product Profile 7,200 BTU Packaged Terminal Air Conditioner Installation and Operation Manual ZoneAire Series 42 Inch Packaged Terminal Air Conditioner Warranty Guide