Expanded recording modes – Fostex UR-2 User Manual
Page 4
4
Two new recording modes -- Relay mode and Loop mode -- are now available in addition to the Normal mode.
Expanded recording modes
Normal mode
(default)
Relay mode
(newly added)
Loop mode
(newly added)
Recording stops when no available recording space is left on the current storage device.
When no available recording space is left on the current storage device, the unit continues recording to the next
storage device. This mode is available only when there is available recording space on the next storage device. If no
recording space is available on every storage device, recording stops.
to a USB memory. On the second SD card, only the BWFF folder is created.
As with the Relay mode above, when no available recording space is left on the current storage device, the unit
continues recording to the next storage device. The difference from the Relay mode is that the unit performs overwrite
recording while erasing old data in the Loop mode. Therefore, when two storage devices are set, recording semi-
permanently continues until you manually stop recording.
to a USB memory. On the second SD card, only the BWFF folder is created.
With version 1.10, when the current file size reaches the maximum file size (2G or 4G) during recording,
the unit automatically creates a new file and performs recording to the new file continuously. (With the previous
version, the unit stops when the current file size reaches the maximum file size.) This function is available only
when you use a storage device that has the recordable space more than the maximum file size. When you use a
storage device that has the recordable space less than the maximum file size, the unit stops when no available
recording space is left (except in Relay and Loop modes).
When recording in MP3 mode, the unit automatically creates a new file when the time indication reaches 100
hours.
When recording "high FS and high bit rate" audio in either Relay or Loop mode, the beginning of the
audio of the next storage device may be slightly muted. In other words, you may hear a small gap when playing
back audio files on two SD cards continuously.
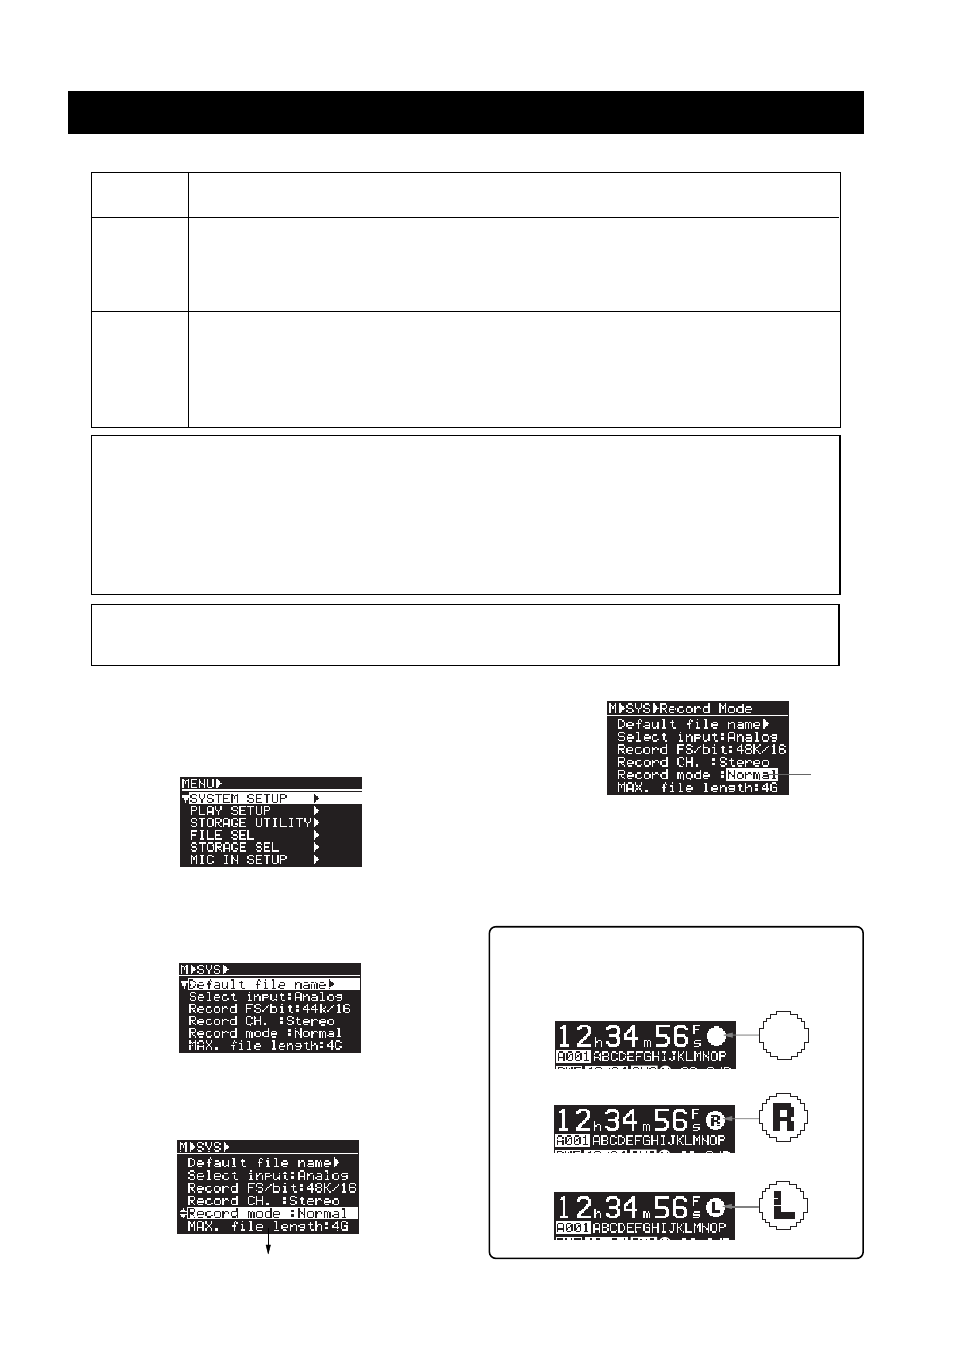
(1)
While the unit is stopped, press the [ENTER] key to
enter the MENU mode.
When you first enter the MENU mode, the
following screen is shown.
(2)
While "SYSTEM SETUP" is highlighted, press the
[ENTER] key.
The display now shows the menu items of the
SYSTEM SETUP menu.
(3)
Use the [MENU] dial to highlight "Record mode" and
press the [ENTER] key.
The currently selected “Recording mode” flashes.
By default, "Normal" is flashing.
(4)
Use the [MENU] dial to highlight the desired recording
mode and press the [ENTER] key.
You can select from "Normal" (default), "Relay" and
"Loop".
(5)
Press the [EXIT] key repeatedly or press the [STOP] key
to exit the MENU mode.
The following screens show how the record
icon is shown on the display during recording in Relay
mode and Loop mode.
Flashing