Freecom hard drive pro – Freecom Technologies 3.5 " / USB 2.0 / ESATA User Manual
Page 48
48
Freecom Hard Drive Pro
GB
7
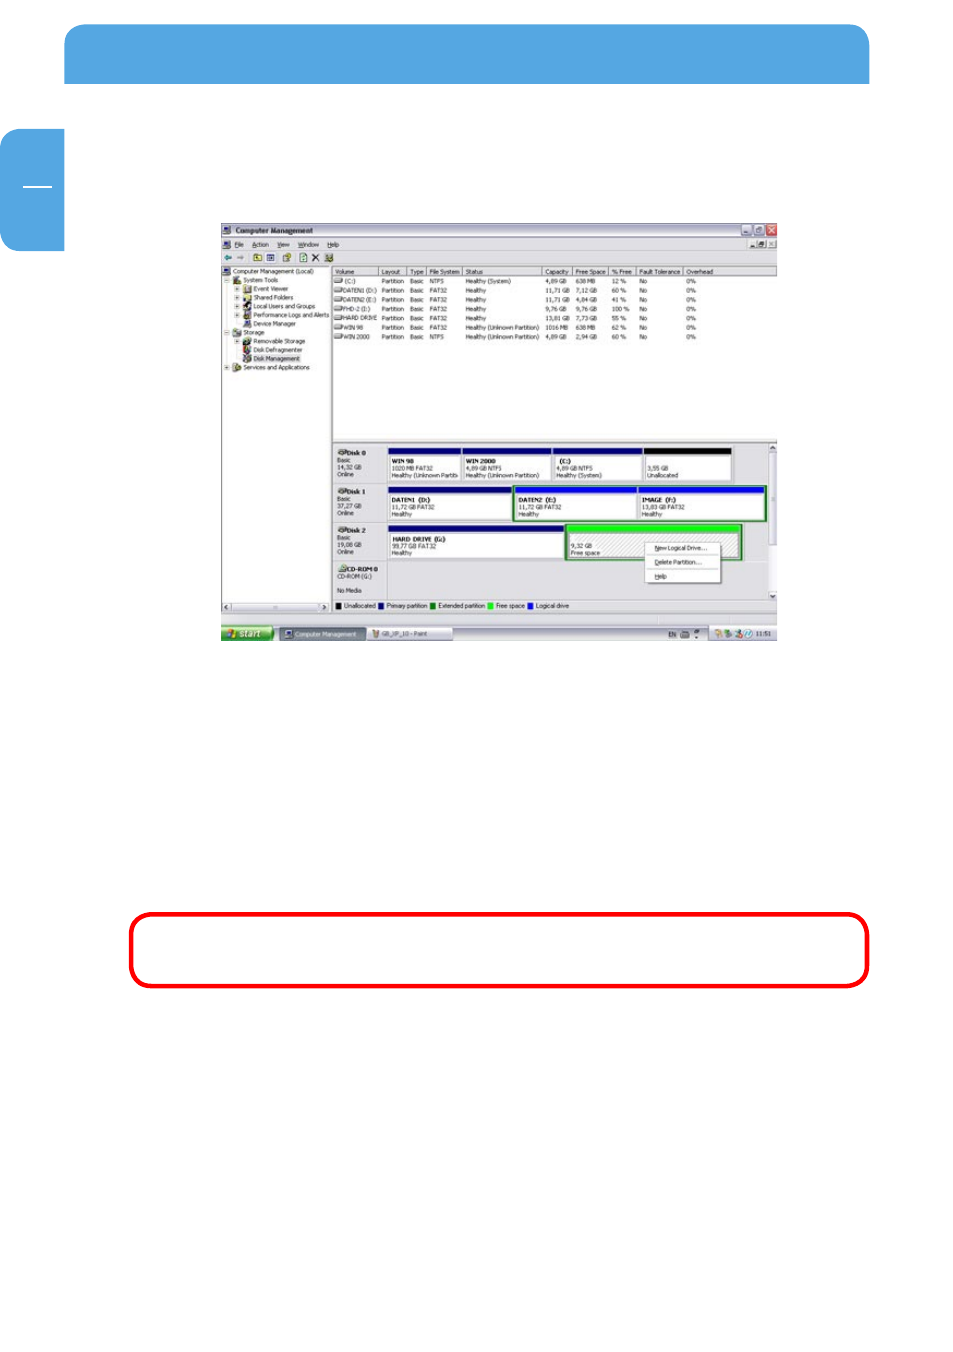
9. Right-click on "Free Space" and select "New Logical Drive" (Windows 2000: "Create
Logical Drive"). The "New Partition Wizard" (Windows 2000: "Create Partition Wizard")
opens. Click on "Next".
10. "Logical drive" is already selected. Click on "Next".
11. Specify the partition size and click on "Next".
12. Assign a drive letter and click on "Next".
13. Select the formatting option. Choose either "FAT32" or "NTFS", the "Allocation Unit
Size" should remain on "Default". Finally select "Perform Quick Format" and click on
"Next".
14. Click on "Finish" to complete partitioning. Your partition will be formatted now and
is ready-to-use.
Attention: If you select NTFS as file system, the data on your Freecom Hard
Drive Pro is read-only under Mac OS X. It is not possible to write data.