Calibrating the lasers – Festool Kapex KS 120 User Manual
Page 28
28
Kapex KS120 Miter Saw
Calibrating the Lasers
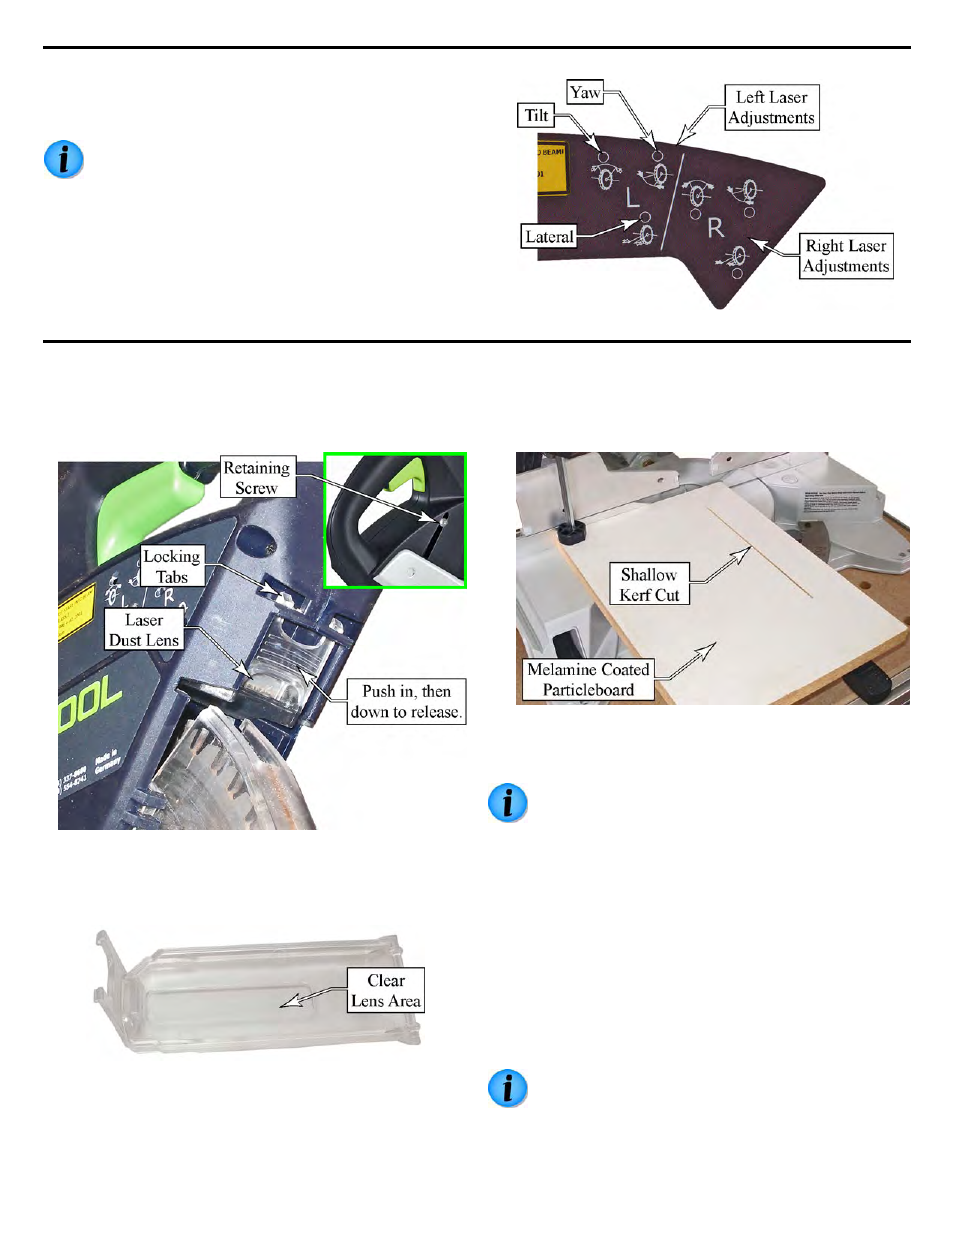
In order to calibrate the lasers, you will need to puncture the
decal on the side of the saw. The 2.5mm adjustment screw
openings are identified by the small circles on the decal.
The 2.5 mm hex key is shipped with the saw and
is located in the Styrofoam packing material.
►
The Tilt adjustment is used to ensure the lasers are
pointing parallel to the sawblade, so they trace out the
same line regardless whether the saw is raised or lowered.
►
The Yaw adjustment rotates the laser (as viewed from
above the saw) so it remains parallel with the path of the
saw cut (front-to-rear).
►
The lateral adjustment moves the laser toward or away
from the saw cut (sawblade).
Setup
1.
Before beginning, remove the laser dust lens and clean
it. To remove the lens, loosen the retaining screw,
push in and down on the ribbed surface to release the
locking tabs, and then slide the lens out of the saw.
2.
Wipe off any dust and debris from the lens with a soft
cotton cloth, or rinse it with water and mild soap.
3.
Reinstall the lens before making adjustments to the
lasers.
4.
Clamp a smooth piece of scrap wood to the saw and
using the depth limit (see page 14), make a shallow
kerf cut across the board.
►
This kerf cut will help you aim the lasers where the
saw actually cuts.
►
You can use any wood that has a relatively smooth
surface. The white melamine board shown below
provides a good contrast between the board surface
and the kerf cut.
5.
Turn on the laser.
6.
Begin by adjusting the yaw settings so both lasers are
parallel with the saw cut.
Make sure to remove the hex key from the screw
before gauging your progress. The pressure of
the hex key is enough to deflect the laser.
7.
Next, lower the sawblade down into the kerf (touching
the wood) and temporarily adjust the lateral setting
until the laser is against the edge of the kerf.
8.
Raise the saw back to the top, and adjust the tilt
setting so the laser remains against the edge of the
kerf (at the same position as the previous setp).
9.
Verify the tilt adjustment by raising and lowering the
saw and check that the laser remains the same
distance away from the kerf.
10.
Finally, adjust the lateral position to line up with the
edge of the saw cut.
It is a matter of your own personal preference as
to whether the laser lines split the edge of the
kerf, or if they remain just outside of the kerf.
Adjust the lateral position that you prefer.