Crown moulding – Festool Kapex KS 120 User Manual
Page 22
22
Kapex KS120 Miter Saw
Crown Moulding
There are several methods for cutting crown
moulding, and each method has its benefits
depending on the specific application. The most
common method for cutting crown moulding is to use
a standard miter cut, where the moulding is tilted
against the fence of the saw. For unusual situations,
or when the moulding is too large to fit against the
fence, compound miters are used. In some
applications, inside corners are made using a method
called “coping.” Each of these methods will be
described briefly.
Standard Miter
A standard miter cut is the easiest and most common
method for cutting crown moulding. The Kapex miter
saw has an optional auxiliary crown moulding fence
(also called the Crown Stop) specifically for making
this type of cut. The fence holds the moulding at the
correct angle so it can be cut with a normal miter cut.
For this type of cut, you place the moulding on the
saw as it would normally rest in the installed position.
The edge that normally faces the ceiling is the edge
that should be on the base of the saw.
Compound Miter
A compound miter cut is used when the moulding is
too tall to use the standard miter method. This can
also be used for a higher level of accuracy when the
tails of the moulding are not perfectly perpendicular
with each other (a common problem with most
mouldings). Place the moulding on the saw with the
flat back face on the base.
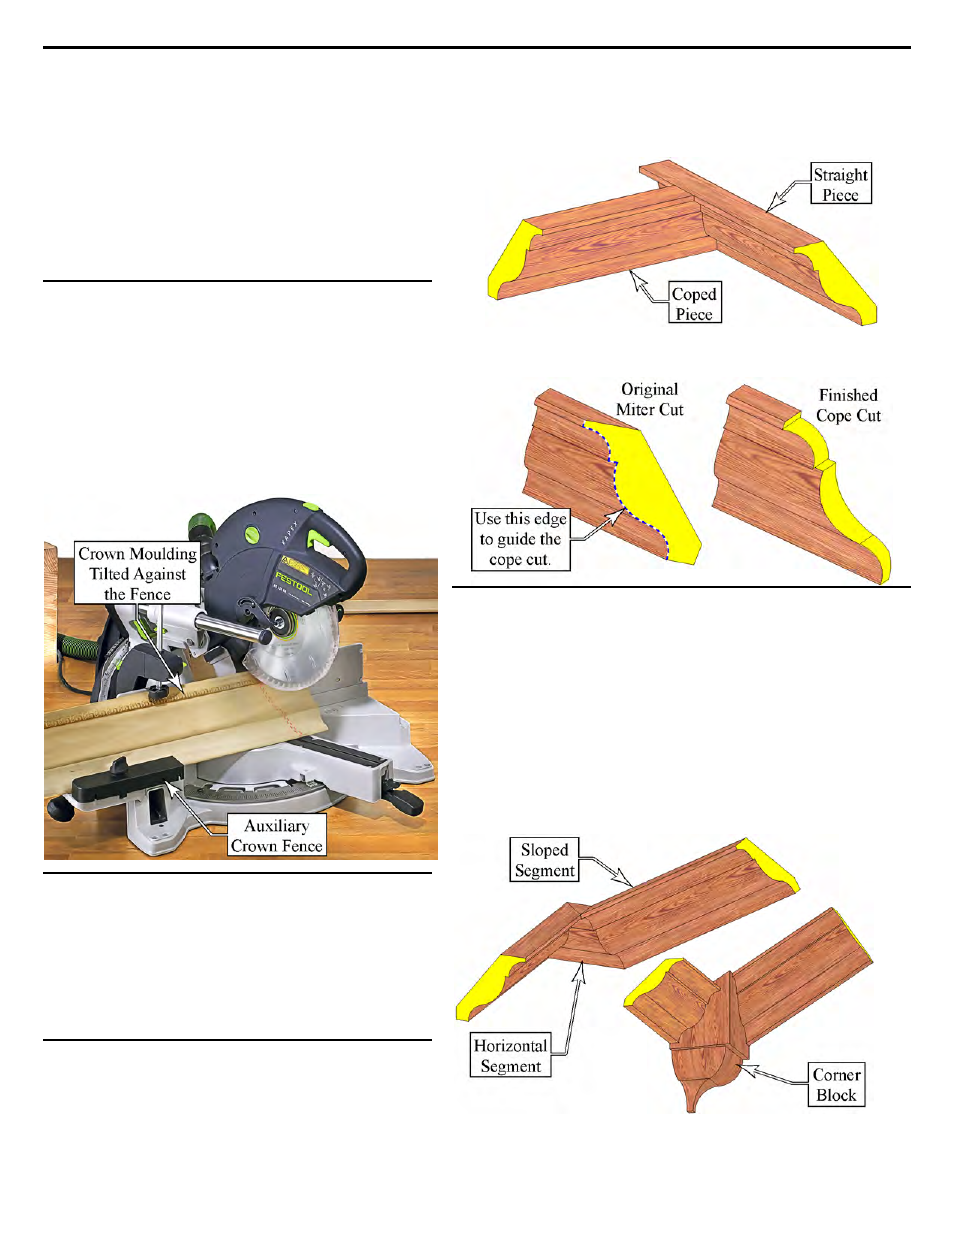
Coped Cut
A coped cut is sometimes used for making inside
corners so there is no visible gap between the two
pieces of moulding. A coped cut requires the use of a
coping saw (a thin bladed handsaw for cutting
curves), but the initial cut is made with a miter saw. The first
piece of moulding does not get a miter, and butts into the
adjacent wall. The second piece of moulding gets a coped cut to
match the profile of the first piece.
To make a coped cut, cut the second piece of moulding with a
miter, just as though it was going to be a mitered joint. Then
use a coping saw to cut along the edge of the resulting miter.
General Notes
►
If you are mitering both ends of a piece of moulding, make
the more difficult cut first, because it does not need to be
at the exact length. For example, a right-handed operator
may want to cut the left-hand miter first. This makes it
easier cutting the second miter to exact length.
►
When installing crown moulding around a room with walls
that may not be square, use a piece of off-cut scrap
moulding to test-fit the miters and lengths.
►
It is mathematically impossible to make a mitered joint that
changes two directions at the same time, such as putting
crown moulding around a vaulted ceiling. You must either
make a double miter joint, or use a corner block.