Frymaster H14 Series User Manual
Page 58
7-8
7-5: REPLACE HEATING ELEMENT (cont.)
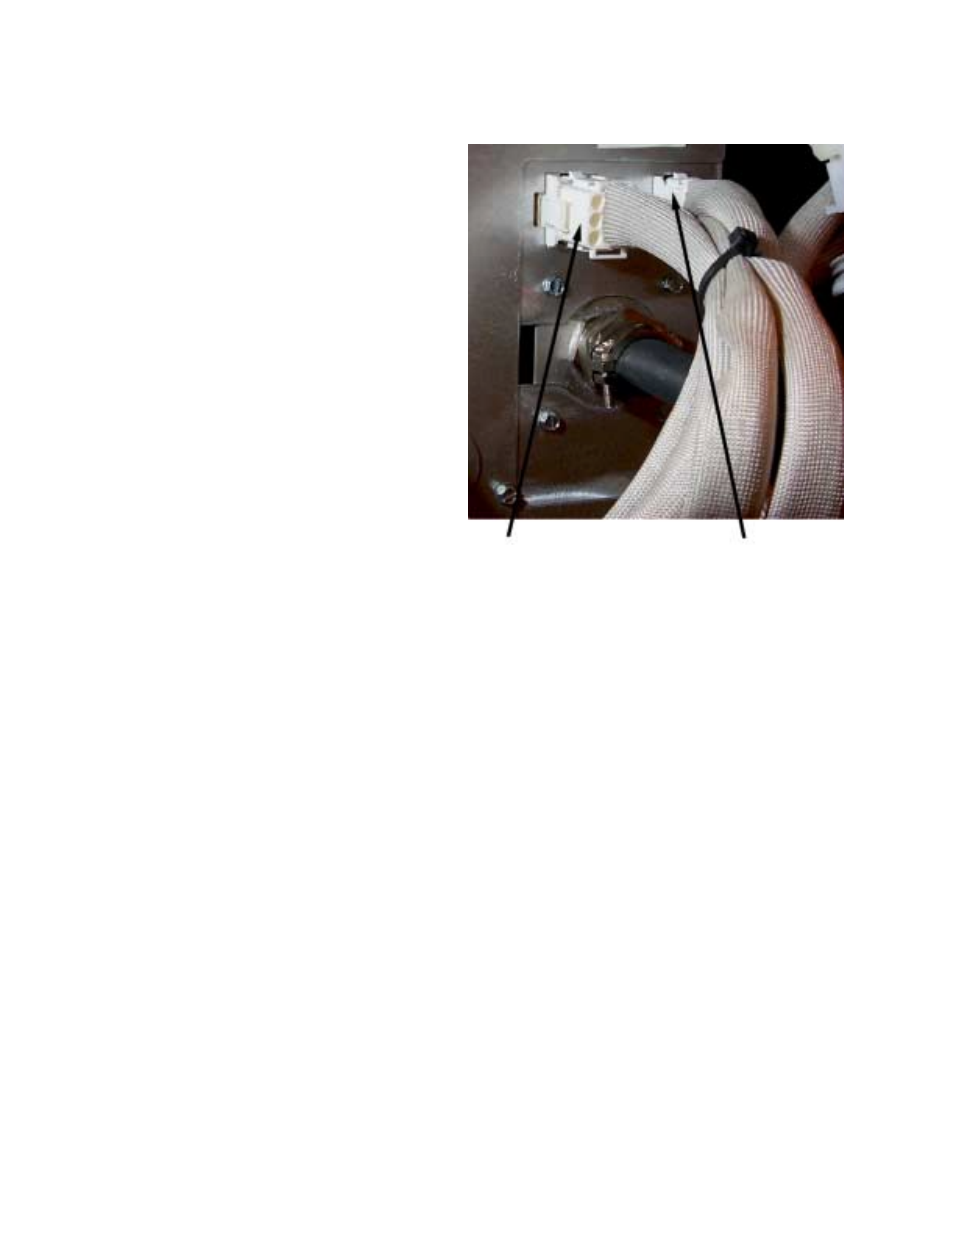
10. When replacing the left element (as viewed
from the rear of the fryer), use the 9-pin
connector, inserting the leads from the
replacement element and closing the
connector, see previous step.
11. Insert the connector(s) into the receptacle(s)
on the rear of the contactor box, ensuring that
the latches lock the connectors in place (see
Step 9).
12. Install the temperature probe wires (marked
for re-assembly) in the corresponding pin
locations.
13. Reconnect the element spring.
14. Place the tilt housing cover over the tilt
housing assembly and secure with screws.
15. Install covers and secure with screws.
16. Position fryer under exhaust hood.
Left element— 9-pin
connector
Right element— 6-pin
connector
See also other documents in the category Frymaster Fryers:
- D460G (2 pages)
- J3F (88 pages)
- TB14 (60 pages)
- Universal Holding Cabinet (53 pages)
- D80 Series (44 pages)
- CF SERIES J65X (50 pages)
- HCP (30 pages)
- GF40 (2 pages)
- GF14 (24 pages)
- FOOTPRINT E4 (88 pages)
- Enodis RE17TC (2 pages)
- Dean 52 Series (39 pages)
- CFESA BKSDU (13 pages)
- JCFX (76 pages)
- GEN II LOVTM BIELA14 (86 pages)
- Enodis FPRE14-7 (2 pages)
- UHC-HD (3 pages)
- FootPrint PRO FPP545 (2 pages)
- Dean SM35 (40 pages)
- FOOTPRINT RE80 (64 pages)
- 8196606 (24 pages)
- D680G (2 pages)
- 35 Series (40 pages)
- SR62 Series (14 pages)
- FPD65 (60 pages)
- LOV BIGLA30 (88 pages)
- FPD (100 pages)
- FOOTPRINT PRO SERIES 45 (50 pages)
- 1814 (10 pages)
- LOV M3000 (50 pages)
- 14 Series (78 pages)
- HD1814 SERIES HD1814G (46 pages)
- 1824/2424G (44 pages)
- YSCF14G (26 pages)
- HLZ18 (4 pages)
- FDP65 (60 pages)
- BIGLA30 (86 pages)
- BIELA14 (26 pages)
- BIRE14 (32 pages)
- FPH55 (2 pages)
- 2424G (68 pages)
- KSCF18G (68 pages)
- Enodis PF50S (2 pages)
- MH52 (115 pages)
- SM5020G (2 pages)