5 i/o data confirmation, 6 restoring default settings, 2) radar function – Furuno 1622 User Manual
Page 18
12
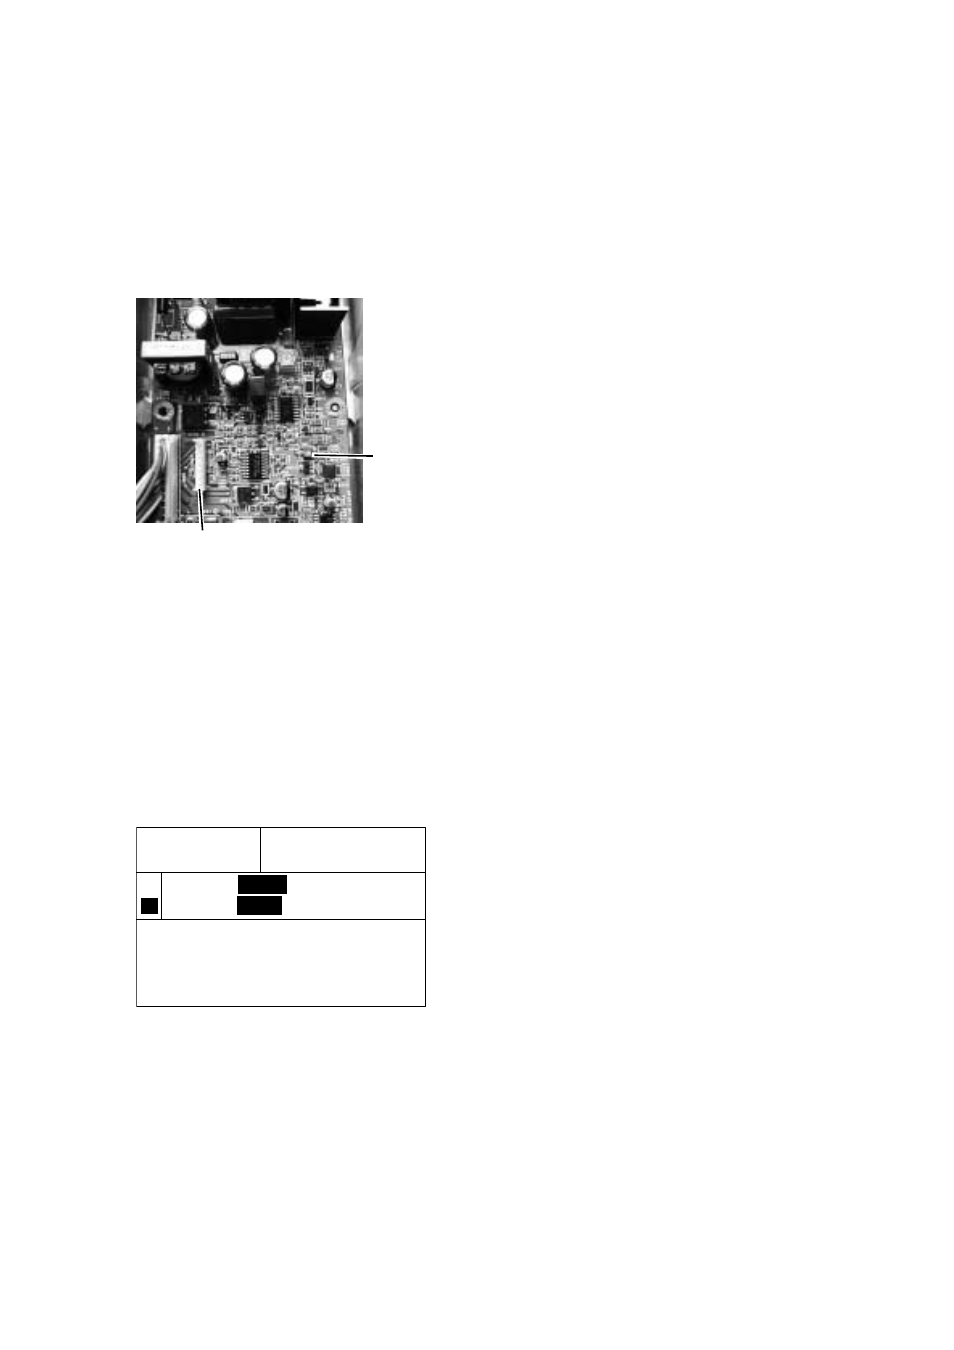
2. Turn on the power. Do not transmit the
radar.
3. Connect a multimeter, set to 10 V DC
range, between #6(+) and #4(-) of test
point TP804 on the MD Board in the
antenna unit.
4. Confirm that the multimeter shows 8.0 V
±0.1 V. If it does not, adjust potentiometer
VR801 on the MD Board.
TP804
VR851
VR801
Figure 27 Antenna unit, inside view
2) Radar function
This radar can function as the main radar or a
demonstration model. displaying internally
generated radar echoes.
1. Set the radar in stand-by.
2. Press and hold down ▲ and ▼ together
(about 10 seconds) to display the
maintenance menu.
NAV DATA (NMEA 0183)
GLL
BWR
BWC
GLC
GTD
RMA
RMG
RMC
VTG
MTW
DBT
DBS
DPT
GGA
PROGRAM NO
03591610XX
SEL MENU
BY KEY
MAIN
DEMO
▲
▲
/
MODEL
M1622
M1621/M2
DISPLAY
1
2
Figure 28 Maintenance menu
3. Select MAIN or DEMO from the DISPLAY
field. (MAIN, Main radar display, DEMO,
demonstration display.)
4. Press the [MENU] to close the menu.
3.5 I/O Data Confirmation
You can confirm NMEA input from a navigator
or echosounder. Follow the procedure shown in
2) Radar function to display the maintenance
menu. NMEA sentences being input are shown
in reverse video.
3.6 Restoring Default
Settings
All default menu settings can be restored by
turning on the power while pressing and holding
down [MENU] and
&
.
Note: Disconnect the antenna cable to use
as demonstration model.