Furuno NETCONTROLLER B042-008 User Manual
Page 32
3. INITIAL SETTINGS
3-6
Entering transducer data by transducer specifications
For dealer: When connecting the transducers which are not programmed, contact to
PRODUCT SERVICE SECTION SERVICE CENTER, FURUNO HEAD OFFICE. For new
transducer or other make of transducer see FURUNO information for further information.
Note 1: If you are continuing from paragraph 3.1, go to step 2.
Note 2: If you have already entered transducer settings and wait to reconfirm them turn on
the power while pressing any key.
Note 3: The transducers of 54 – 64 kHz, 112 – 122 kHz and 171 – 181 kHz cannot be
connected to the FCV-1100L because of noise. (Available range: HIGH; 40 – 220
kHz, LOW; 25 –220 kHz).
1. Turn on the power.
2. Press any key.
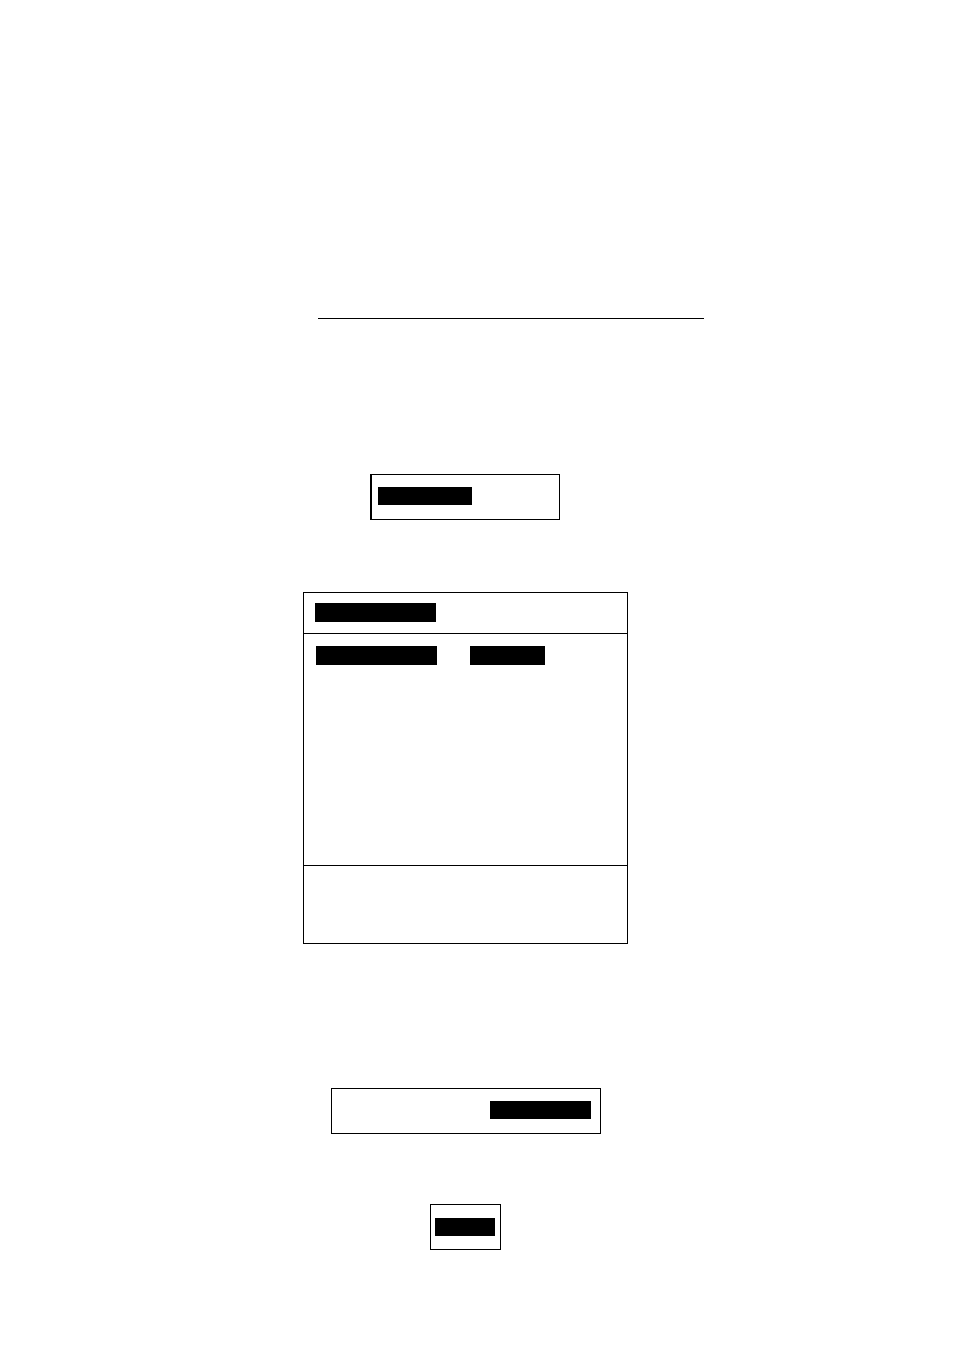
3. Press ["] to select XDCR SELECT, and then press [+] or [-] to show the dialog below.
XDCR TYPE
MANUAL
4. Press [+] to select MANUAL, and then press [!] or ["] to close the dialog box. The
display should now look something like the one below.
XDCR SELECT
INSTALLATION DEMO
XDCR SELECT
:
MANUAL
[HIGH]
CONNECTION
: NOT CONNECTED
FREQ
: ---kHz
[LOW]
CONNECTION
: NOT CONNECTED
FREQ
: --- kHz
POWER REDUCTION : OFF
Select how to set XDCR type.
[-/+]: Change setting, Turn OFF to exit
Menu for manual entry of transducer specifications
5. Do the following for both the high and low frequency transducers, or whichever
transducer is installed.
a) Press ["] to select CONNECTION of [HIGH] or [LOW], and then press [+] or [-] to open
the dialog box.
NOT CONNECTED
CONNECTED
b) Use [+] or [-] to select CONNECTED, and then press [!] or ["] to close the dialog box.
c) Press ["] to select FREQ, and press [+] or [-] to display the frequency setting dialog box.
--- kHz