Step 7 - assembling fan blades – Hunter Fan Hunter Ceiling Fans 41462-01 User Manual
Page 15
15
41462-01 10/14/2005
®
Blade
Bracket
Blade
Bracket
Assembly
Screws
Cover
Plate
Figur
Figur
Figur
Figur
Figure 7a - Attaching Blades to Blade
e 7a - Attaching Blades to Blade
e 7a - Attaching Blades to Blade
e 7a - Attaching Blades to Blade
e 7a - Attaching Blades to Blade
Ir
Ir
Ir
Ir
Iron
on
on
on
on
Figur
Figur
Figur
Figur
Figure 7c - Attaching Blade Ir
e 7c - Attaching Blade Ir
e 7c - Attaching Blade Ir
e 7c - Attaching Blade Ir
e 7c - Attaching Blade Iron
on
on
on
on
Assembly to Motor
Assembly to Motor
Assembly to Motor
Assembly to Motor
Assembly to Motor
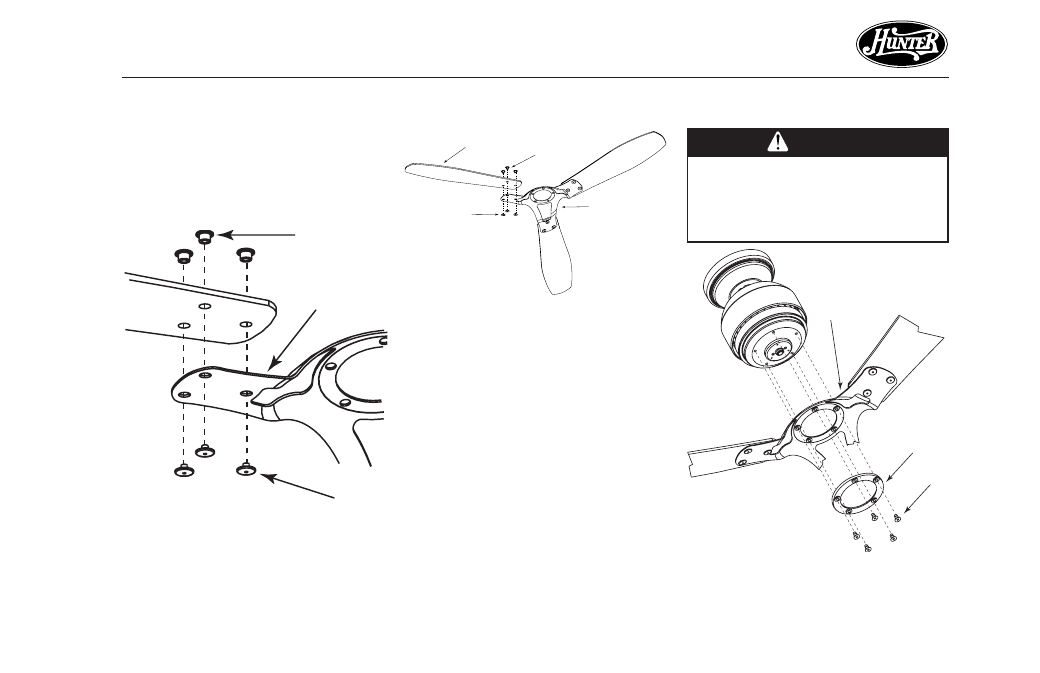
1. Attach each blade to the blade
iron using three barrel nuts and
three decorative screws as shown
in Figure 7a, 7b and 7c.
STEP 7 - ASSEMBLING FAN BLADES
STEP 7 - ASSEMBLING FAN BLADES
STEP 7 - ASSEMBLING FAN BLADES
STEP 7 - ASSEMBLING FAN BLADES
STEP 7 - ASSEMBLING FAN BLADES
Figur
Figur
Figur
Figur
Figure 7b
e 7b
e 7b
e 7b
e 7b
2. Remove the blade mounting
screws and rubber shipping
bumpers from the motor.
3. Align the holes in the blade
bracket and the cover plate with
the five holes in the bottom of
the motor and partially install
the five 1/4"-20 Screws. Refer
to Figure 7c.
4. Once all five screws are partially
installed, tighten them securely.
Decorative
Screw
Barrel Nut
Blade
Iron
Decorative
Screw
Barrel Nut
Blade
Iron
Blade
WARNING
WARNING
WARNING
WARNING
WARNING
Failure to securely tighten the
1/4"-20 Screws into the Motor
could cause the Blade Assem-
bly to fall.