Moza Slypod Pro Master Kit User Manual
Page 7
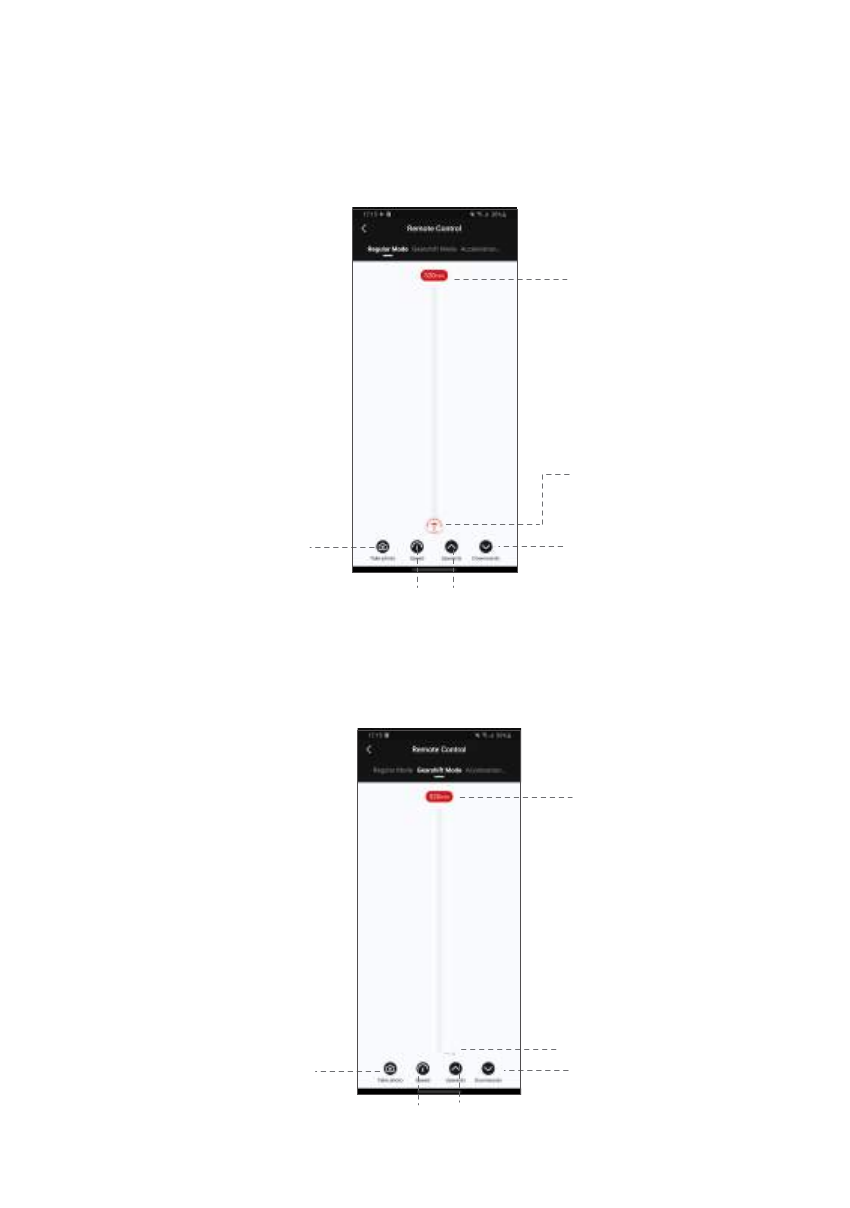
6
Control the camera
to take photos
Set the up-and-down
movement speed
of the SLYPOD PRO
Operating Point, the
current movement
distance is 0mm
Maximum moving
distance is 520mm
Long tap to control the
movement, click again to
stop movement
● Regular Mode
Long tap to control the
movement, click again
to stop movement
Control the camera to
take photos
The current movement
distance is 0mm
Maximum moving
distance is 520mm
Tap to control the
movement, click again
to stop movement
● Gearshift Mode
Tap to control the movement,
click again to stop movement
Slide the red operating point from the starting point to any position, the SLYPOD PRO will move
accordingly. Release the operating point, the SLYPOD PRO will stop moving. Long tap the
“Downwards” or “Upwards” icon, the SLYPOD PRO will automatically move up or down. Tap the
“Downwards” or “Upwards” icon again to stop the movement. Tap the ‘Take photo’ icon, and
SLYPOD PRO will control the camera to take a photo. (Please make sure your SLYPOD PRO is
connected with the camera control cable, the camera control cable needs to be purchased
separately). Speed Setting: Click Speed icon to set the speed, and the SLYPOD PRO will move
according to the set speed.
Tap the “Upwards” or “Downwards” icon to control the movement of SLYPOD PRO. Tap again to
stop the movement. Tap Take photo icon to control the camera to take a photo. (Please make sure
your SLYPOD PRO is connected with the camera control cable, the camera control cable needs to
be purchased separately). Speed Setting: Tap speed icon to set the speed, the SLYPOD PRO will
move from the current speed to the set speed and then decelerates to the end position. (The end
position speed is 0)
Set the up-and-down
movement speed of
the SLYPOD PRO