Livewire© setup, Livewire sync indicator, Livewire – Omnia Audio Omnia.11 User Manual
Page 33: Setup
17
Livewire
©
Setup
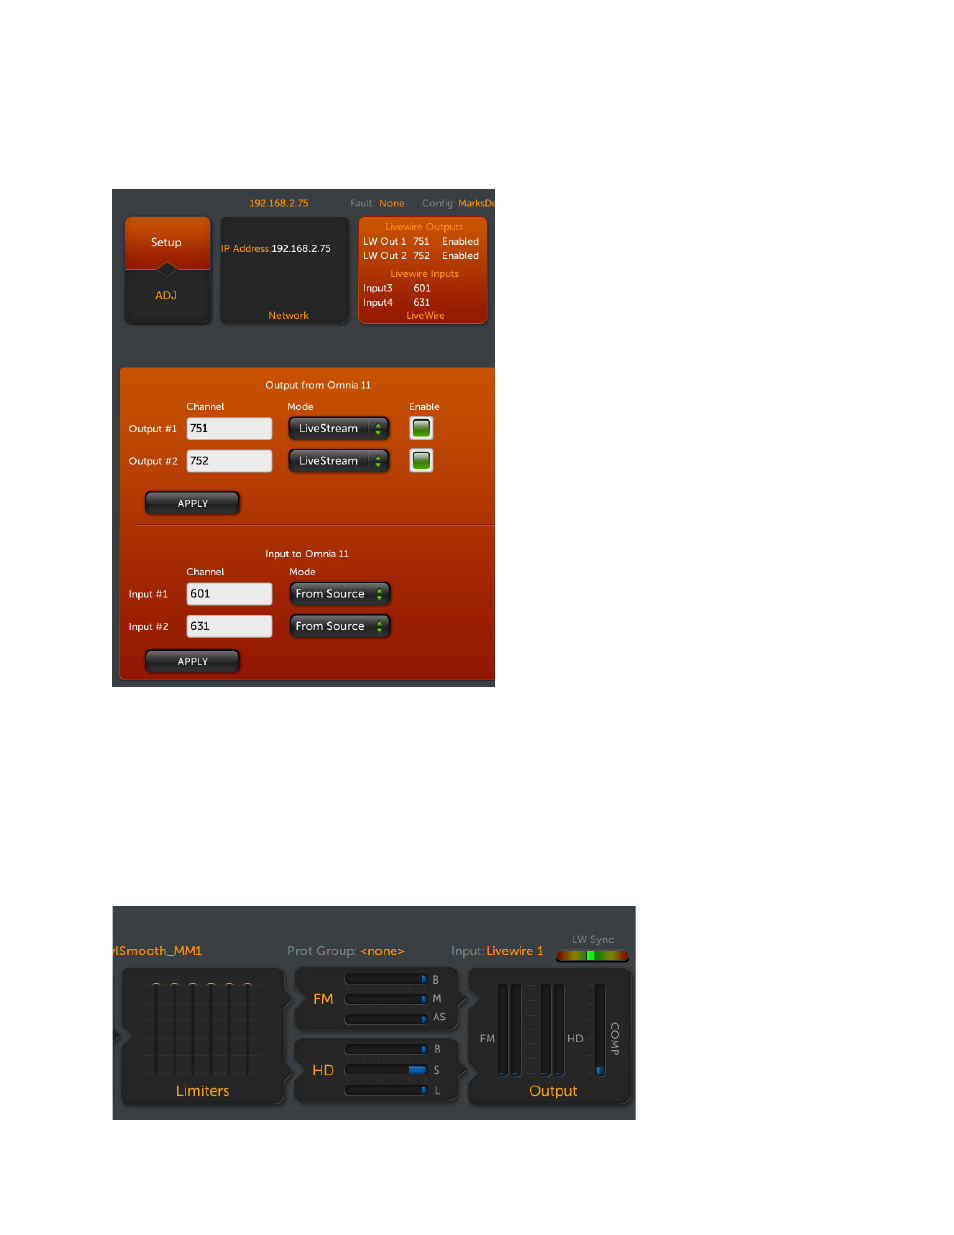
Touch the Livewire icon button to bring up the Livewire setup screen:
Here you can Enable Livewire and select Livewire
input and output channels.
There are 2 stereo Livewire output channels and 2
stereo Livewire input channels available.
Entries are changed as in the Network setup screen
by touching the white box to bring up the on-screen
keyboard.
To enable or disable Livewire, touch the Enable
button for the appropriate Livewire output. Livewire
is disabled when both Enable buttons are white. The
Enable button will turn green when Livewire is
enabled for a channel.
Be sure to touch the Apply button after making your
changes or they will not take effect.
For more information on Livewire, please consult the
documentation that came with your Axia or other
Livewire gear.
If you do not have a Livewire system and need to use the network interface for remote control, make sure that the 2
Livewire output channels are disabled. If the 2 Enable squares are green, touch them to make the squares white then
touch “Apply” and the Livewire outputs will be disabled.
When finished, touch the ADJ icon button to return to the main metering/menu interface. Or another setup icon
button if you wish to continue with setup.
Livewire Sync Indicator
The Livewire Sync indicator can be found in the upper-right hand corner of the touchscreen and remote.
When the Omnia.11 is
connected to a Livewire
network and at least one of the
Livewire outputs is enabled, a
green square indicator will
appear as in the picture at left.
While syncing to the network,
the green square will be off-
center, moving slowly to the
center (as shown) once fully
synced.