Breaking in your tiller, Tilling hints, Cultivating – Poulan CHDF550B User Manual
Page 10: Operation
Attention! The text in this document has been recognized automatically. To view the original document, you can use the "Original mode".
OPERATION
NOTE: A warm engine requires less choking to start.
•
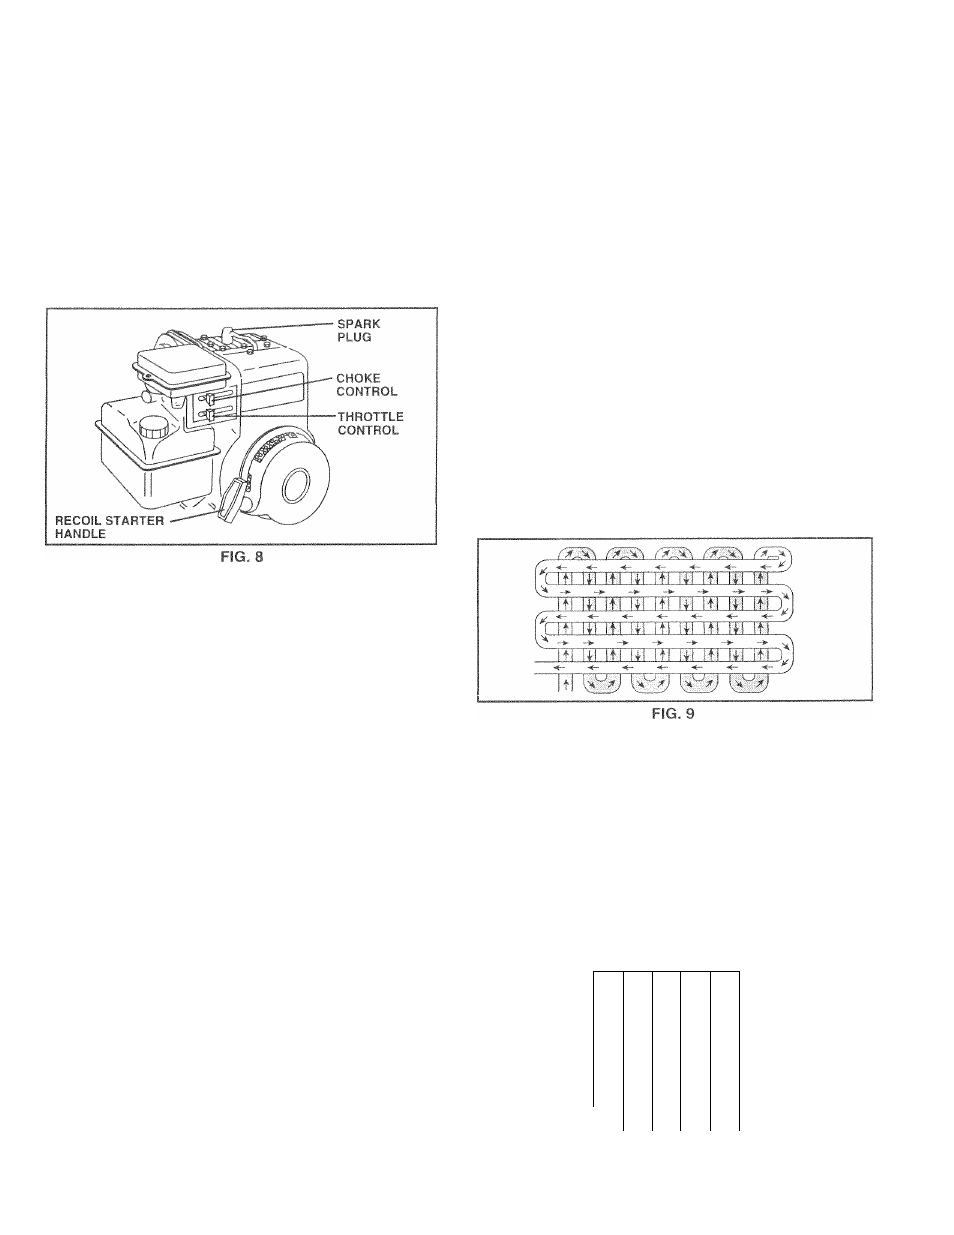
Move throttle control to desired running position.
•
Allow engine to warm up tor a few minutes before
engaging tines.
NOTE: If at a high altitude (3000 feet) or in cold tempera
tures (below 32°F), the carburetorfuel rnixiure may need to
be adjusted for best engine performance. See “TO AD
JUST CARBURETOR” in the Service and Adjustments
section of this manual.
NOTE: If engine does not start, see troubleshooting points.
BREAKING IN YOUR TILLER
Break-in your belt(s), pulleys and tine control before you
actually begin
tilling.
•
Start engine, tip tines off ground by pressing handles
down and engage tine control to start tine rotation.
Allow tines to rotate for five minutes.
•
Check tine operation and adjust if necessary. See
“TINE OPERATION CHECK” in the Service and Ad
justments section of this manual.
TILLING HINTS
A
CAUTION: Until you are accustomed to
handling your tiller, start actual field
use with throttle in slow position.
To help tiller move forward, lift up the handles slightly (thus
lifting depth stake out
of ground). To
slow down
the
tiller,
press down on handles.
If you are straining ortiller is shaking, the wheels and depth
stake are not set properly in the soil being tilled. The proper
setting of the wheels and depth stake is through trial and
error and depends upon the soil condition. (The harder or
wetter the ground, the slower the engine and tine speed
needed. Underthese poor conditions, at fast speed the tiller
will run and jump over the ground).
A properly adjusted tiller will dig with little effort from the
operator.
Tilling is
'
digging i nto, turning ove ;r, and bre aking up
packed s
Il 1(1
1
e p lanting. Lo
ose, unpat
helps root
;
growth. Bes
it
tilling deptf
1
i s 4 “ - 6 " .
f
\ tiller will
also clear the soil c
)f
ur iwanted veg^etation. Th'e decom-
position c )f this Vt egetable mattei
'
enriches
the SOIL
Dependin g on the clirriate (rainfall
11
J A
1
'1
1
it msy be
d 1 \ i
^L/1
1' 1' i|
soil
ill
r 1 n
the growin gseason
1st
fu't'li
conditioi
1 ihi
3 soil.
Fo |( f) dthoh- ;iif'im|'nirc ^ffc
j,. uth
(/ill
noi r idil'/pi rii lidti
r|i V ¡1
ii'i' (
II wli (ri hio/ fUiiib-
utf t) c mer' ii/f f iincf
-nc Oi., u' h
i
, i , mi
tille*" Hard ' oi' unuk'
h< numu ^ d
hrf. - t'Tiir,
hOi//t ver, e
during tillini] /(/ 41 uni I thr oil i, |p_ o-i in o'df r in
acnirvf ttif ' ' r r t r m u V'J
k
iti i nir, h fi| mov'
ViHf & nd ionn or s
to E
¡hi m in
i v r ipi "ig
aii'un ’ t h - ■'
1 i t . n ■ ‘-I
I I M
' All-lili'i ' r*^' m
'i
ou w
il linn
t lli'i
I nil I
h f ^
.1
i ‘f yoi Ir- iV( -> 'ow
untilled n< tw‘ <■ II p s'-o- I f r ^ b a i l
ontiir
? ic dt
right irigie''(bf
of
ir
9t Thrmoit- Iwurea^rms
iJi doing Mil Fir^t, i.'ir turn
a
j ri u h i- ‘ i i m
nogutiate Tan UP' ul f lof > Setono tim tiller von t b<-
pulling imeli, and yuu, toward rho low ncxi lo it.
Set depth stake and wheel height for shallow tilling
when working extremely hard soil or sod. Then
work
across the
first cuts
at normal depth.
CULTIVATING
Cultivating is destroying the weeds between rows to pre
vent them from robbing nourishment and moisture from
the plants. At the same time, breaking up the upper layer
of soil crust will help retain moisture in the soil. Best
digging depth is T‘-3".
• You will probably not need to use the depth stake.
Begin by tipping the depth stake forward until it is
held
by the stake spring.
• Cultivate up and down the rows at a speed which will
allow tines to uproot weeds and leave the ground in
rough condition, promoting no further growth of weeds
and grass (See Fig. 10).
0 o
r'\
o o
0 o o 0 o
0 o
0 o
0 6 o n o
V-/
FIG. 10
10