Plus+ setup, At first, choose your connection type, Connection type a – Panasonic PV-M2037 User Manual
Page 22: Connection type b, Cable box setup, For connection type a (see left) only, Select yes if all, Select no if your cable connection “b” at left, Push menu to display the main menu, Select no
Attention! The text in this document has been recognized automatically. To view the original document, you can use the "Original mode".
Plus+ Setup
Easy Taping
VCR Plus+ programming allows you to set most items of a timer recording by simply entering a special code (PlusCode) found in TV
GUIDE magazine as well as the TV listings in selected newspapers. In order for your Combination VCR to do a VCR Plus+ recording, or
a timer recording of cable stations, some setup is required.
At first, choose your
Connection Type.
(Then, follow the instructions under the diagram.)
Connection Type A
.■m va
I
Cable Sox
(^(xn
Cable/
Antenna
RF Coaxial Cable
6eck Of
{notsupplied)
Combination VCR
VIDEO m Auaow
Front of
Combination VCR
If your system looks like this, do the
following.
1. Complete the “Cable Box Setup”
section at right.
2. Skip page 23 and go directly to page
24 for VCR Plus+ Programming.
Connection Type B
Back of
Combination VCR
From Antenna
or Cable
Cable/
Antenna
RF Coaxial Cable
(not supplied)
If your system looks like this, do the
following.
1. Skip the “Cable Box Setup” section
at right and turn to page 23.
2. Complete the “VCR Plus+ Channel
Setup” section on page 23.
3. Turn to page 24 for VCR Plus+
Programming.
VCR Plus+ and PlusCode are
trademarks of Gemstar
Development Corporation.
The VCR Plus+ system is
manufactured under license from
Gemstar Development Corporation.
Cable Box Setup
For Connection Type A (see left) only
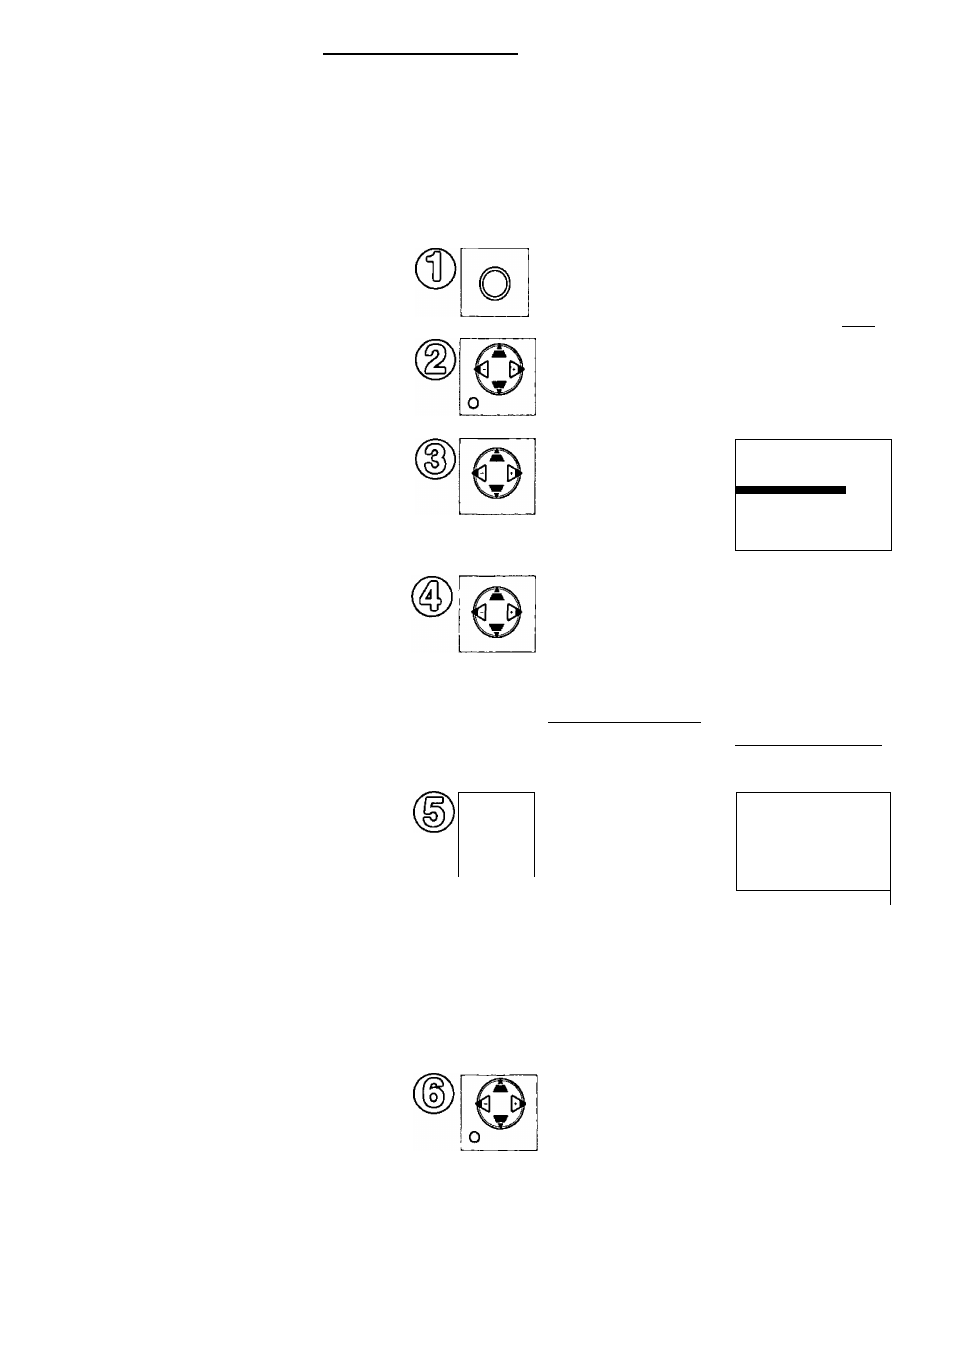
Push MENU to
display the MAIN
MENU.
CH
CLOCK EXIT
Push A V <3 to
select “CH,” and then
push MENU to
display the SET UP CHANNEL screen.
MAIN MENU
□ EH
LANGUAGE
Ü
SELECT :A » -d ► KEY
SET :MENU KEY
Push a WXo select
“CABLE BOX SET
UP,” and then ^to
set.
[ -*- SET UP CHANNEL ---
1
ANTENNA SYSTEM :
1 ALITO SET
CATV
■ CABLE BOX SET UP
VCR PIUS+ CH SET
UP
SELECT
: A
▼ KEY
SET :► KEY
END :MENU KEY
ARE YOU USING
A CABLE BOX?
YES
Push a ^to select
“YES” or “NO,” and
then pushO>to set.
Select YES
if all
channels are received
via the cable box
(connection “A” at leftV Then, go to step 5.
Select NO
if your cable connection “B” at left
SELECT
SET
END
A
▼ KEY
► KEY
MENU KEY
Push MENU to exit and turn to page 23.
Pushfe Vto select
ENTER CABLE BOX OUTPLTT
Cable box output
CHANNEL
channel number,
EH
and then push [>to
SELECT:A ▼ KEY
enter.
SET :► KEY
If necessary, refer to your cable
box manual.
If you are using AudioA/ideo jack
connection for your cable box,
select and set “VIDEO OUT” as the
output channel.
YOUR TV IS RECEIVING
THE OUTPUT OF CABLE BOX
CH 01
This display appears for
5 seconds. (Channel
shown is example only)
Push MENU to exit this mode and then,
push A V ^ E> to select “EXIT.” Now,
push MENU to exit from the MAIN
MENU.
Go directly to VCR Plus+ Programming
on page 24.
22