Craftsman 536.881130 User Manual
Page 7
Attention! The text in this document has been recognized automatically. To view the original document, you can use the "Original mode".
ASSEM BLY
A
WARNING: Always wear
safety glasses or eye shields
while assembling snow
thrower.
TOOLS REQUIRED FOR
ASSEMBLY
1 - Knife to cut carton
1 - 1/2 inch wrenches
{or adjustable wrenches)
1 - 9/16 inch wrenches
(or adjustable wrenches)
1 - 3/4 inch wrenches
(or adjustable wrenches)
1 - Pliers (to spread cotter pin)
1 - Screwdriver
1 - Measuring tape or ruler
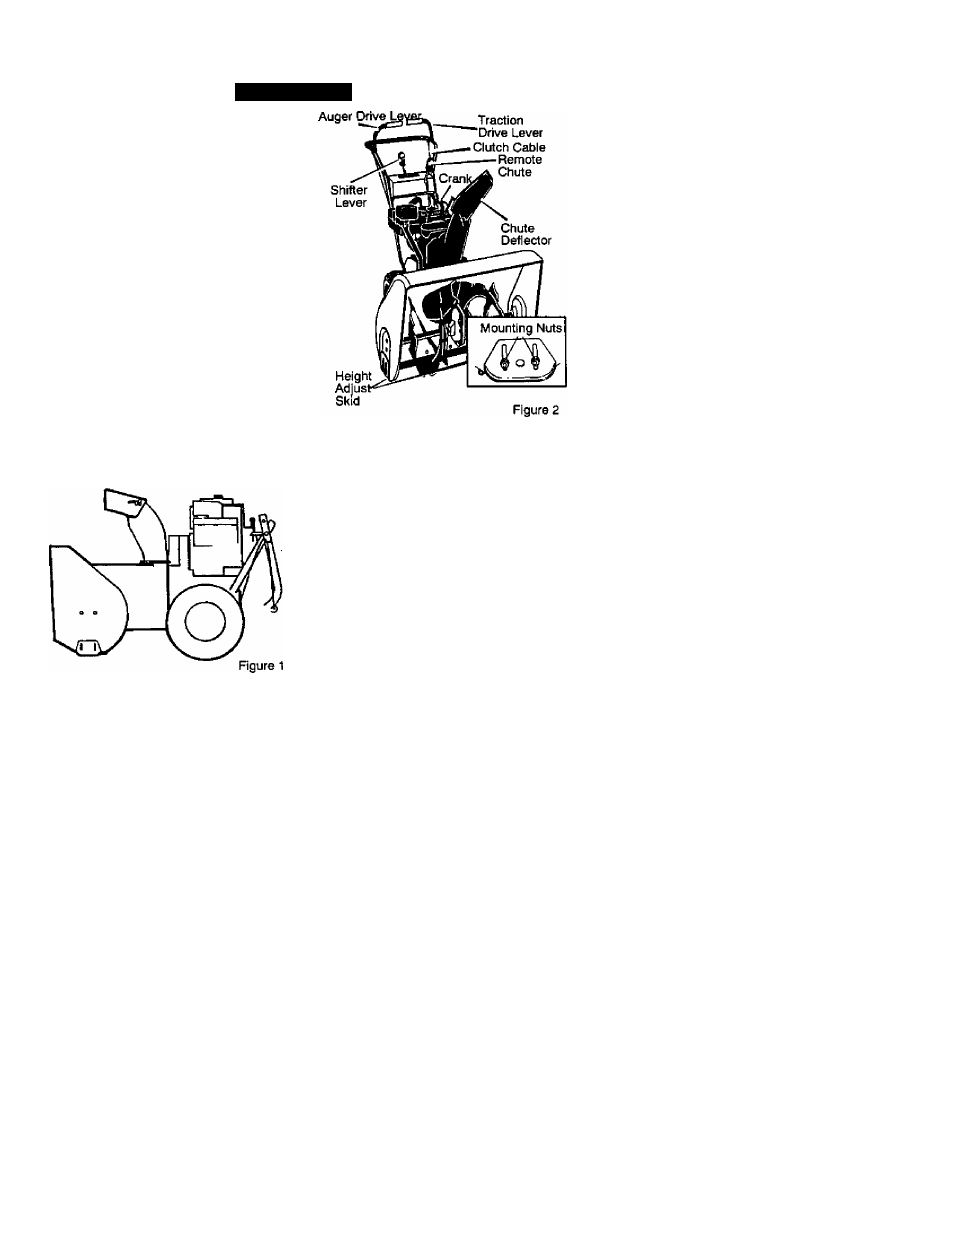
Figure 1 shows the snow thrower in the
shipping position.
Figure 2 shows the snow thrower com
pletely assembled.
References to the right or left hand side
of the snow thrower are from the view
point of the operator's position behind
the unit.
3.
TO REMOVE SNOW THROWER
FROM CARTON
1. Locate all parts packed separately
and remove from the carton,
NOTE:
Place fuel stabilizer in a safe
place until needed for storage.
2, Remove top pallet from carton.
Cut and discard the plastic ties se
curing the chute rod to the upper
pallet and place aside. Discard pal
let.
Cut down all four corners of the car
ton and lay the panels flat.
Cut the bands holding the snow
thrower to the lower pallet.
Remove snow thrower from lower
pallet.
Remove the packing material from
the handle assembly and all protec
tive material from unit and discard.
Cut ties securing the clutch control
cables to the lower handle.
5.
6
.
8
.
F-001060J