Craftsman 536.881130 User Manual
Page 11
Attention! The text in this document has been recognized automatically. To view the original document, you can use the "Original mode".
ASSEM BLY
Control
Panel
16 Hex
Jam Nut
Shift Bracket
Washer
Locknut
Exposed
Thread
Figure 12
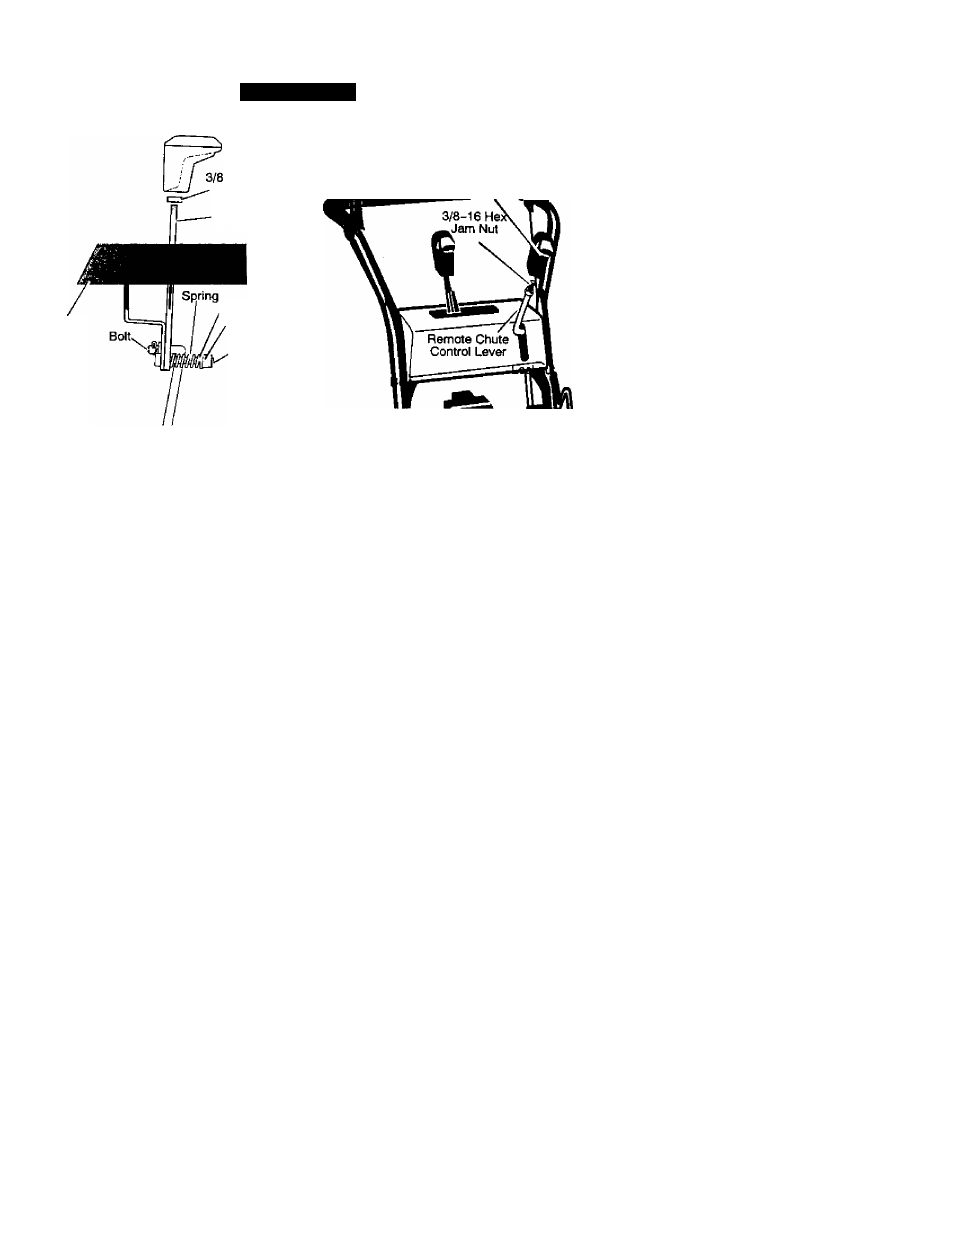
3. Tighten the 3/8-16" hex jam nut
against the knob securely.
Remote Chute
Control Knob
REMOTE CHUTE CONTROL
KNOB
1. Thread the 3/8-16" hex jam nut
onto the lever until the nut reaches
the end of the thread. See
Figure 13.
2. Thread the plastic knob as far as
possible and ensure that the knob
points forward.
HOW TO SET THE SKID HEIGHT
Your snow thrower is equipped with
height adjust skids on the outside of the
auger housing. To adjust the skid
height for different conditions, see
To
Adjust Skid Height
paragraph in the
Service And Adjustment
section.
CHECKLIST
Before you operate your new snow
thrower, to ensure that you receive the
best performance and satisfaction from
this quality product, please review the
following checklist:
Ail assembly instructions have been
Figure 13
HEADLIGHT
The headlight on your snow thrower is
positioned down for packaging pur
poses. Rotate upward for operating
position.
completed.
The discharge chute rotates freely.
No remaining loose parts in carton.
While learning how to use your snow
thrower, pay extra attention to the fol
lowing important items:
Engine oil is at proper level.
Make sure gas tank is filled properly
with dean, fresh, unleaded gasoline.
y"
Become familiar with all controls-
their location and function. Operate
controls before starting engine.
F-001060J
11