InnoMax Hardside Fluid User Manual
Page 4
BOOKCASE HEADBOARD
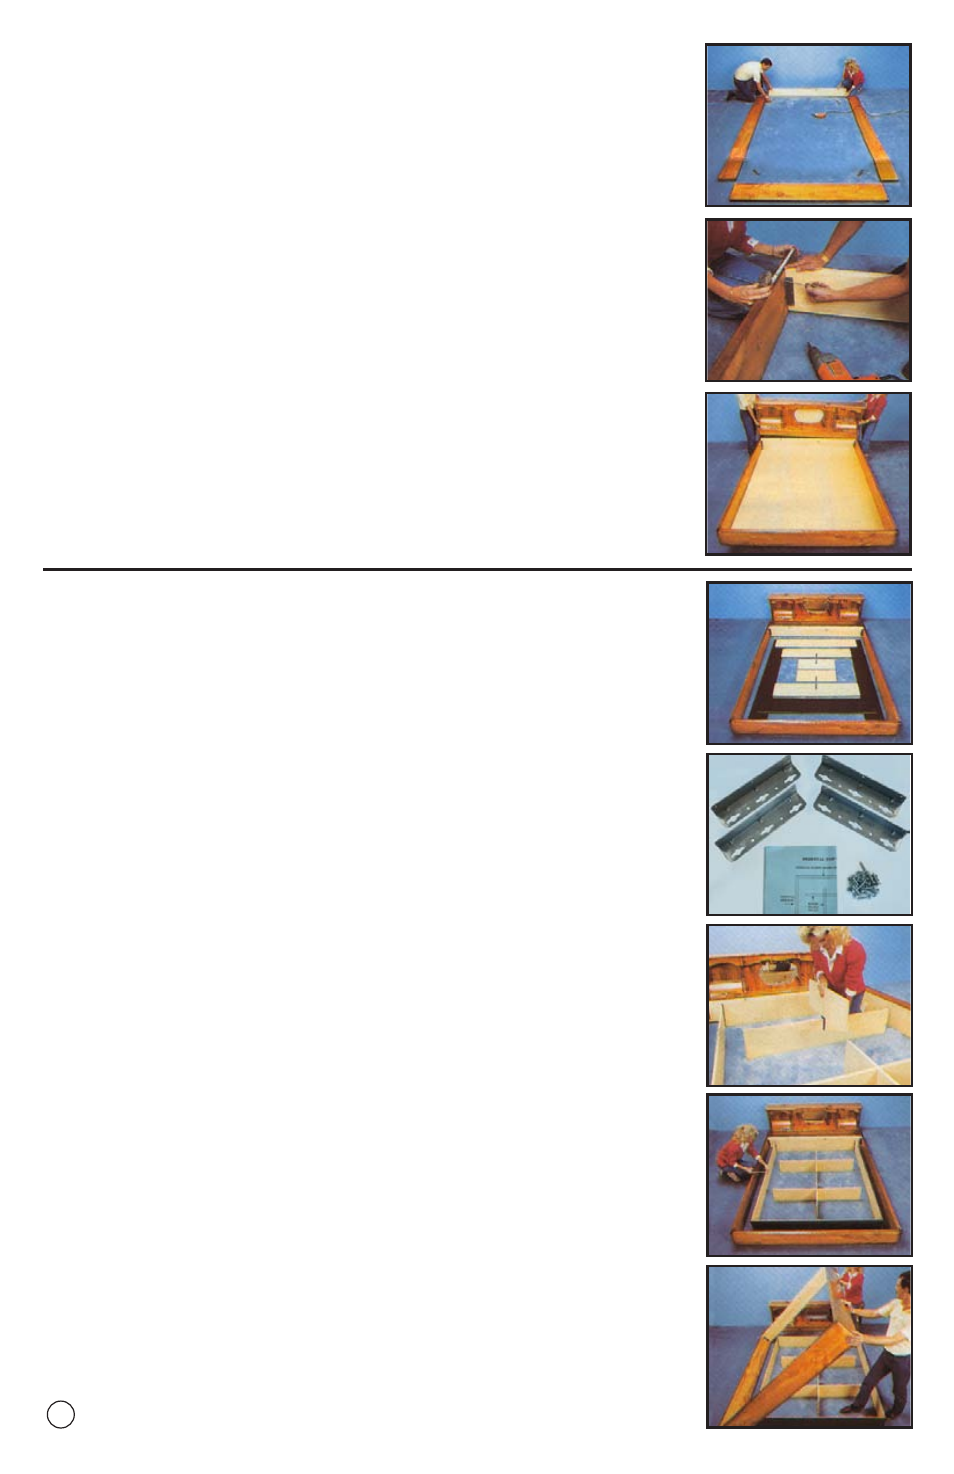
A.
Lay out your frame and hardware. Note: The footboard and
backboard have grooved bottoms that should face inward
toward each other. Also the finished side of the frame boards
should face the floor.
B.
Assemble the frame with the corner brackets and screws
provided. Note that the side frame boards extend past the
backboard. The extended portion of the frame will support your
bookcase headboard. A sure way to insure correct internal
spacing from head to foot is to use one of the deck boards (see
Step 2), as a measure. Lay the 1 piece of deck into the groove
at the foot, now bring the head frame board in between the side
rails until the deck fits in the groove. Mount at that point. Now
remove the deck board and go to Step 2 - Building the Pedestal.
C.
Position your assembled frame exactly where you want it in
your room. This photo shows how the bookcase headboard will
be positioned on the extended frame
AT A LATER TIME. DO
NOT MOUNT NOW! Refer to Step #2
.
STEP 2: BUILDING THE PEDESTAL
Standard Pedestal (Riser Pedestal)
A.
Lay out the pieces of your standard pedestal inside of the
frame as pictured. The finished sides when assembled are to
face outward.
B.
Use the L-Brackets included to assemble the pedestal.
C.
Assemble the two sets of the center support system, by
inserting the slotted pieces into one another. Position the two
internal supports in the center of the pedestal, head to foot and
side to side. You may receive a center support system of one
longer piece and two shorter pieces that are slotted. Position
down the middle of the pedestal.
D.
The pedestal should be accurately centered within the frame
in its final position.
E.
Next, without letting it slide out of place, tilt the frame on to one
side. Avoid moving the pedestal. After Step 3 you will lower the
frame onto the deck boards which will be mounted on the
pedestal.
3