Changing the torque cylinder – Hawk Industries Hawkjaw Sr. Manual 100K-2GSR Serial Numbers 121 to 140 User Manual
Page 56
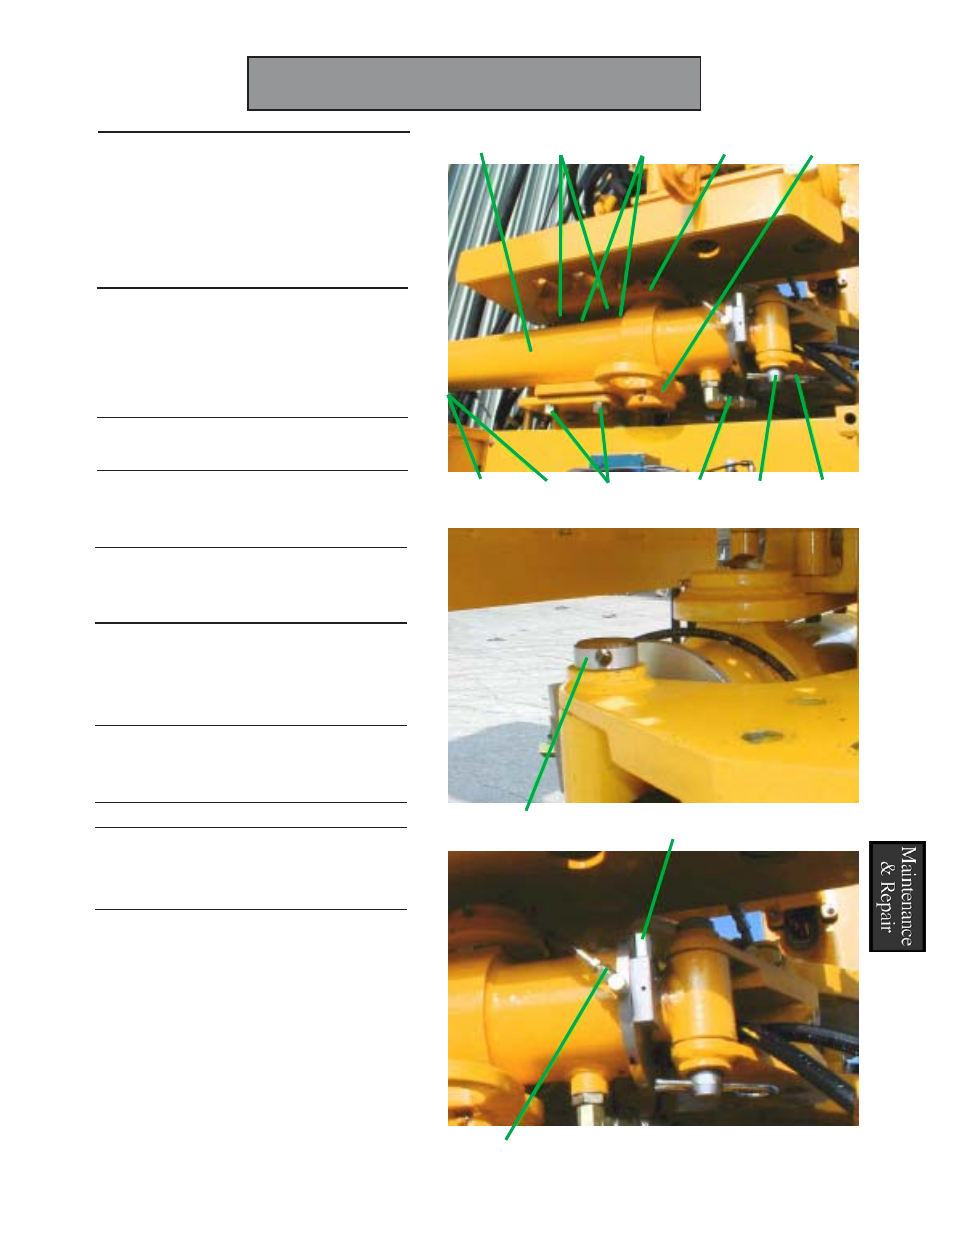
6. Use the 1 1/8" wrench to slowly
loosen the Cap side Hoses
(CH1), (CH2). Check for fluid
flow. Bleed any pressure.
Disconnect the Cap side Hoses
(CH1), (CH2).
7. Use the 1" wrench to slowly
loosen the Rod side Hose (RH).
Check for fluid flow. Bleed any
pressure. Disconnect the Rod
side Hose (RH).
8. Pull out the Torque Cylinder
Safety Clip (SC).
9. Use the Torque Cylinder Safety
Clip (SC) to pull out the Torque
Cylinder Rod Pin (P).
10. Disconnect the Low Torque
Warning System Hydraulic Hoses
(HH & HH1).
11. Use the 1 1/8" wrench and 5/8"
Allen wrench to remove the Top
Torque Cylinder Mount Bolts
(TBH), (TBA).
12. Use the 1 1/8" wrench to remove
all Four Bottom Torque
Cylinder Mount Bolts (BB).
13. Slide out the Torque Cylinder (C).
14. Remove the Bottom Trunion
Mount Plate (BMP) and the Top
Trunion Mount Plate (TMP).
Continued on next page...
Maintenance & Repair 55
Changing the Torque Cylinder
P
HH1
HH
C
TBH
TBA
TMP
BMP
CH2
CH1
BB
RH
P
SC