Nor-Lake envIro-lIne User Manual
Page 33
© 2013 Nor-Lake, Inc 07/13 Rev. F 132617
31
W
alk
-i
n
m
ainTenance
dOOR GASKET REPLACEMENT
1. Place the door, exterior face down, gasket up, on a clean, smooth surface
that will not mar or scratch the finish.
2. The magnetic door gasket consists of a cavity
containing the magnetic strip, a bellows cavity
that permits the gasket to conform to irregular
surfaces, and a base section that features
a dart- shaped projection that serves as the
attachment means when it is forced into the
slot in the door breaker.
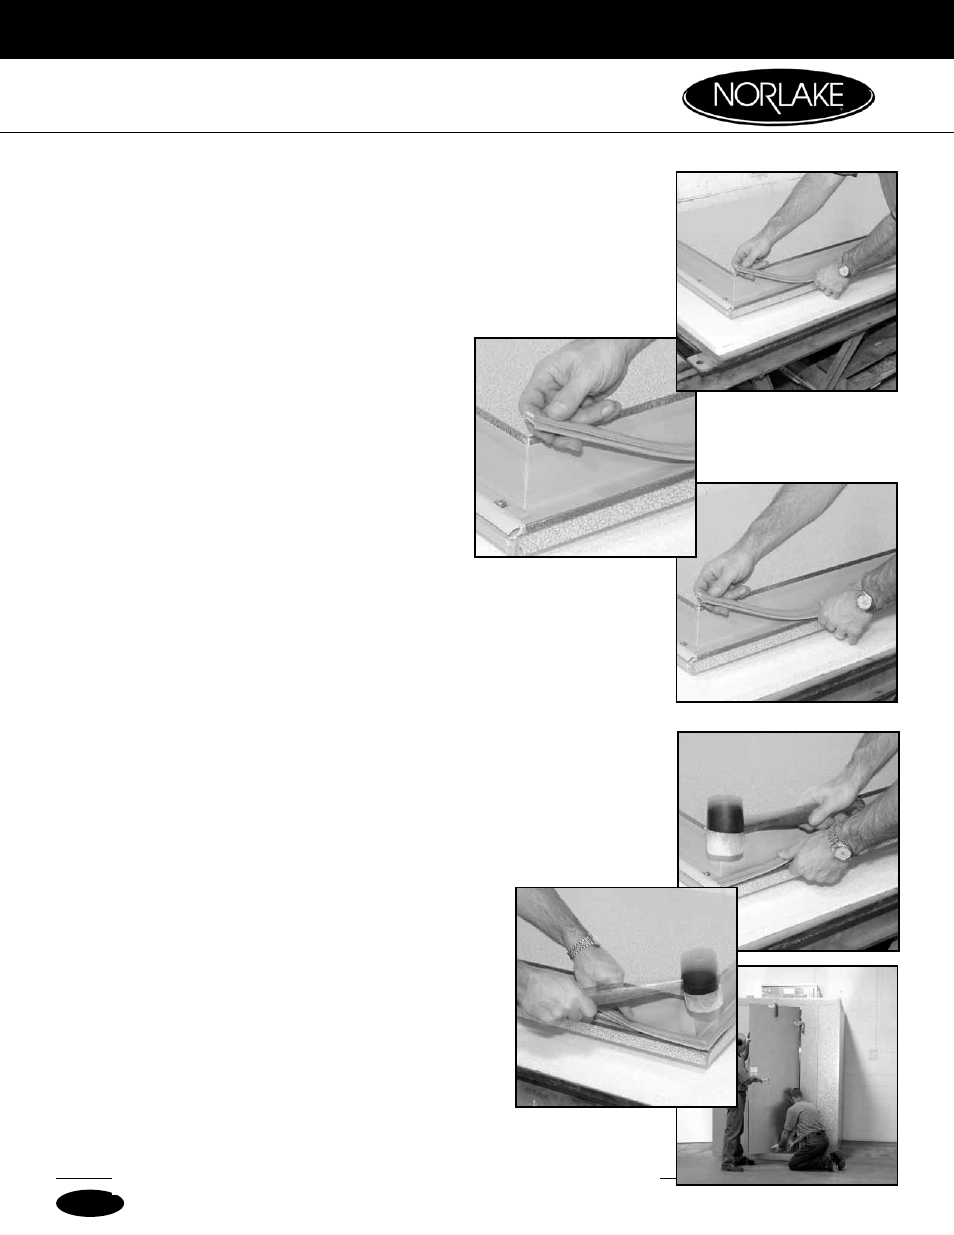
3. To remove the original magnetic gasket
assembly, grasp the gasket at one of the
corners and pull the dart-shaped projection
out of the retainer slot in the door breaker.
Pull slowly and examine your progress to
avoid tearing the projection which will then
remain in the retainer slot.
4. Remove the entire gasket assembly and examine the retainer slot to make
sure that it is free of gasket material or other debris.
5. Starting at one corner, insert the dart-shaped projection of the replacement
gasket into the retainer slot and, using a rubber mallet, drive the dart into
the retainer slot. HINT: Cover the face of the rubber mallet with masking
tape to prevent smudging the gasket. Attach only about two inches (2") of
the gasket in each direction away from the corner.
6. Use the same procedure as in Step 4 at the
remaining corners and also midway between the
corners on the long sides of the door.
7. Using the rubber mallet, drive the dart into the
retainer slot working from the center of each side
toward the corners.
8. Lift the gasket base on the outer edge of the gasket
and examine the gasket to determine if the dart
is engaged by the retainer slot around the entire
perimeter of the door, except where the sweep
gasket is attached. If the dart has failed to engage
in some areas, a small, slotted screwdriver blade can
be used to tuck the dart into the slot.
9. Replace the door assembly. Simply reverse the instructions in the "Door
Assembly Removal" section.