Maintenance, Names of the parts, Cleaning the overflow filter – haier AWT-120LI User Manual
Page 3: Cleaning the lint filter, Meaning and description of the symbols, Figure 2
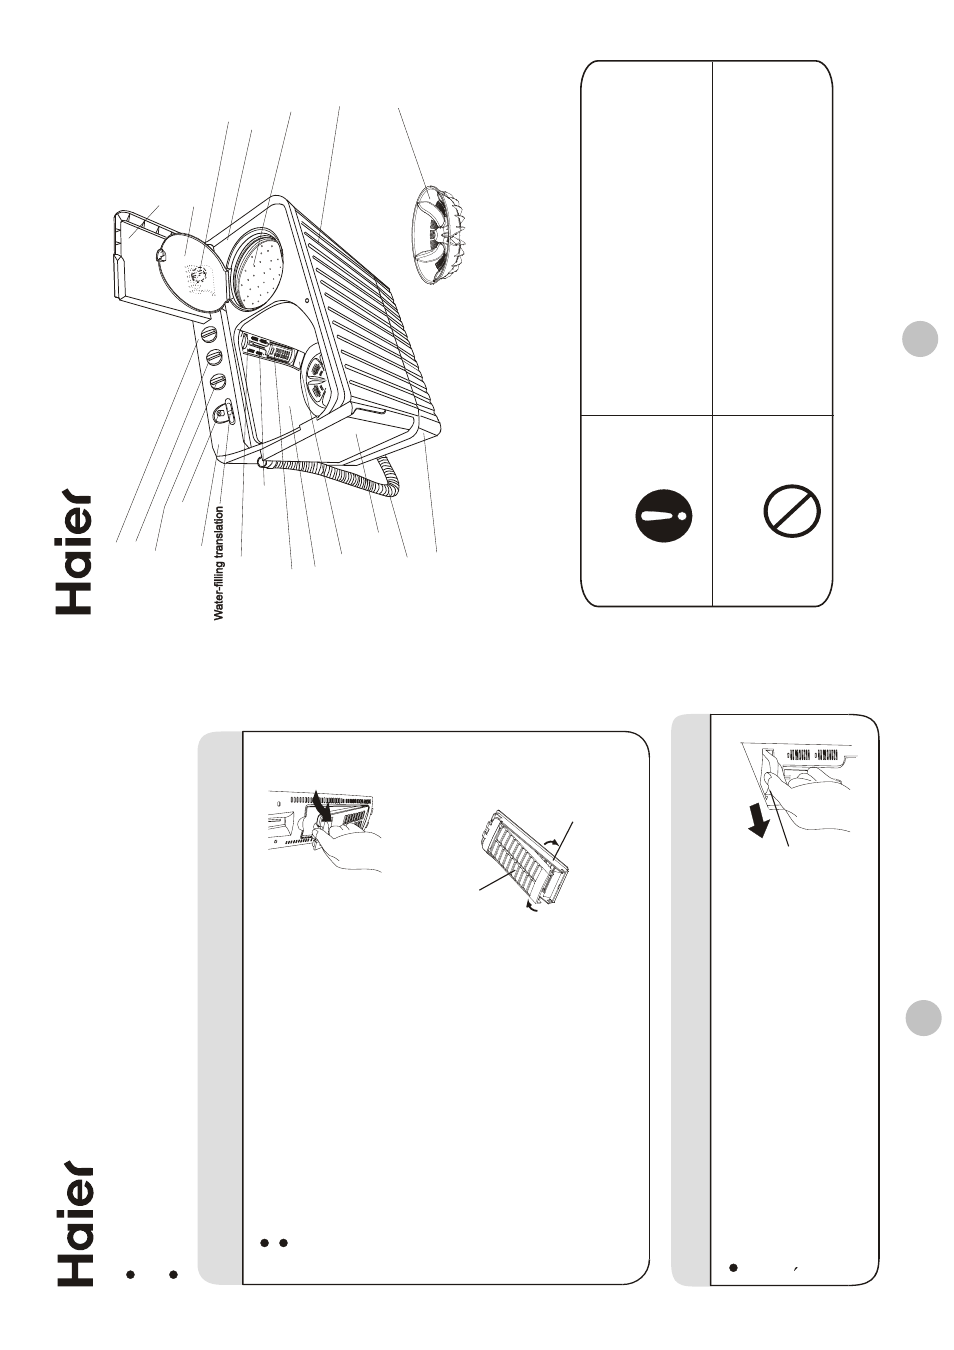
Major frame
Base frame
W
ater-filling entrance
W
a
sh selector
W
a
sh timer
Control
panel
W
ater level adjusting
lever
Pulsator
Wa
s
h
t
u
b
W
a
sh tub cover
Drain hose
V
alve cover
Outer cover of the spin tub
Inner
cover of the spin tub
Spin
tub
Cabinet
Notes: All illustrations
in this manual are given for reference only. Your products and
accessories may show differences fro
m these illustrations due to our
continuous improvement.
Spin timer
Filter frame
Lint filter
Maintenance
12
After using, please clean the lint and eyewinker of the lint filter and
overflow filter in time. Otherwise it may influence your using the machine.
Please first pull off the power plug from the receptacle before cleaning.
Cleaning the overflow filter
1
Meaning and description of the symbols
Warning sign
Forbidding sign
Contents marked with that symbol
are related
to the safety of the product and the personal
safety of
the users. Please operate in strict
conformity
to the contents, otherwise
it may
cause damage of the machine
or injure the
personal safety of the user
.
Contents marked with that symbol are actions
forbidden
to perform. Performing of those
actions may result in damage of the machine
or injure the personal safety of the user
.
Please
check
if
the
power
receptacle
h
as
good
earthing
condition
before
u
sing
to
guarantee
y
our
s
afety
.
Names of the parts
The lint filter must be used during washing.
It must be cleaned in time after each using.
Cleaning the lint filter
1.
Press the elastic piece at
upper
e
nd of
lint
filter
to
release the tab from the filter
cover
2.
Remove lint
Pull the lower
end of
lint
filter
rear
cover
o
utward
to disassemble it
from the lint
filter
front
cover
.
Remove lint
completely with clear
w
ater
.
(See
Figure 2).
3.
Install lint
filter
,
and pull the lint
filter
outward to remove it. (See Figure 1).
Figure 1
Figure 2
Lint fi
lter re
ar cov
er
Lint filt
er fr
ont co
ver
Assemble
Disassemble
Drain selector
1
T
ake off the overflow filter.
As indicated in the figure, nip the elastic fixing
claw and pull it to the direction of the arrow to
take it off.
T
oo much lint on the overflow filter will influence
the normal usage of the machine. Please
clean it every two months.
Elastic fixing claw