Hd 990, Operation – Harman-Kardon HD 990 User Manual
Page 9
HD 990
9
Operation
Operation
Loading and Unloading Discs
to load a disc, first turn the unit on (if it is not already) by pressing the power switch
2 on the front panel or the power on button b on the remote, then press the open/
close button 3 p, taking care to make certain that the space in front of the drawer is
not obstructed. When the unit is turned off (to standby), pressing the play button 4 j
on the front or on the remote will automatically turn on the cd player and start playback.
also, pressing the open/close button from standby switches on the player directly and
opens the drawer.
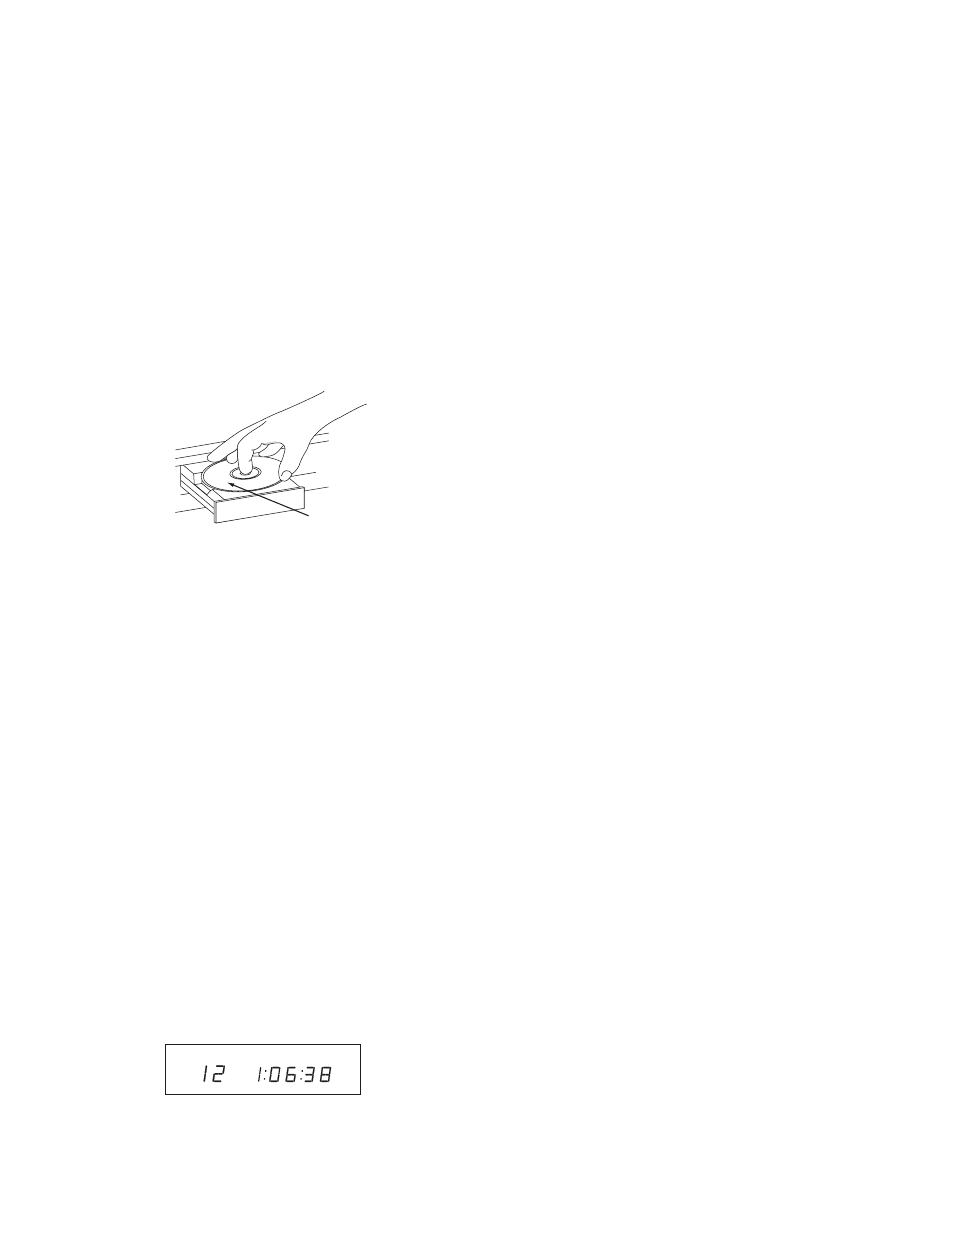
load the disc in the tray with the printed (label) side facing up. make certain that the
disc is centered in the tray. either 12cm (5") or 8cm (3") discs may be used. When an
8cm disc is played, it should be carefully centered within the smaller ridges inside the
cassette drawer.
to retract the drawer back into the player after loading a disc, press the open/close
button 3 p. When the drawer is closed the display will indicate the total number of
tracks on the disc and the total running time of the disc.
the drawer will also close when the play button 4 j is pressed. the drawer will
close and the disc will start playing the first track.
to remove a disc from the player, press the open/close button 3 p. the drawer will
open, allowing the disc to be removed.
Disc Handling Notes: When loading or unloading discs, it is best to hold them by
the edges. While compact discs are very reliable, rough handling may damage them.
avoid scratching the bottom (non-printed) side of discs, or any handling that will leave
fingerprints.
to avoid damage to the disc and player, always seat discs so that they are centered in
the tray. do not lift the player while the disc tray is opening or closing, as this may cause
the disc to unseat from the tray and possibly jam.
Normal Play
to play a disc, first turn the hd 990 on using the power switch
2 on the front panel or
the power on button b on the remote control. When the unit is turned off (to standby),
pressing the play button 4 j on the front or on the remote will automatically turn on
the cd player and start playback.
to load or change a disc, open the disc drawer by pressing the open/close button 3
p. place a disc in the tray following the instructions shown above.
pressing the open/close button once a disc has been carefully seated will close the
disc drawer while the message “closing” will appear in the information display. as soon
as the tray is closed the display will show the message “reading” while the table of
contents (toc) of the disc is read. note that particularly with cd-rW discs this tracking
may take some time due to the reflectibility and data structure being different from
normal discs. afterward, the information display will show the total number of tracks
and the total running time of the disc. note that with mp3 cds, the total running time
will not be shown.
the drawer will also close when the play button 4 j is pressed. the drawer will
close and the disc will start playing the first track.
to play all of the tracks on the disc in order, press the play button 4 j. a play symbol
› will appear in the main Information display 1, as well as indication of track number
and time elapsed.
to play all of the tracks in random order, press the random button C. the random
indicator will light when that mode is in use. random can be activated also while a track
is playing. When random is activated while programmed play is in use (see page 11), all
programmed tracks will be played in random order.
you may also select a specific track by pressing the skip buttons 7 h until the
desired track number is displayed (see page 10). the track may also be selected directly
by entering the track number via the
numeric controls c, simply enter the track
number by pressing the buttons that correspond to the desired track. note that when
a two- or three-digit track number is being entered, the second and third digit of the
number must be pressed within two seconds of the first digit. after the track is selected,
press the play button 4 j.
While the disc is playing, the track being played will show as a number in the middle of
the display just below the word “track.” the elapsed time of the track being played will
also appear in the display. as a disc plays, the track numbers will change, and the time
will reset to 00:00 at the start of each new track.
to momentarily pause the play of a disc, press the pause button 5 j. note that a red
pause indication
|| will appear in the display to remind you that the disc is paused. press
either the play button 4 j or the pause button 5 j to resume normal play.
to stop the disc, press the stop button 6 k. When the stop button is pressed the
display again will show the total number of tracks and total running time of the disc.
to remove a disc from the player, press the open/close button 3 p. to prevent dirt
and dust from entering the unit, do not leave the disc tray open.
to place the unit in a standby mode, press the power switch
2 on the front panel or
the power off button a on the remote. the display will show a “standby” message
for a moment and the status mode Indicator will glow orange, indicating that the unit
is off, but ready to accept a power on command from the remote. If the disc drawer
is open, it will automatically close when the unit is placed in the standby mode. this
ensures that the unit will not be harmed by dust, dirt or inadvertent damage to the
drawer mechanism.
note that the unit is not removed from ac main power when it is in the standby mode but
its power consumption is reduced to a low value. to remove the ac power completely
from the unit its ac power cord 4 must be plugged into a switch-controlled ac outlet
that is turned off. We recommend using the switched ac outlet on the rear side of a
receiver or amplifier. When that ac outlet will be turned on, the hd 990 will always turn
to the standby mode even if it was on before the ac power was removed.
Display Dim
In some situations, it may be desirable to reduce the brightness of the display or to turn
it off completely. to do this, press the display button q on the remote or the display
dimmer button 9 on the main unit to dim the display to half brightness. press it again
to turn the display off. a third press will return the display to normal level.
Labeled
Surface
A_
B
AUTO
MIN
SEC
TRACK
HOUR