Hd 990, Rear panel connections – Harman-Kardon HD 990 User Manual
Page 6
6
HD 990
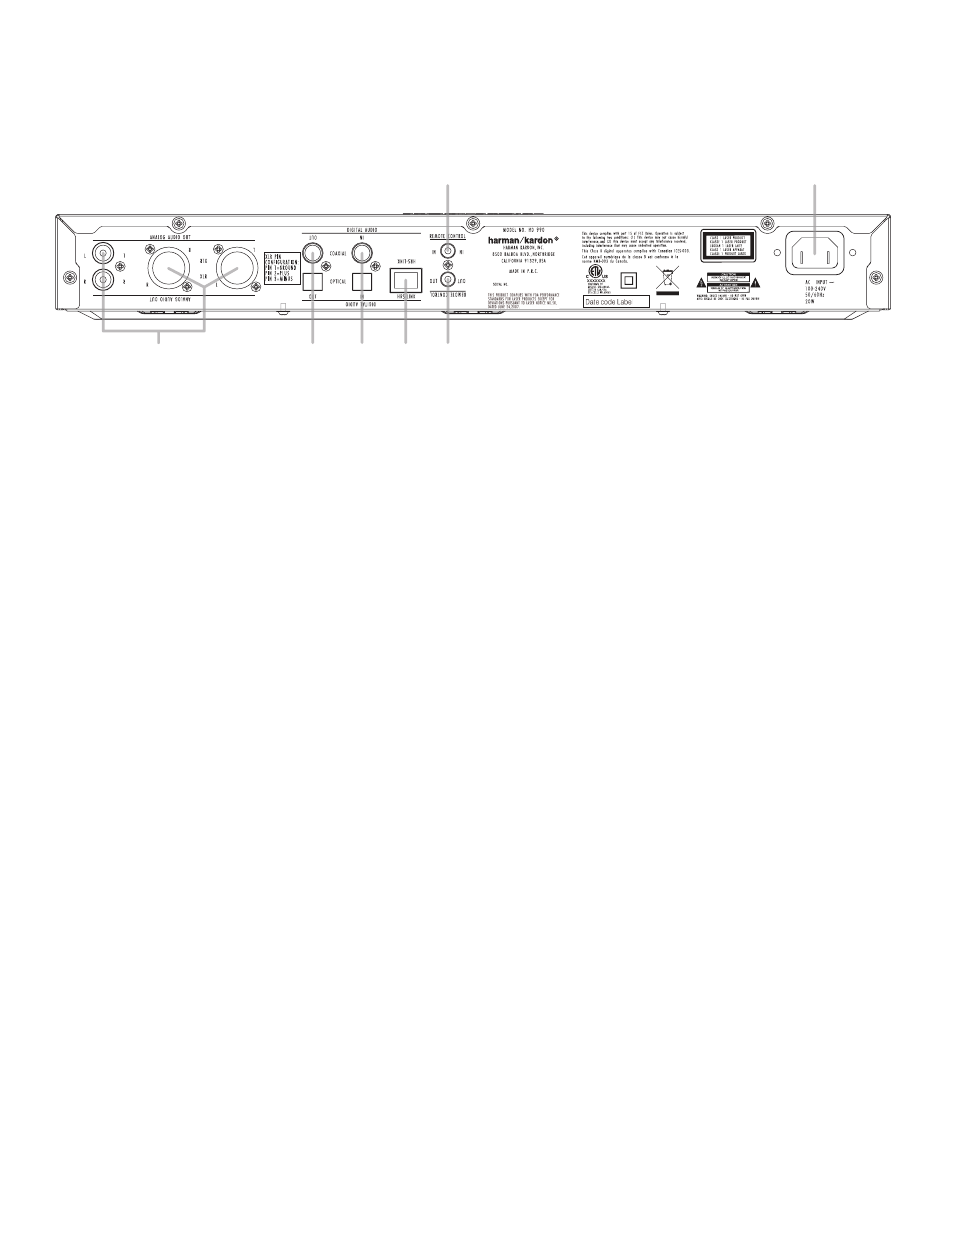
Rear Panel Connections
Digital Output: connect this jack to the coaxial or optical digital input of an external
digital-to-analog converter for direct access to the digital signals of the cd player or the
external digital audio source. do not connect this jack to the standard audio inputs of
any device.
1
Audio Outputs: connect these jacks to the cd audio inputs of your receiver, surround
processor or preamplifier. If your amplifier features balanced Xlr inputs, you may use
the Xlr outputs instead. sound quality via balanced connection is usually more dynamic,
with even better signal-to-noise ratio. pin configuration for the Xlr outputs: pin 1 is
ground, pin 2 is plus/hot, pin 3 is minus/cold.
2
Remote Control Input: connect the output of a remote infrared sensor or the remote
control output of another compatible harman Kardon product. this will enable the remote
control system to operate even when the front panel remote sensor is blocked. It will also
allow use of the cd player with optional, external control systems.
3
Remote Control Output: connect this jack to the input of another compatible
harman Kardon remote-controlled device to have the remote sensor on the cd player
provide signals to other products.
4
AC Power Cord: connect this plug to an ac outlet. If the outlet is switch-controlled,
make certain that the switch is in the on position.
5
Coaxial and Optical Digital Inputs: connect these jacks to the coaxial or optical
digital output of an external audio source. this will enable you to have the digital-to-
analog conversion of that source done by the highgrade audiophile digital-to-analog
convertors in the hd 990 rather than the (older ones) in the external source, for better
audio quality.
6
HRS-Link Output: the special high-resolution synchronization link cable (optional)
connects to the hrs jack on the matching hK 990 amplifier (or other compatible hK
amplifiers) to attain an even higher quality of sound. you need only connect the hrs-link
cable for complete synchronization and audio. no further cable is necessary.
digital output
1
audio outputs
2
remote control Input
3
remote control output
4
ac power cord
5
coaxial and optical digital Inputs
6
hrs-link output
�
�
�
�
�
�
�