Mounting mower lift system, Set-up and assembly – HONDA MM60 User Manual
Page 12
SET-UP AND ASSEMBLY
MOUNTING MOWER
LIFT SYSTEM
Install with the tractor on level ground.
Lock the parking brake, set the transmission lever
in "N" (Neutral) and the PTO clutch lever in the
"OFF"
position. Set Lift Control lever to "DOWN"
and turn Lowering Speed Control knob fully
counter-clockwise
("FAST").
This allows you to pull
the rear lift arms down by hand and makes assem-
bly easier.
1.
2.
Installing Mower Lift Plate to Tractor
Remove drawbar assembly; this is bolted onto
the transmission housing below the Rear PTO.
Retain bolts, nuts and spacers for installation of
lift plate assembly. Remove any dirt and debris
from bottom of transmission housing and make
sure bolt holes and screw threads are clean.
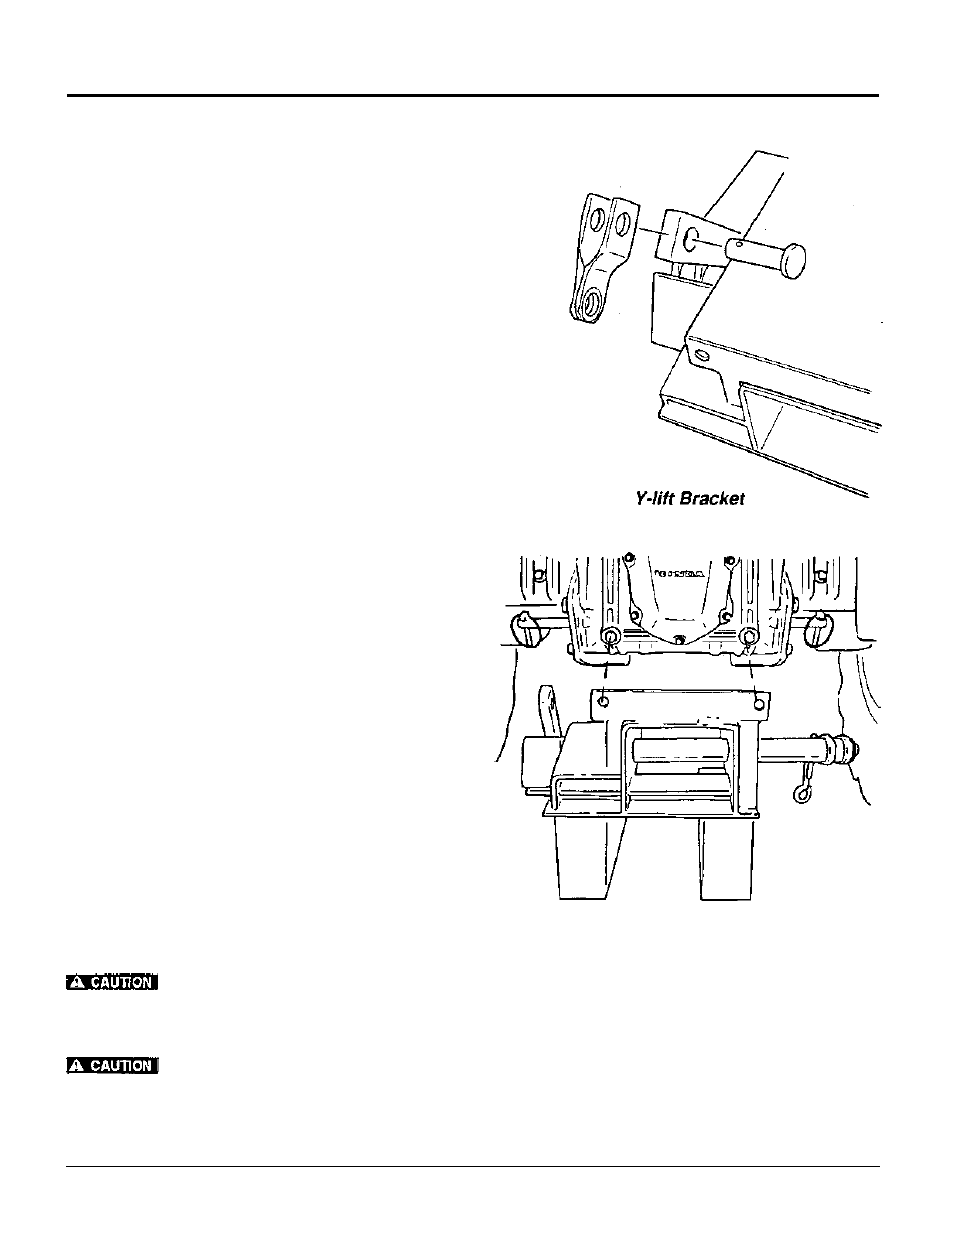
Assemble
Y-lift
bracket to
lift plate assembly.
Raised flange on
lift plate assembly will face rear
of tractor. Insert
Y-lift
bracket
so
that fork
of Y
faces front of tractor.
3.
Attach mower
lift plate assembly to tractor,
passing the two projecting stud bolts on the
transmission housing through the holes in the lift
plate flange. Slide on
2 spacers previously
removed and hand tighten both
26 mm flange
locknuts.
4.
Reach beneath the mower
lift plate assembly
and carefully insert the four
12 mm x 32 mm
bolts through holes in lift plate assembly and
into threaded holes on bottom of transmission
housing. Housing
is
made of aluminum,
so
start
bolts by hand to guard against cross threading.
Tighten to 7 kg-m
(50
ft-lb).
5.
Finish by tightening two
26 mm flange locknuts
on projecting studs to 7 kg-m
(50
ft-lb).
Wear heavy gloves to protect
your hands when installing lift link kit and
mower deck.
Lifting system can crush fingers
and hands,
so keep them clear of links and
lift
arms when operating.
Mower Lift Plate
11