Tine replacement, 10 to clean screen – Husqvarna 966957301 User Manual
Page 10
10
TO CLEAN SCREEN
a) Wash SCREEN in water and detergent solution.
b) Rinse thoroughly in clean water, then air dry.
TO CLEAN AND RE-OIL FOAM FILTER
a) Wash FOAM FILTER in water and detergent
solution and squeeze (don’t twist) until all dirt is
removed.
b) Rinse thoroughly in clear water.
c) Wrap in a clean cloth and squeeze (don’t twist)
until completely dry.
d) Saturate FOAM FILTER with clean engine oil,
squeeze (don’t twist) to distribute oil and remove
excess oil.
4. Clean inside of COVER and BODY thoroughly.
5. Reassemble AIR CLEANER as shown in Fig. 13.
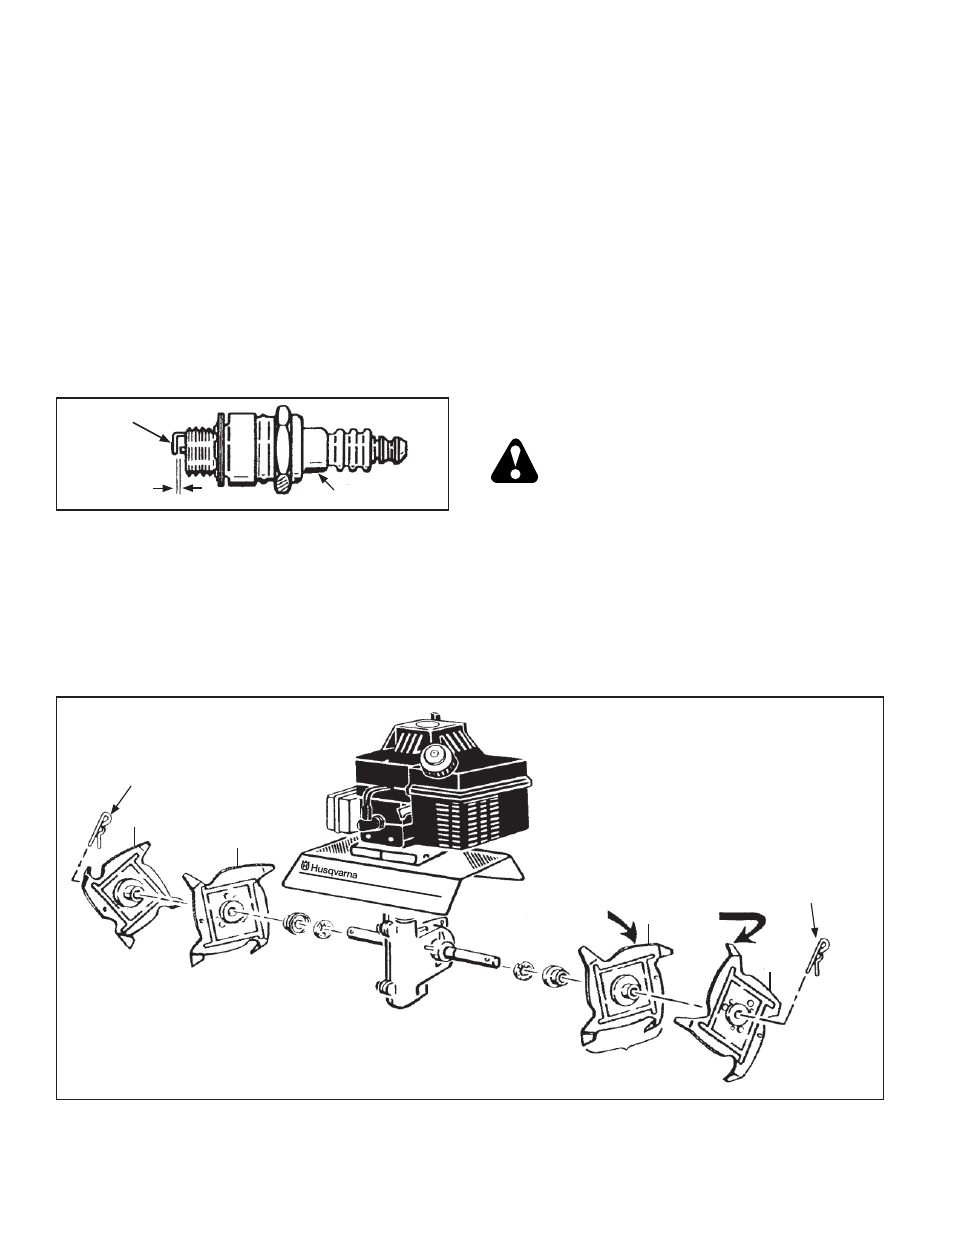
.030 GAP
PORCELAIN
ELECTRODES
SPARK PLUG
1. Clean area around SPARK PLUG base.
2. Remove and inspect SPARK PLUG.
3. Replace SPARK PLUG if ELECTRODES are pitted
or burned or if PORCELAIN is cracked. Replace as
follows:
For TC300 use Champion RCJ8Y or equivalent.
Fig. 15
TINE REPLACEMENT
Remember that right and left sides of your unit are deter-
mined from the operator’s position behind the unit. Note
that all four tines of this unit are different and must be
installed correctly or tiller will not function properly. Tines
will wear and become quite sharp. Be very careful when
replacing tines. If tines are being replaced due to wear,
all four tines should be replaced as a set. (See Fig. 15)
ALWAYS MOVE SWITCH TO “O” POSITION
AND REMOVE SPARK PLUG WIRE BEFORE RE-
PLACING TINES.
1. Remove hairpin cotter from tine shafts.
2. Wearing heavy gloves, remove tines.
3. Clean tine shaft. Apply a few drops of oil.
NOTE: In Canada, replace spark plug with a resistor plug.
4. If reusing SPARK PLUG, clean it by carefully
scraping ELECTRODES (don’t wire brush or sand
blast). Be sure entire SPARK PLUG is clean.
5. Check ELECTRODES GAP with wire feeler gauge
and set gap at .030 if necessary.
6. Install SPARK PLUG in engine and tighten to 15 foot
pounds torque. If lacking torque wrench, tighten securely.
CT20
HAIRPIN
COTTER
LEFT
INBOARD
TINE
D
C
B
A
LEFT
OUTBOARD
TINE
HAIRPIN
COTTER
NOTE POSITION OF
INBOARD TINE TEETH
Fig. 14