Warning – Hearth and Home Technologies TIARAI-CES User Manual
Page 25
August 1, 2008
Page 25
Heat & Glo · Tiara I B & Tiara II B · 7010-149M
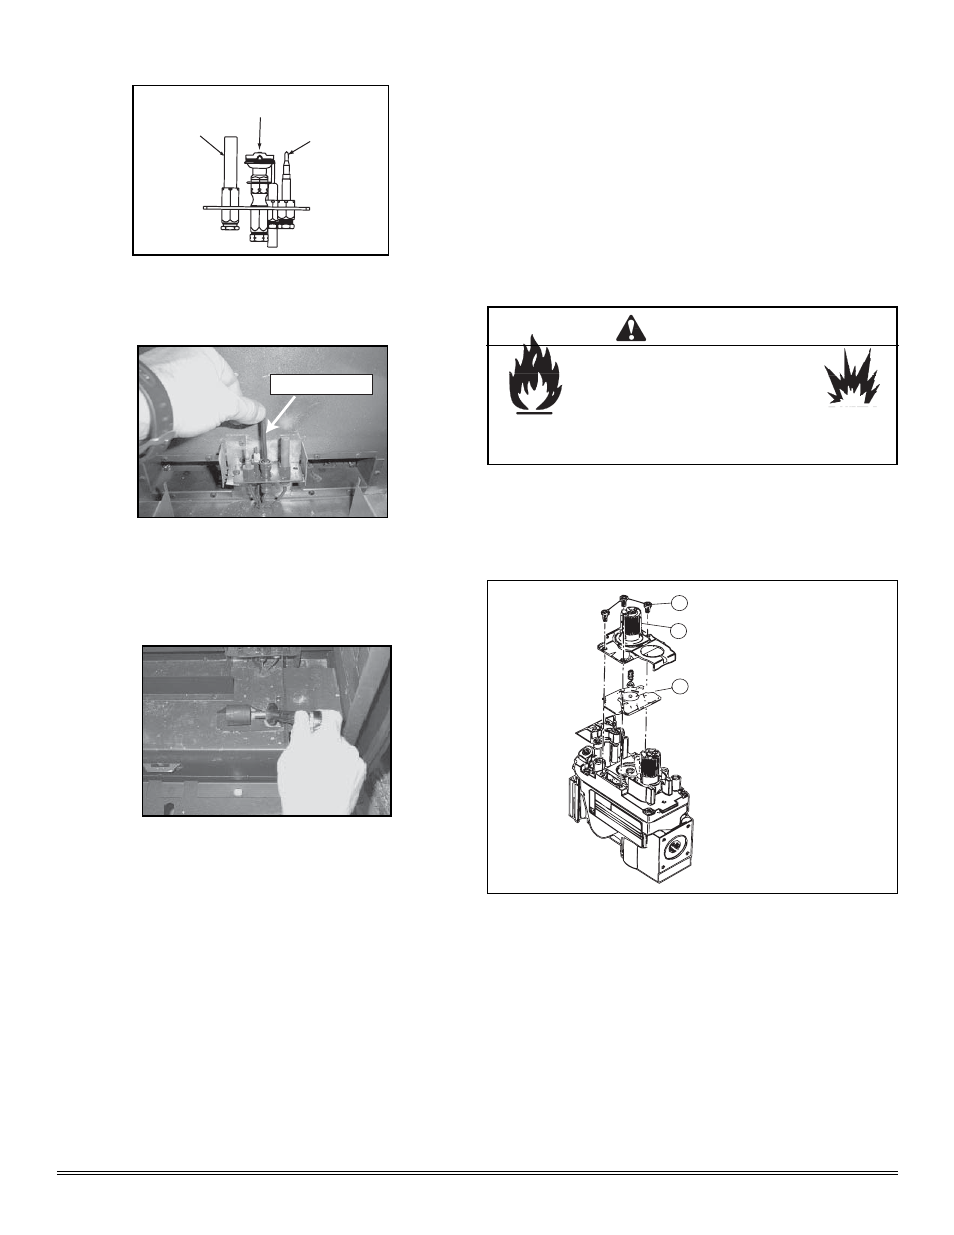
MILLIVOT GENERATOR
THERMOCOUPLE
PILOT HOOD
Figure 6.4
Pull off pilot hood and set aside.
NOTE: Do not remove retaining clip from hood.
5/32 in. Allen wrench
Figure 6.5
Use a 5/32 in. Allen wrench to remove the pilot injec-
tor. Replace pilot injector with the one supplied with the
appliance (#35 for Propane, #62 for Natural Gas).
Replace pilot hood, snapping into position.
Figure 6.6
Remove main burner orifi ce using a 5/8 in. wrench.
Replace orifi ce with the proper size as indicated on for your
gas type and venting.
PROPANE
NATURAL GAS
Tiara I-B
.063
.106
Tiara II-B
.073
.120
Reinstall burner by placing it into the fi rebox.
Tiara I-B: Installation is the reverse of the removal. DO NOT
OVERTIGHTEN. Reinstall the optional brick set, if applica-
ble.
Tiara II-B: Installation is the reverse of the removal. Make
sure to reinstall the two 1/4 in. x 20 screws that secure the
burner.
Reinstall logs, glass and front.
Figure 6.6
Turn control knob to the OFF position, ensure that
gas supply to the valve has been turned off. Using a Torx
TH20, or slotted screwdriver, remove the three pressure
regulator mounting screws
(1), pressure regulator tower (2),
and diaphragm
(3).
2. Valve Regulator Replacement
Remove upper and lower back shield. Loosen the set col-
lars on the extension rods with the 3/32 in. Allen wrench.
Remove the rods and adapter cap.
Fire Risk.
Explosion Risk.
• Disconnect any electrical cords and
turn off gas supply to unit before
proceeding if converting fuel on an
appliance already fully installed.
WARNING
Tiara I-B and Tiara II-B:
1
2
3
Mounting Screws
Pressure Regulator Tower
Diaphragm