Rear rack installation, After installation – Harbor Freight Tools 66187 User Manual
Page 5
Page 5
For technical questions, please call 1-800-444-3353.
Item 66187
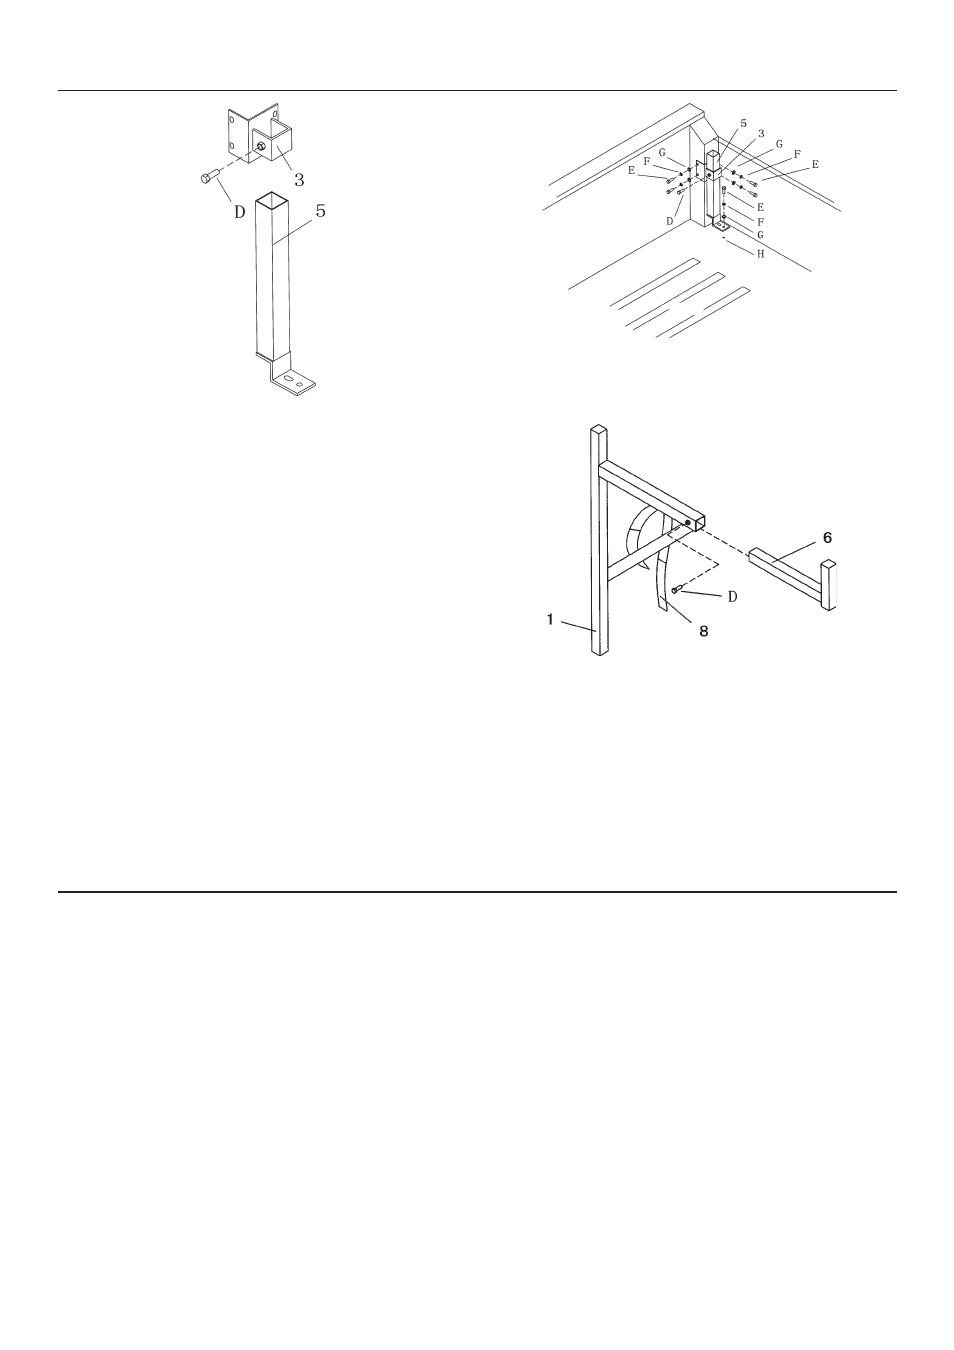
Rear Rack Installation
1. Slide Rear Mounting Bracket (3)
over Rear Base (5) as shown above.
Temporarily secure in place with Jam Bolt (D).
2. Place the Base/Bracket assembly as shown below at
the passenger side of the vehicle near the tailgate.
Loosen the Jam Bolt and allow the Base to slide
down so the foot rests flat on the truck bed.
3. Mark the bedrail at center of the holes, 4
holes in the side and 1 hole on the truck bed.
Any one of the holes in the Base can be used for
the truck bed hole. Set the assembly aside.
4. Drill for and install 5 Blind Fasteners (H) in
the locations marked in the previous step.
5.
(Tailgate)
(Passenger
Side Bedrail)
(Bed)
Attach the assembly to the Blind Fasteners as
shown above using Bolts (E), Washers (F),
and Spring Washers (G) - as shown above.
6. Insert Arm (6) into Frame (1) and secure
with Jam Bolt (D), as shown above.
7. Install Strap (8) through the bracket on the Frame (1).
8. Slide the assembled Frame (1)
into the Rear Base (5).
After Installation
1. If desired, a Cleat (9) can be installed on each
Frame (1). Place the Cleat in the desired location
and mark the holes. Drill 1/4″ holes in the locations
shown and install the Cleats, using Screws (J),
Washers (K), and Nylon Insert Nuts (L).
2. Inspect and test vehicle systems thoroughly,
especially lighting and braking systems, to confirm
that they were not damaged during installation.