Care and maintenance, Changing the plug, Cleaning the pump – Hotpoint WT640 User Manual
Page 15: Cleaning, Moulded plug
15
GB
Care and Maintenance
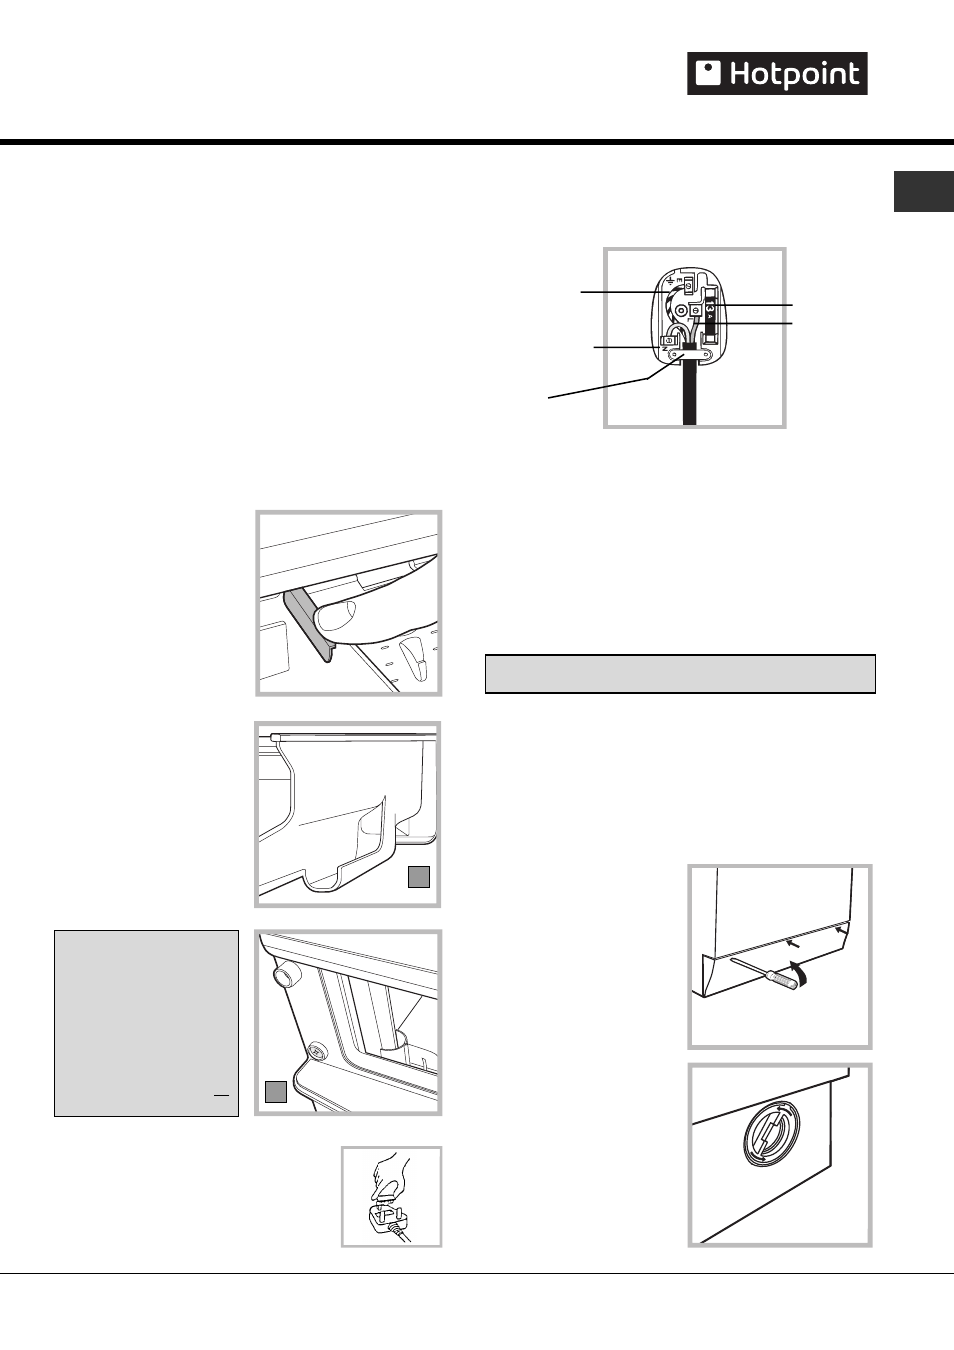
Changing the plug
The wires in the power cord are coloured in accordance
with the following:
Green and Yellow
(Earth)wire to terminal
marked E, symbol
or coloured green
and yellow
Blue (Neutral) wire to
terminal marked N or
coloured black.
Cross-bar
Cord clamp
! If the plug being replaced is a non-rewirable type,
then the cut-off plug must be disposed of safely.
DO NOT leave it where it can be inserted into a
socket and create a shock hazard.
! The power supply cord should be checked periodically
and replaced by a cord specially prepared for this
machine and fitted only by authorised technicians (see
Service ). Replacement power cords can be purchased,
at an extra cost from our Genuine Parts and
Accessories department or authorised dealers.
! The manufacturer denies any responsibility should any
of these rules not be followed.
! If in doubt about any of the above consult a
qualified electrician.
Cleaning the pump
This appliance is fitted with a self-cleaning pump that
does not require any maintenance.
Sometimes, small items (such as coins or buttons)may
fall into the pre-chamber that protects the pump.
! Make sure the wash cycle has ended and unplug
the appliance.
To access the chamber:
1. Remove the kickstrip, on
the lower front of the
appliance, by holding at each
end and pulling towards you
(see figure ).
2. Unscrew the pump filter
by rotating it antclockwise,
until it can be removed (see
figure ). A little water may
leak from the pump: this is
perfectly normal.
3. Clean the interior
thoroughly, removing any
visible debris.
4. Refit by screwing the
filter into place until it
reaches its stop position.
5. Refit the kickstrip, making
sure that the hooks are
securely in place before you
push in onto the appliance.
GB
Cleaning
!
Unplug your machine when cleaning it and before all
maintenance operations.
!
Do not clean any part of the machine with abrasive
cleaners, scouring agents, acids,any bleach or metal
polish as they may cause damage.
Use a damp cloth or silicon polish to clean the
exterior surfaces of the appliance.
Clean the internal surface of the door bowl regularly
with a soft cloth.A build up of soap powder and
water hardness residue may result in water leaking
from the door.
Always leave the appliance door ajar to prevent
unpleasant odours from forming.
Cleaning the dispenser drawer and compartments
It is advisable to clean the dispenser drawer regularly.
!
Do not try to clean any part of the dispenser drawer
while the machine is running.
1. Pull out the drawer until
it reaches its stop.
2. Press the drawer release
button to remove the dispen-
ser drawer (see pic).
3. Clean and dry the
dispenser drawer, syphons,
grate and fabric conditioner
exit channel () ), ensuring any
build up ofdetergent and
fabric conditioner is fully
removed.
!
Failure to do so may
lead to the machine
leaking from the
dispenser drawer.
Also regularly clean the
outlet pipe area (B
4. Relocate the dispenser
drawer and push it firmly
back into place.
!
We recommend a
maintenance wash 2 or 3
times a year, to avoid a
build up of greasy deposits
and water hardness residue.
Run the 95 °White Cotton
programme, with the normal
amount of detergent but no
laundry.
Moulded plug
!
The plug must
not be used without the fuse cover in place.
If a replacement fuse holder/cover is
required, it must be of the same colour
coding or wording as shown on the base
of the plug. Replacements are available
from authorised dealers.
13A ASTA
approved
fuse to BS1362.
Brown (Live) wire
to terminal
marked L
or coloured red.
B
A