Inspection, maintenance, and cleaning, Troubleshooting – Harbor Freight Tools 94280 User Manual
Page 12
Page 12
SKU 94280
For technical questions, please call 1-800-444-3353.
INSPECTION, MAINTENANCE, AND CLEANING
WARNING! Make sure the Floor Machine is disconnected from its electrical
outlet prior to performing any inspection, maintenance, or cleaning procedures.
Before each use, inspect the general condition of the Floor Machine. Check for
cracked or broken parts, damaged electrical wiring, and any other condition that
may affect safe operation. If abnormal noise or vibration occurs, have the problem
corrected before further use.
Do not use damaged equipment.
After each use, remove the Carpet Brush (51), Floor Brush (52), or Pad (54). This
will allow the Brushes and Pad to dry and retain their original shape. To prolong
the life and shape of the Brushes and Pad, store them face up.
To clean: Use a clean cloth and mild detergent to clean the exterior of the Floor
Machine. Do not immerse the Floor Machine in liquid.
When storing, make sure to store the Floor Machine in a clean, dry, safe location
out of reach of children and other unauthorized people.
CAUTION! All maintenance, service, or repairs not mentioned in this
manual must only be performed by a qualified service technician.
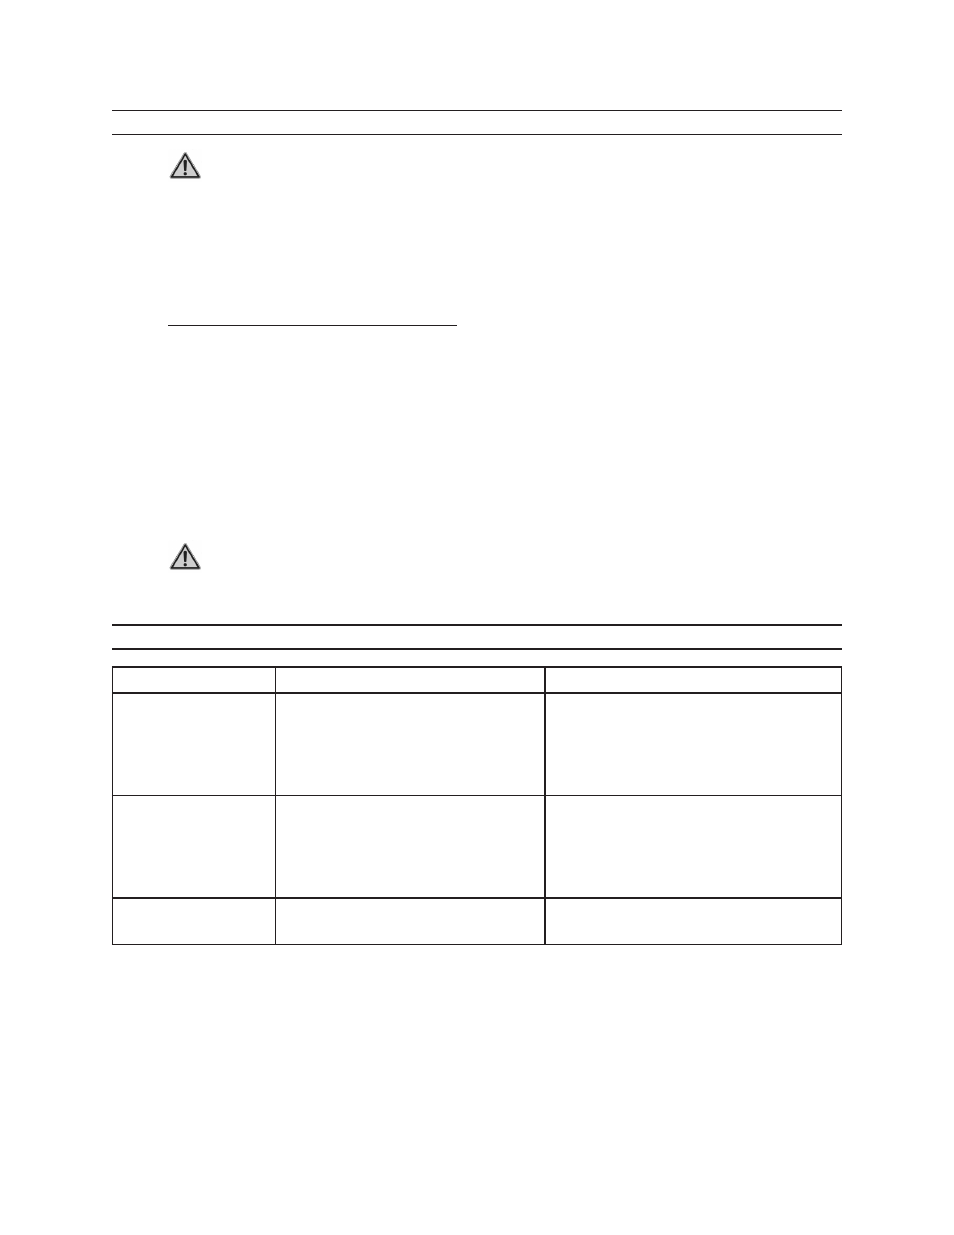
TROUBLESHOOTING
Problem
Possible Cause
Possible Solution
Machine will not run.
Not firmly plugged into electrical
outlet.
Capacitor (4A) malfunction.
1.
2.
Make sure the power plug is plugged
into a working, 115 volt, grounded,
electrical outlet.
Have a qualified technician check
capacitor.
1.
2.
Machine bounces.
Using carpet brush (51) on dry
surface without dry shampoo or
wet shampoo.
Carpet brush (51) or brush holder
pad (35) not properly in place.
1.
2.
Apply dry shampoo or wet shampoo
to floor surface.
Position carpet brush and/or brush
holder pad level.
1.
2.
Irregular noises when
running.
Handle Screw (11) is loose.
Pad Screws (25) are loose.
1.
2.
Retighten Handle Screw.
Retighten Pad Screws.
1.
2.
1.
2.
3.
4.
5.
6.