Fig. 3, Fig. 4 – Hoshizaki KM-1900SAH/3 User Manual
Page 16
16
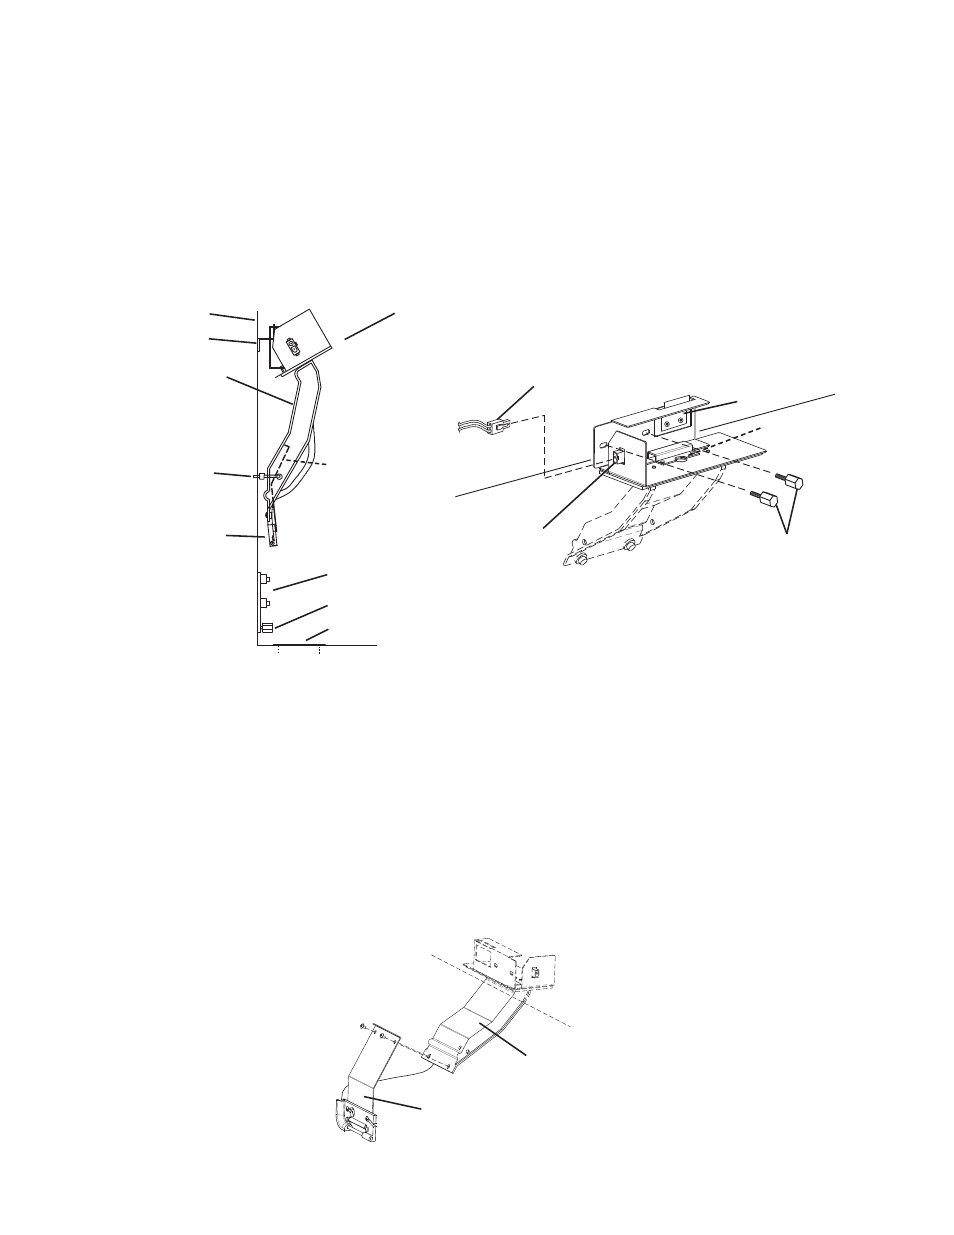
6) Install the bin control thermostat as follows:
a. Remove the baffle from the storage bin.
b. Remove the tie securing the bin control thermostat assembly. Remove the
2 thumbscrews and the "Z" bracket.
c. Remove the bin control thermostat assembly from the shipping hook by lifting it up
and shifting it to the right. Lower the thermostat extension bracket (stainless) with
the thermostat bulb attachment and thermostat bulb through the hole located at the
bottom of the icemaker. Next, lower the thermostat bracket (plastic) through the hole.
See Fig. 3.
Fig. 3
Bin Control Thermostat Assembly
Shipping Hook
Thermostat Bracket
(plastic)
Tie
"Z" Bracket
Thermostat Bulb
Attachment (plastic)
and Thermostat Bulb
Thumbscrews
Thermostat Extension
Bracket (stainless)
Hole
Wall
d. Slide the left side of the upper part of the assembly towards you and make sure it
is hooked on the wall. Make sure the left side and bottom of the assembly are flush
against the wall and base panel.
e. Secure the assembly in place with the thumbscrews (unless you are installing an
upper unit). (See "II.E. Installation of Upper Unit.")
f. Insert the plug into the receptacle on the assembly until it locks into place. See Fig. 3.
If a Hoshizaki B-800, B-900, or B-1150 storage bin is used:
g. Put aside the "Z" bracket; it is not needed with the storage bins listed above.
h. Remove the 2 screws from the lower part of the thermostat bracket (plastic) and use
them to attach the thermostat extension bracket (stainless) to the thermostat bracket
(plastic). See Fig. 4.
Thermostat Bracket
(plastic)
Thermostat Extension
Bracket (stainless)
Fig. 4
Plug
Receptacle
Thumbscrews
Hook
Bushing