Installing the main unit, Installation angle, Mounting the main unit (example) – Eclipse - Fujitsu Ten AVN5495 EN User Manual
Page 17
- 17 -
Installing the main unit
Installing the main unit
Remove the pocket and any other accessories
from the center cluster to make room for the main
unit.
1
Remove the mounting brackets for the pocket.
2
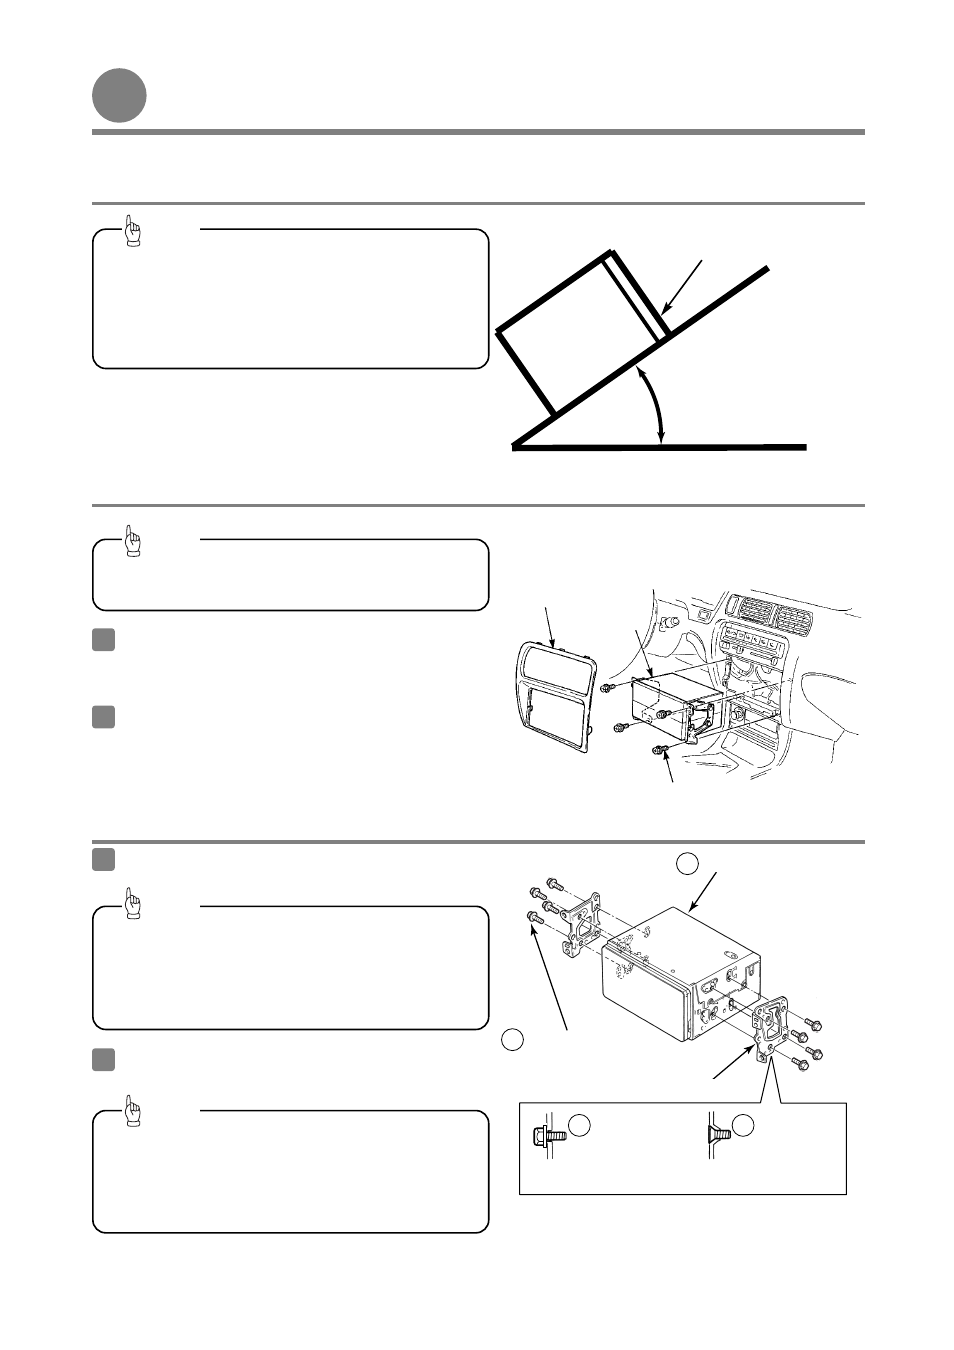
30˚ or less
Level (reference)
Front
- Installation angle -
Mounting bolts
Pocket, etc
Center cluster panel
Attach the brackets to the main unit.
3
Install the main unit in the vehicle.
4
- Mounting the main unit (example)-
Main unit
Mounting bracket
Hex-head bolt
(Red:M5 x 8) x 8
Hex-head bolt
(Red:M5 x 8) x 8
Flathead
screw
(Red:M5x8) x 8
Select the screws in accordance with the shapes
of the screw holes in the mounting bracket.
5
6
5
1
Connect all cables before installing the main
unit.
Tip
Be careful not to push the main unit display or the
buttons too strongly when installing the main unit
to the vehicle, otherwise the main unit and buttons
may become damaged.
Tip
Be sure to use the accessory mounting screws
(Red:M5 x 8) as the mounting screws. If any other
screws are used, they may damage the inside of
the unit.
Tip
To maintain proper function, the unit must be
mounted less than 30 degrees. If the angle is in
excess of 30 degrees, DVD/CD skipping and
improper DVD/CD and Memory Stick ejection may
occur.
Tip