Timer tones ceramic glass, Timer, Tones – JennAir Lustre Stainless Series 36 Inch Induction Cooktop Use and Care Guide User Manual
Page 8: Ceramic glass, One tone, Two tones
8
To Turn Off:
1.
Cancel the Pause function by touching the Power keypad
twice, and then touch the Pause keypad while the display
light is flashing. The Pause display light will turn off, the
previous cooking area setting(s) will be displayed, and both
of the cooking areas in the zone will continue working at their
previous power levels.
Timer
Use the timer to set times up to 1 hour and 59 minutes. The
timer is independent of all other control settings. Three timers
can be set for each cooktop zone. Repeat the steps below to
set additional timers. A timer symbol will appear in the cooktop
control display for the cooking areas. The timer(s) will count
down and the symbol for the timer with the least amount of
time remaining will flash until it reaches “0:00.”
To Use:
1.
Touch the Timer “+” and “-” keypads at the same time.
“0:00” will appear in the timer window.
2.
To set the timer for a specific cooking area, make sure the
desired cooking area is on. Touch the Timer “+” and “-”
keypads at the same time. The timer symbol will light up in
the next activated cooking area. Touch the Timer “+” and “-”
keypads at the same time again until the timer symbol is lit in
the display for the desired cooking area.
3.
Touch the Timer “+” keypad to set the desired time up to
1 hour and 59 minutes in the timer window. To decrease
the time, touch the “-” keypad.
To Stop a Timer:
1.
Make sure the indicator light above the Power keypad is on.
If it is not, touch the Power keypad.
2.
Touch the Timer “+” and “-” keypads at the same time
until the desired timer symbol lights up. The timer will be
momentarily paused.
3.
While the timer is paused, touch the “-” keypad until “0:00”
appears in the timer window. Two tones will sound until you
press the Timer “+” and “-” keypads at the same time again.
To Stop Both the Cooking Area and Linked Timer:
1.
Make sure the timer symbol for the desired cooking area is
lit up. If it is not, touch the Timer “+” and “-” keypads at the
same time until it is.
2.
Touch the On/Off keypad for the desired cooking area to
stop the timer and turn off the cooking area, or touch the
Power keypad to stop all timers and turn off the entire
cooking zone.
Tones
Tones are audible signals, indicating the following:
One tone
■
Valid keypad touch
■
Slider is moved to “0” power level.
■
Slider is moved to “Boost” power level.
Two tones
■
End of timer cycle
Ceramic Glass
Cleaning off the induction cooktop before and after each use will
help keep it free from stains and provide the most-even heating.
For more information, see the “General Cleaning” section.
■
Avoid storing jars or cans above the cooktop. Dropping
a heavy or hard object onto the cooktop could crack the
cooktop.
■
To avoid damage to the cooktop, do not leave a hot lid on
the cooktop. As the cooktop cools, air can become trapped
between the lid and the cooktop and the ceramic glass could
break when the lid is removed.
■
For foods containing sugar in any form, clean up all spills
and soils as soon as possible. Allow the cooktop to cool
down slightly. Then, while wearing oven mitts, remove the
spills while the surface is still warm. If sugary spills are
allowed to cool down, they can adhere to the cooktop
and can cause pitting and permanent marks.
■
To avoid scratches, do not slide cookware or bakeware
across the cooktop.
■
To avoid damage to the cooktop, do not allow objects that
could melt, such as plastic or aluminum foil, to touch any
part of the entire cooktop.
■
To avoid damage to the cooktop, do not use the cooktop
as a cutting board.
■
Use flat-bottomed cookware for best heat conduction and
energy efficiency. Cookware with rounded, warped, ribbed,
or dented bottoms could cause uneven heating and poor
cooking results.
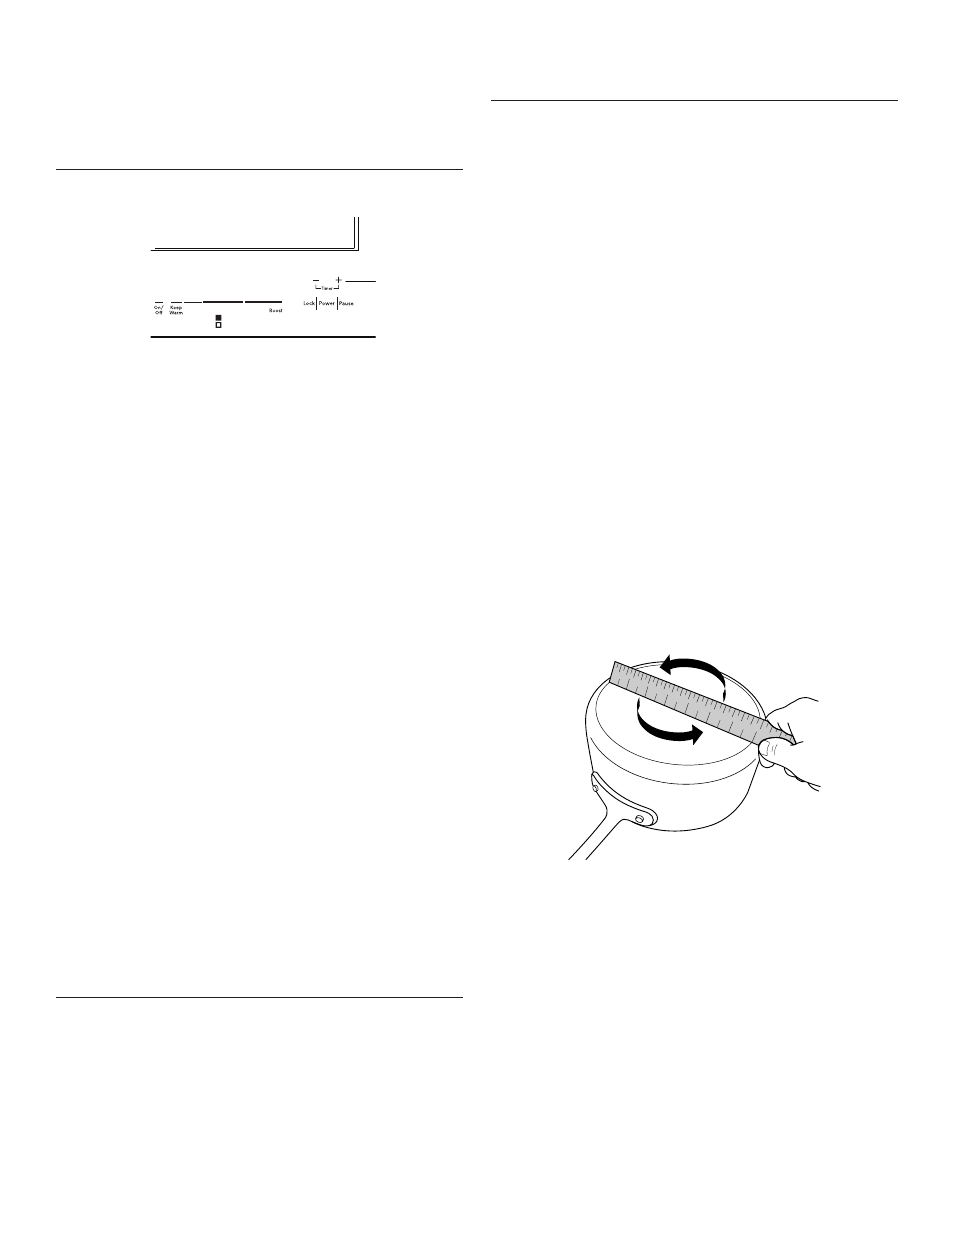
■
Determine flatness by placing the straight edge of a ruler
across the bottom of the cookware. While you rotate the
ruler, no space or light should be visible between it and the
cookware.
■
To determine which pan to use on which induction element,
measure the bottom of the flat area of your pan. Do not
include the sides if they curve up. Use this measurement
to help determine which induction element would best fit
your pan. Manufacturer measurements listed on pans are
usually for the top opening dimension. The flat bottom
may be smaller.
■
Make sure the bottoms of pots and pans are clean and dry
before using them. Residue and water can leave deposits
when heated.
A
A. Timer function symbol
1
2
3
4
5
6
7
8
9
1 0
1 1
1 2
1 3
1 4
1 5
1 6
1 7
1 8
1 9
2 0
1
2
3
4
5
6
7