Wall unit mounting - fig. 6, Wall unit mounting - fig. 7 – Electrolux CHDD 8820 User Manual
Page 13
61
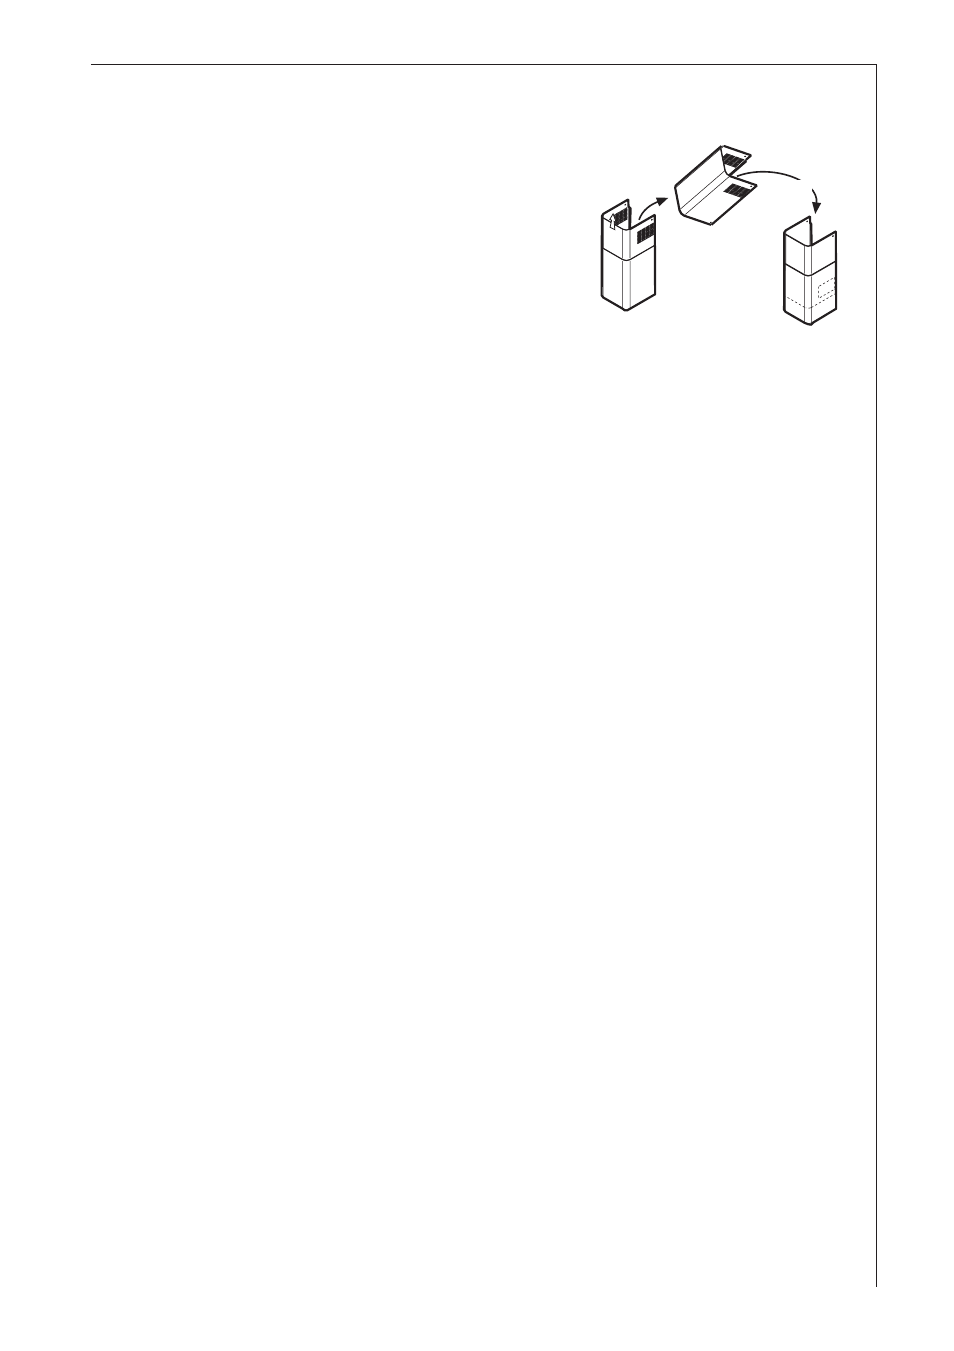
Wall unit mounting - Fig. 6
First decide which functioning version is
better for you.
If you decide to use the hood in exhausting
version we suggest to position the upper
section of the chimney so that the oulet
slots are not visible once installation has
ended, on the contrary if is decided to use
the hood in recycling version BE SURE that
the side with slots is up (see also A-B-C
sequence on on Fig. 6).
Wall unit mounting - Fig. 7
Mark the wall with a centre line, this will aid mounting procedure (1),
position the template so that the mid line printed on the template
matches with the centre line previously drawn, the lower side of the
template corresponds to the lower side of the hood once mounted
(2).
Drill two holes Ø 8mm and fix the support bracket with two wall
plugs and screws (3). Hang the hood (4) and adjust its position (5-
6).
From the inside of the hood sign two points for definitive fixing (7).
Remove the hood (8) and drill two holes Ø 8mm (9), fit two wall
plugs (10).
Drill two holes Ø 8mm on the upper side close to the ceilling, fit two
wall plugs (11) (In case the hood is to be used in filter version,
mount the deflector F on the chimney support with four screws
2,9x6,5 (Two screws for model CHDD 8820)) and fix the chimney
support G with two screws (12).
Hang the hood again (13) and fix it definitively with two screws (14).
Fit an exhausting pipe (15) to connect the outlet hole A of the hood
to the outside (Extractor hood) or to the deflector F (Filter version).
Make electrical connection (16).
Fix the chimney first up (17a) to the chimney support (17b), then
slide the lower section of the chimney down into the proper housing
on top of the hood (18).
Only for model CHDD 8820: Fix the lower section to the hood with
two screws 3 x 9 mm (19).
A
B
180°
C - OK!
Fig. 6