Switch housing/downlight installation – Emerson LA FAYETTE CF820ORB00 User Manual
Page 10
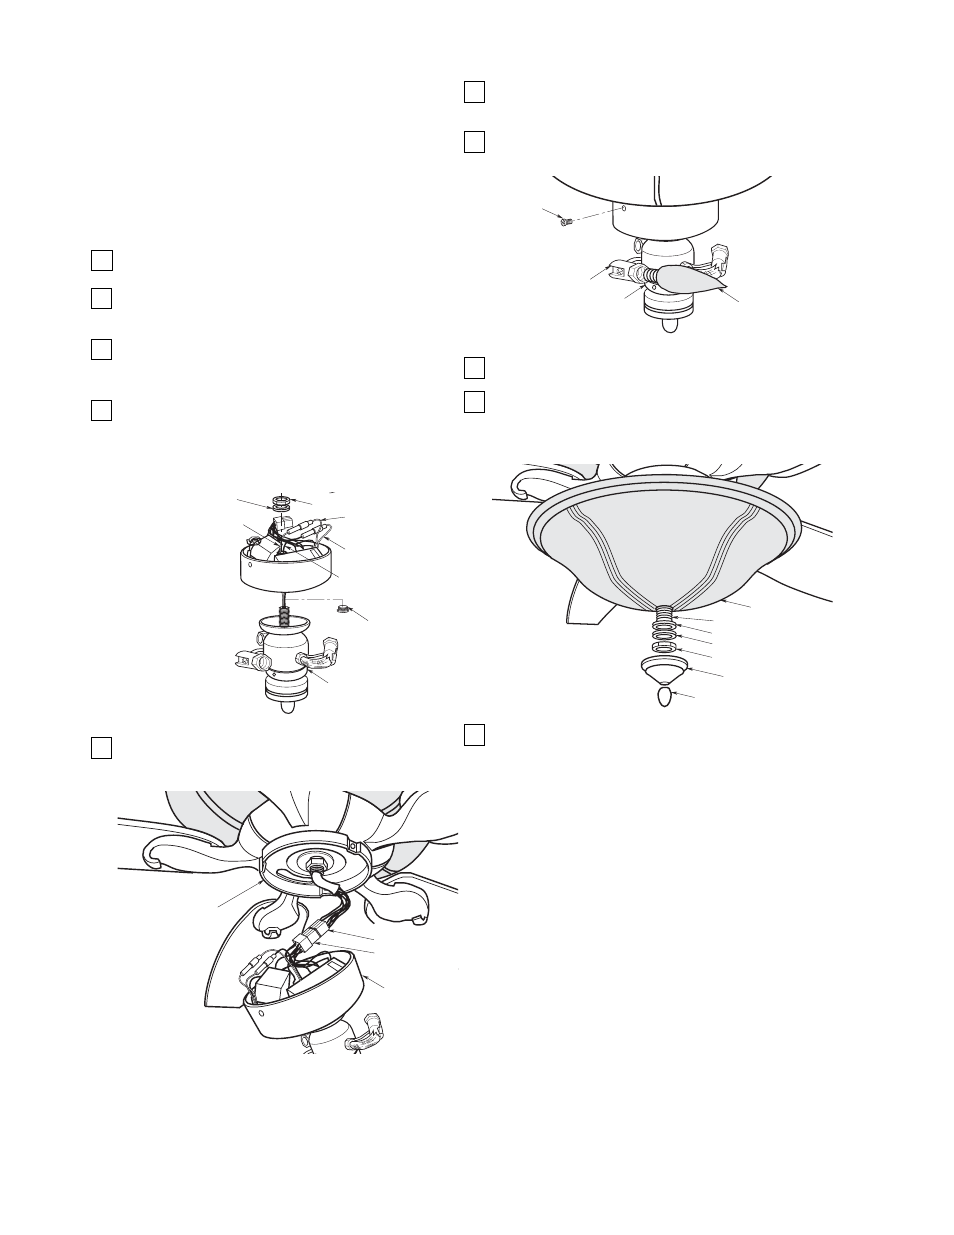
1.
Remove the center housing plug from the switch
housing for downlight kit assembly.
2.
Slide the two connectors and wires from the
downlight kit assembly into the switch housing hole
(Figure 20).
3.
Screw the downlight kit assembly onto switch
housing. Install hex jam nut and nut (supplied in
parts bag) onto threaded nipple inside of switch
housing and securely tighten.
4.
Connect the downlight kit assembly black wire
connector to the switch housing blue wire
connector. Connect the downlight kit assembly
white wire connector to the switch housing white
wire connector (Figure 20).
5.
Attach the 9-pin connector of the switch housing to
the 9-pin connector of the fan assembly.
(Figure 21).
10
REMOVED SWITCH
HOUSING CENTER
PLUG
DOWNLIGHT KIT
ASSEMBLY
FLAT WASHER
HEX JAM NUT
SWITCH HOUSING BLUE
WIRE CONNECTOR
SWITCH HOUSING WHITE
WIRE CONNECTOR
DOWNLIGHT WHITE
WIRE CONNECTOR
DOWNLIGHT BLACK
WIRE CONNECTOR
Figure 20
Switch Housing/Downlight
Installation
SWITCH
HOUSING
SWITCH HOUSING
PLATE
SWITCH HOUSING
9-PIN CONNECTOR
FAN ASSEMBLY
9-PIN CONNECTOR
Figure 21
6.
Position the switch housing assembly onto the
switch housing plate and secure using the three
switch housing screws (supplied) (Figure 22).
7.
Install three 40-watt (max.) candelabra light bulbs
(not supplied) into the downlight sockets (Figure 22).
8.
Remove the rubber washer, flat washer, hex jam
nut, cap and finial from the downlight kit assembly.
9.
Install downlight glass shade and reassemble the
rubber washer, flat washer, hex jam nut, cap and
finial. Gently secure to avoid damage to glass
shade (Figure 23).
10.
Your ceiling fan is now installed ready to be
controlled by your remove control system.
THREADED STUD
HEX JAM NUT
CAP
FINIAL
GLASS SHADE
RUBBER WASHER
FLAT WASHER
Figure 23
40-WATT (max.)
CANDELABRA LIGHT
BULB (3)
DOWNLIGHT KIT
ASSEMBLY
DOWNLIGHT
SOCKET (3)
SWITCH HOUSING
SCREW (3)
Figure 22
NOTE: Perform the steps in this section only if
the downlight is desired.
CAUTION: To reduce the risk of electrical shock,
disconnect the electrical supply circuit to the fan
before installing light kit.