Creating a custom preset and printing – Epson STYLUS 7900 User Manual
Page 119
119
Printing With Epson Drivers for Macintosh
|
119
•
Max Optical Density
adjusts the overall density or focus of the
print. Create a soft focus print by setting the density lower.
•
Highlight Point Shift
helps to reduce gloss differential by adding
density to the highlights of your image.
•
The tone color circle adjusts the hue of your black and white print.
Click on any portion of the color wheel or enter corresponding
values to customize the tone (hue) added to your print. The closer
you select to the edge of the wheel, the more color you add.
The preview image approximates the image tone based on your settings.
Note that this preview always shows the same image and is not color
managed. It provides a level of feedback as you make changes.
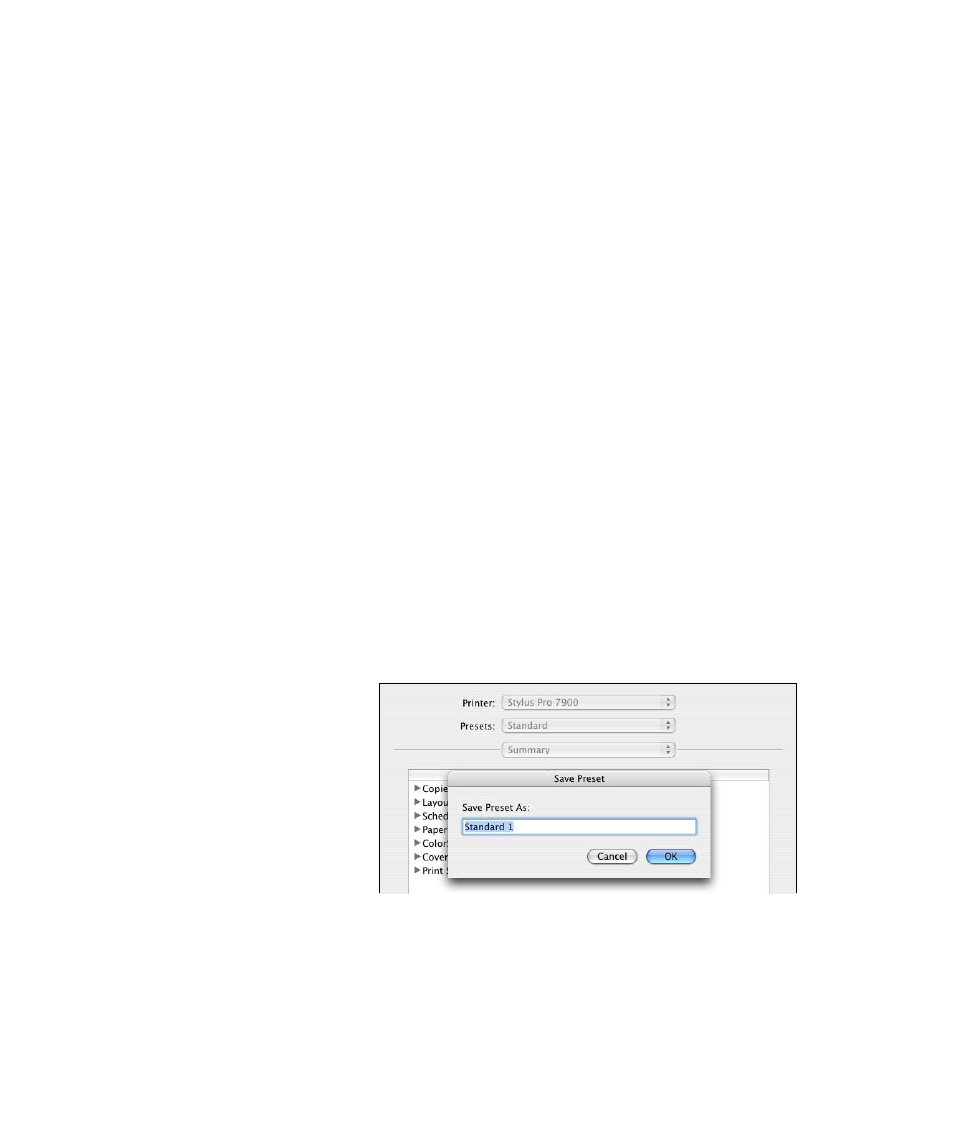
Creating a Custom Preset and Printing
Once you’ve made the correct settings for your print job, create a
custom preset. This will save you time when you use the same
profile/printer/ink/media combination for future print jobs.
1. Select
Summary
from the drop-down menu.
2. After verifying that your settings are correct, select
Save As
from the
Presets
drop-down menu.
3. Type a name for your custom preset and click
OK
.
4. When you’re ready to print, click the
button.
Whenever you want to print with your custom preset, select it from the
Presets
drop-down menu.
Note: If you check the
settings on each screen
in the drop-down menu,
go through them carefully
from top to bottom.
Avoid cycling through
them repeatedly, or you
may lose your settings.
Caution: Do not open
and close the Presets
menu without typing a
name, or you will lose
your settings.